As a result of seeing the Sekhmet box, a different friend has asked me to do an African deity themed box! The thing that makes this even better is that he himself is an artist, so he can provide HIS OWN artwork to make the box even more personal.
Very excited about this project. It likely won’t come to fruition for many months as these things go…but the concept of making something that personal is an honor, truly. Looking forward to that.
I’m off to further my shamanic training, so there won’t be work updates for a few weeks most likely…though I may share some images of the grounds of where I’ll be.
There was some sort of issue with a windows update (I think) that caused some kind of a setting where I could no longer upload pictures. I’ve been a VERY busy lady, and haven’t had time to upload pictures of the work.
First step after the burning was done, was the staining. We purchased a lovely golden shade for the stain. It’s really gorgeous, and I started using it for other projects as well.
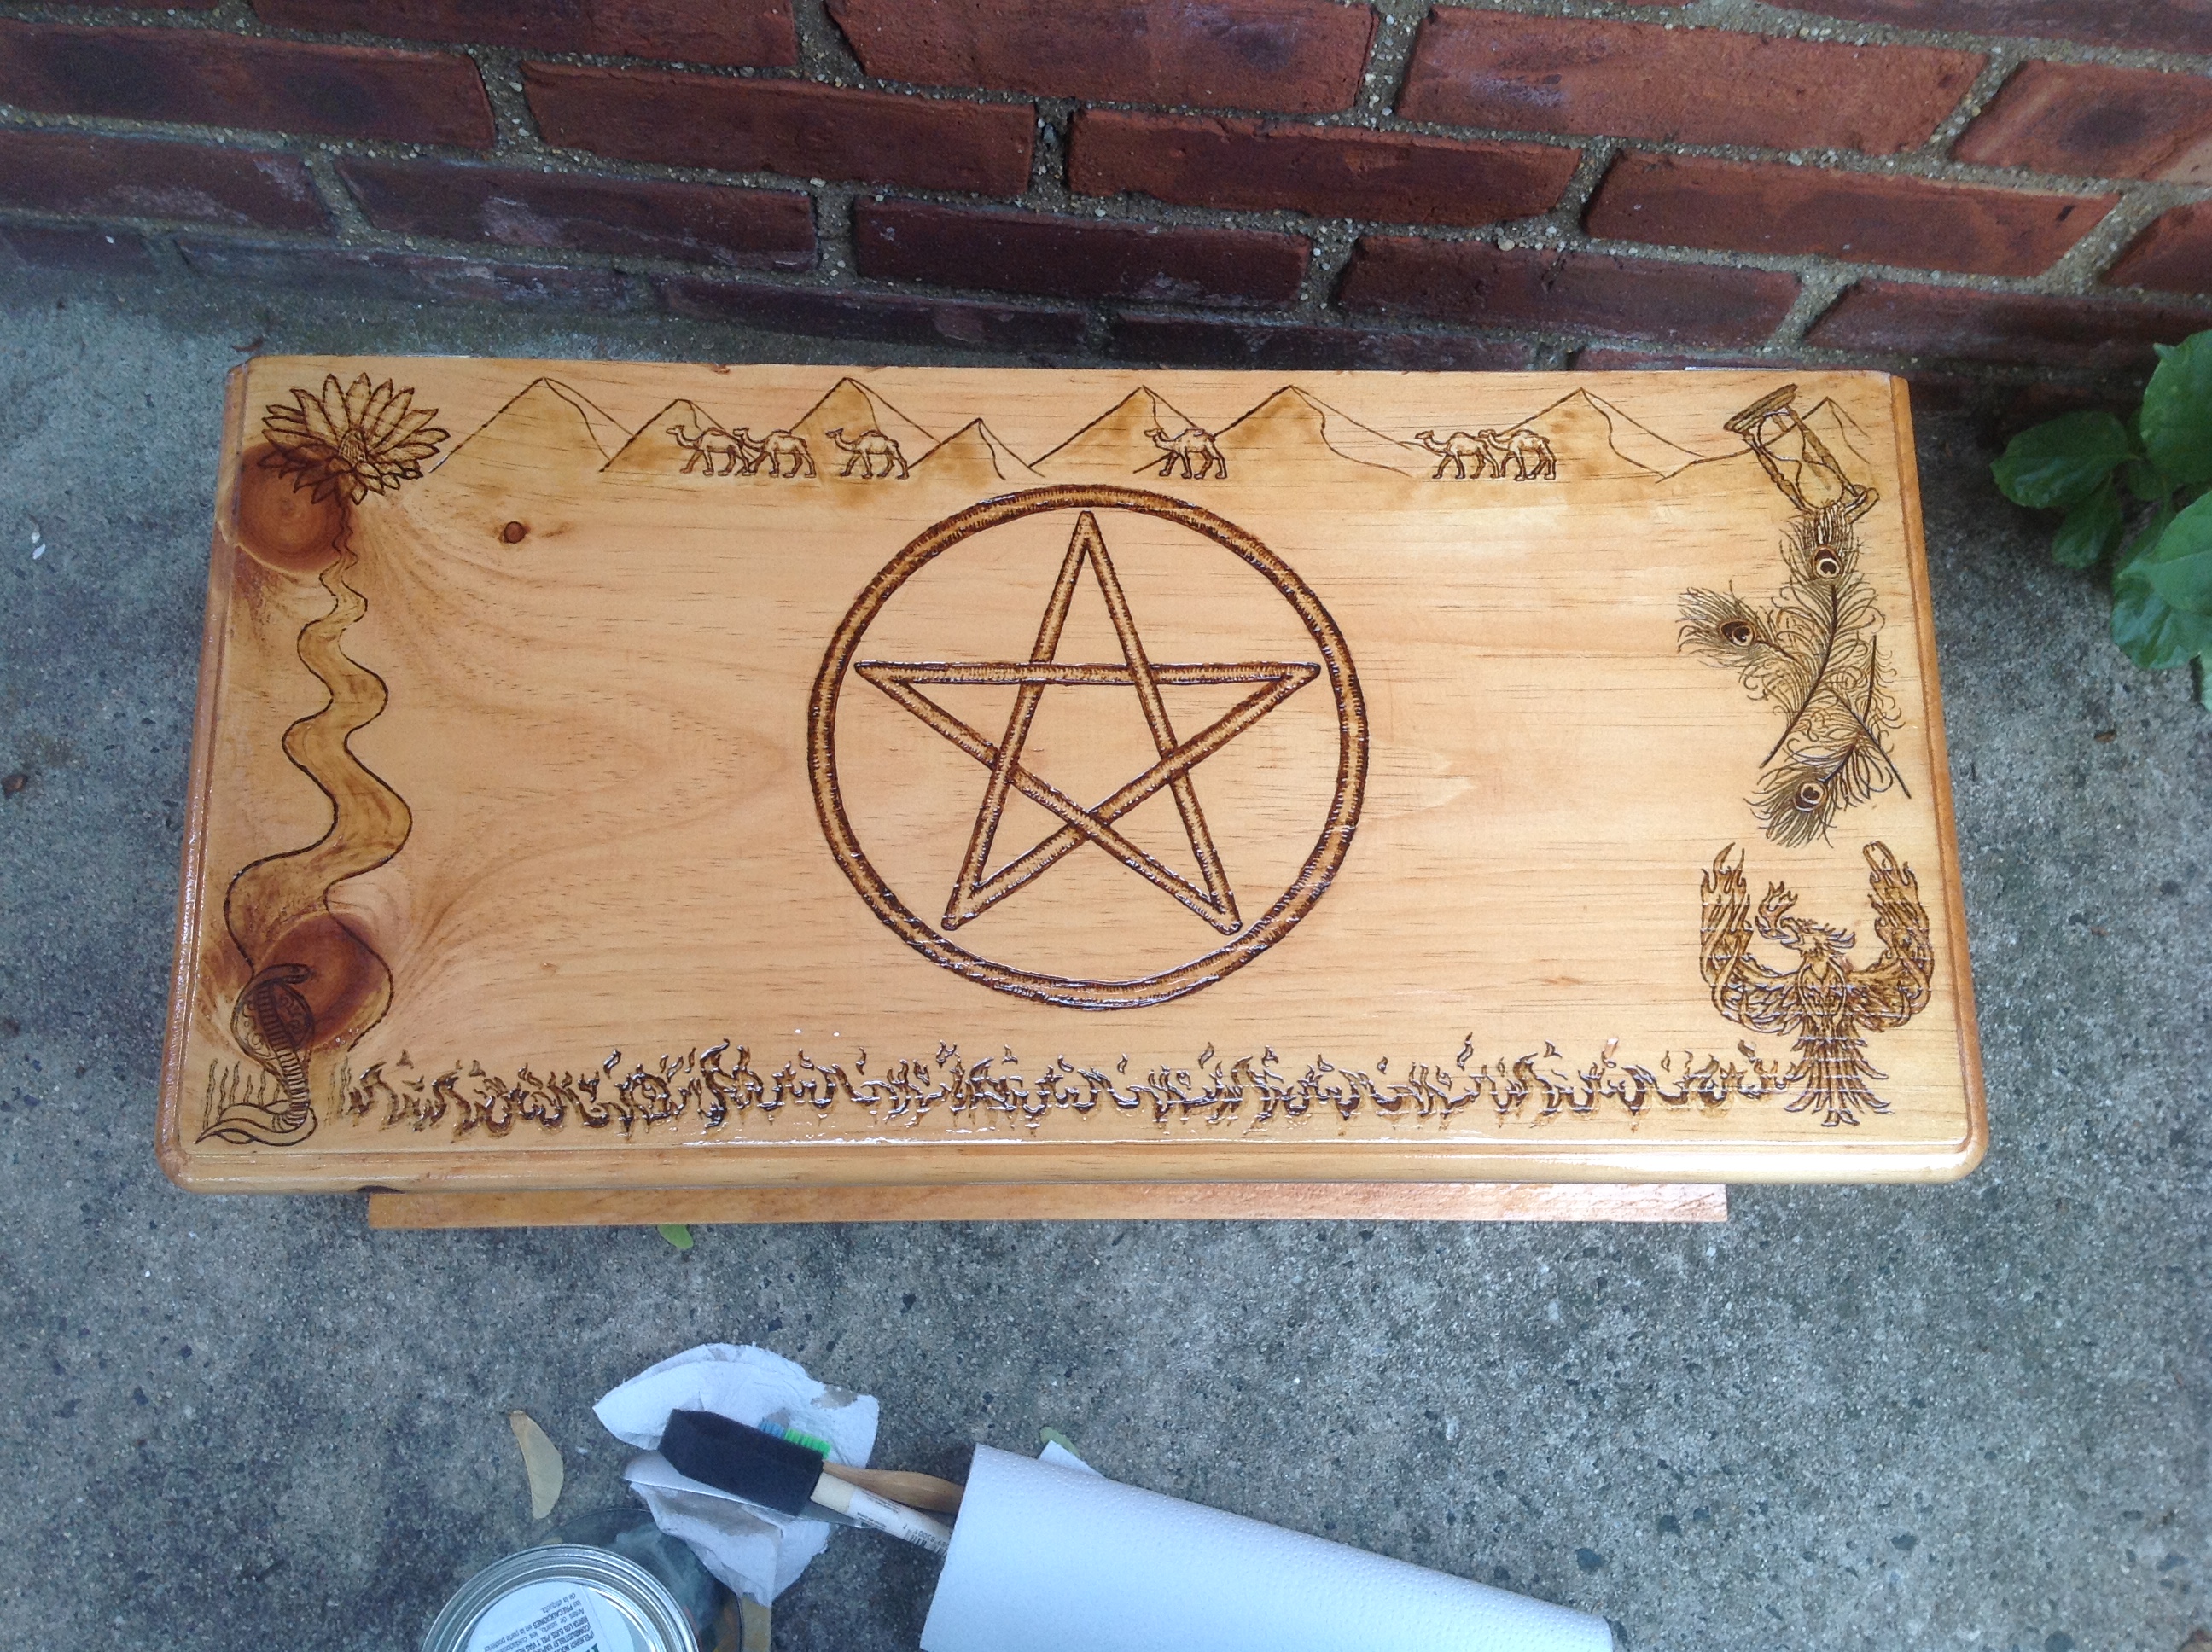
With the bricks and the plants, you can imagine the lovely honey tone this thing has. Look at it enlarged. It’s worth it.
In fact, I took another picture with more plant so you can guess some of the tones on it. Gorgeous.
MMmmm-mmm.
I had a small problem, though. I did the stain, sanded it a little, and then put on the first layer of the varnish. The varnish is a high-gloss, so it showcases everything just perfectly. But there was some sort of powdery residue that I didn’t see when I varnished, and it looked like there were white streaks on the left and right sides.
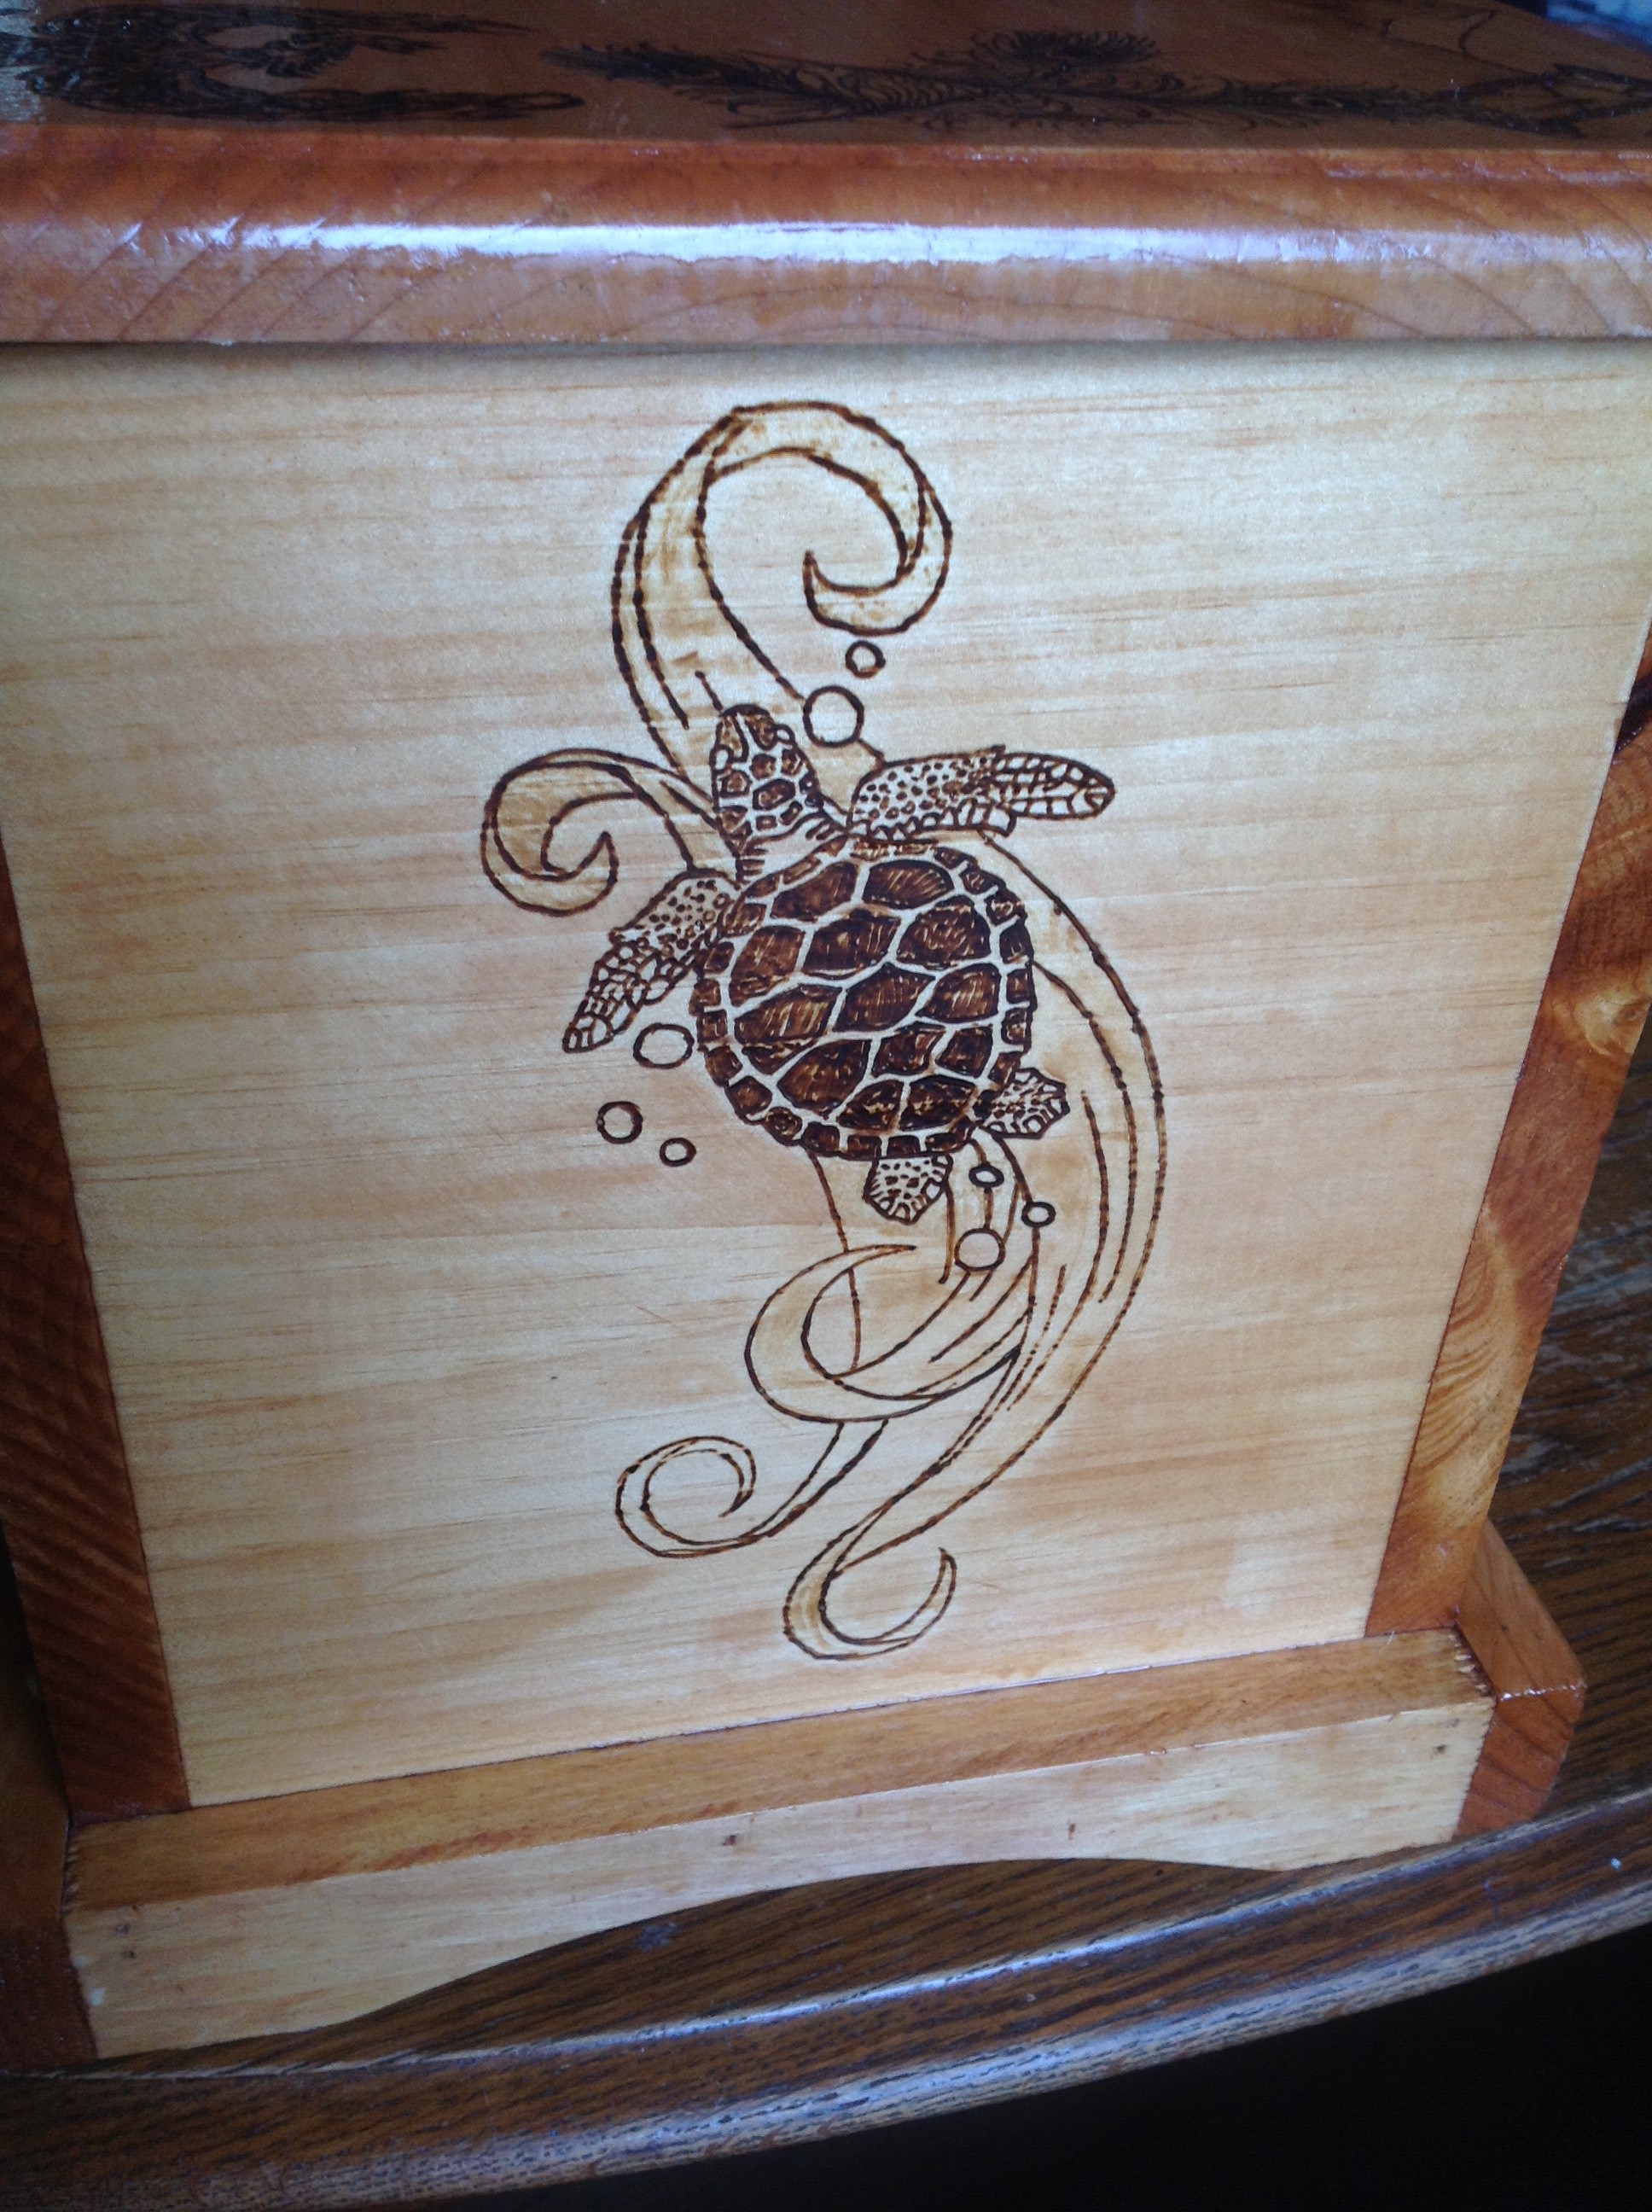
I had to sand the whole thing on both sides, brush everything out, (I mean REALLY brush it out, with a toothbrush) and then restain AND revarnish. But then I felt the stain looked splotchy.
What I ended up doing was mixing a stain of the thing we were using, plus a dash of a darker stain to kind of force a match for the newer stain with two layers. It mostly worked. Honestly, if you didn’t know, you couldn’t tell, but I could tell, so it was making me nuts.
You can see it more toward the left hand side below the bubbles, but it was above the right flipper too.
Oh, it was KILLIN me. But I had to just let it go at some point. Once I realized you honestly couldn’t tell if I didn’t point it out, I had to let it go. It’s funny….on the one hand it’s super anal-retentive….but on the other, it’s why the work has quality. All the details really contribute to the overall project.
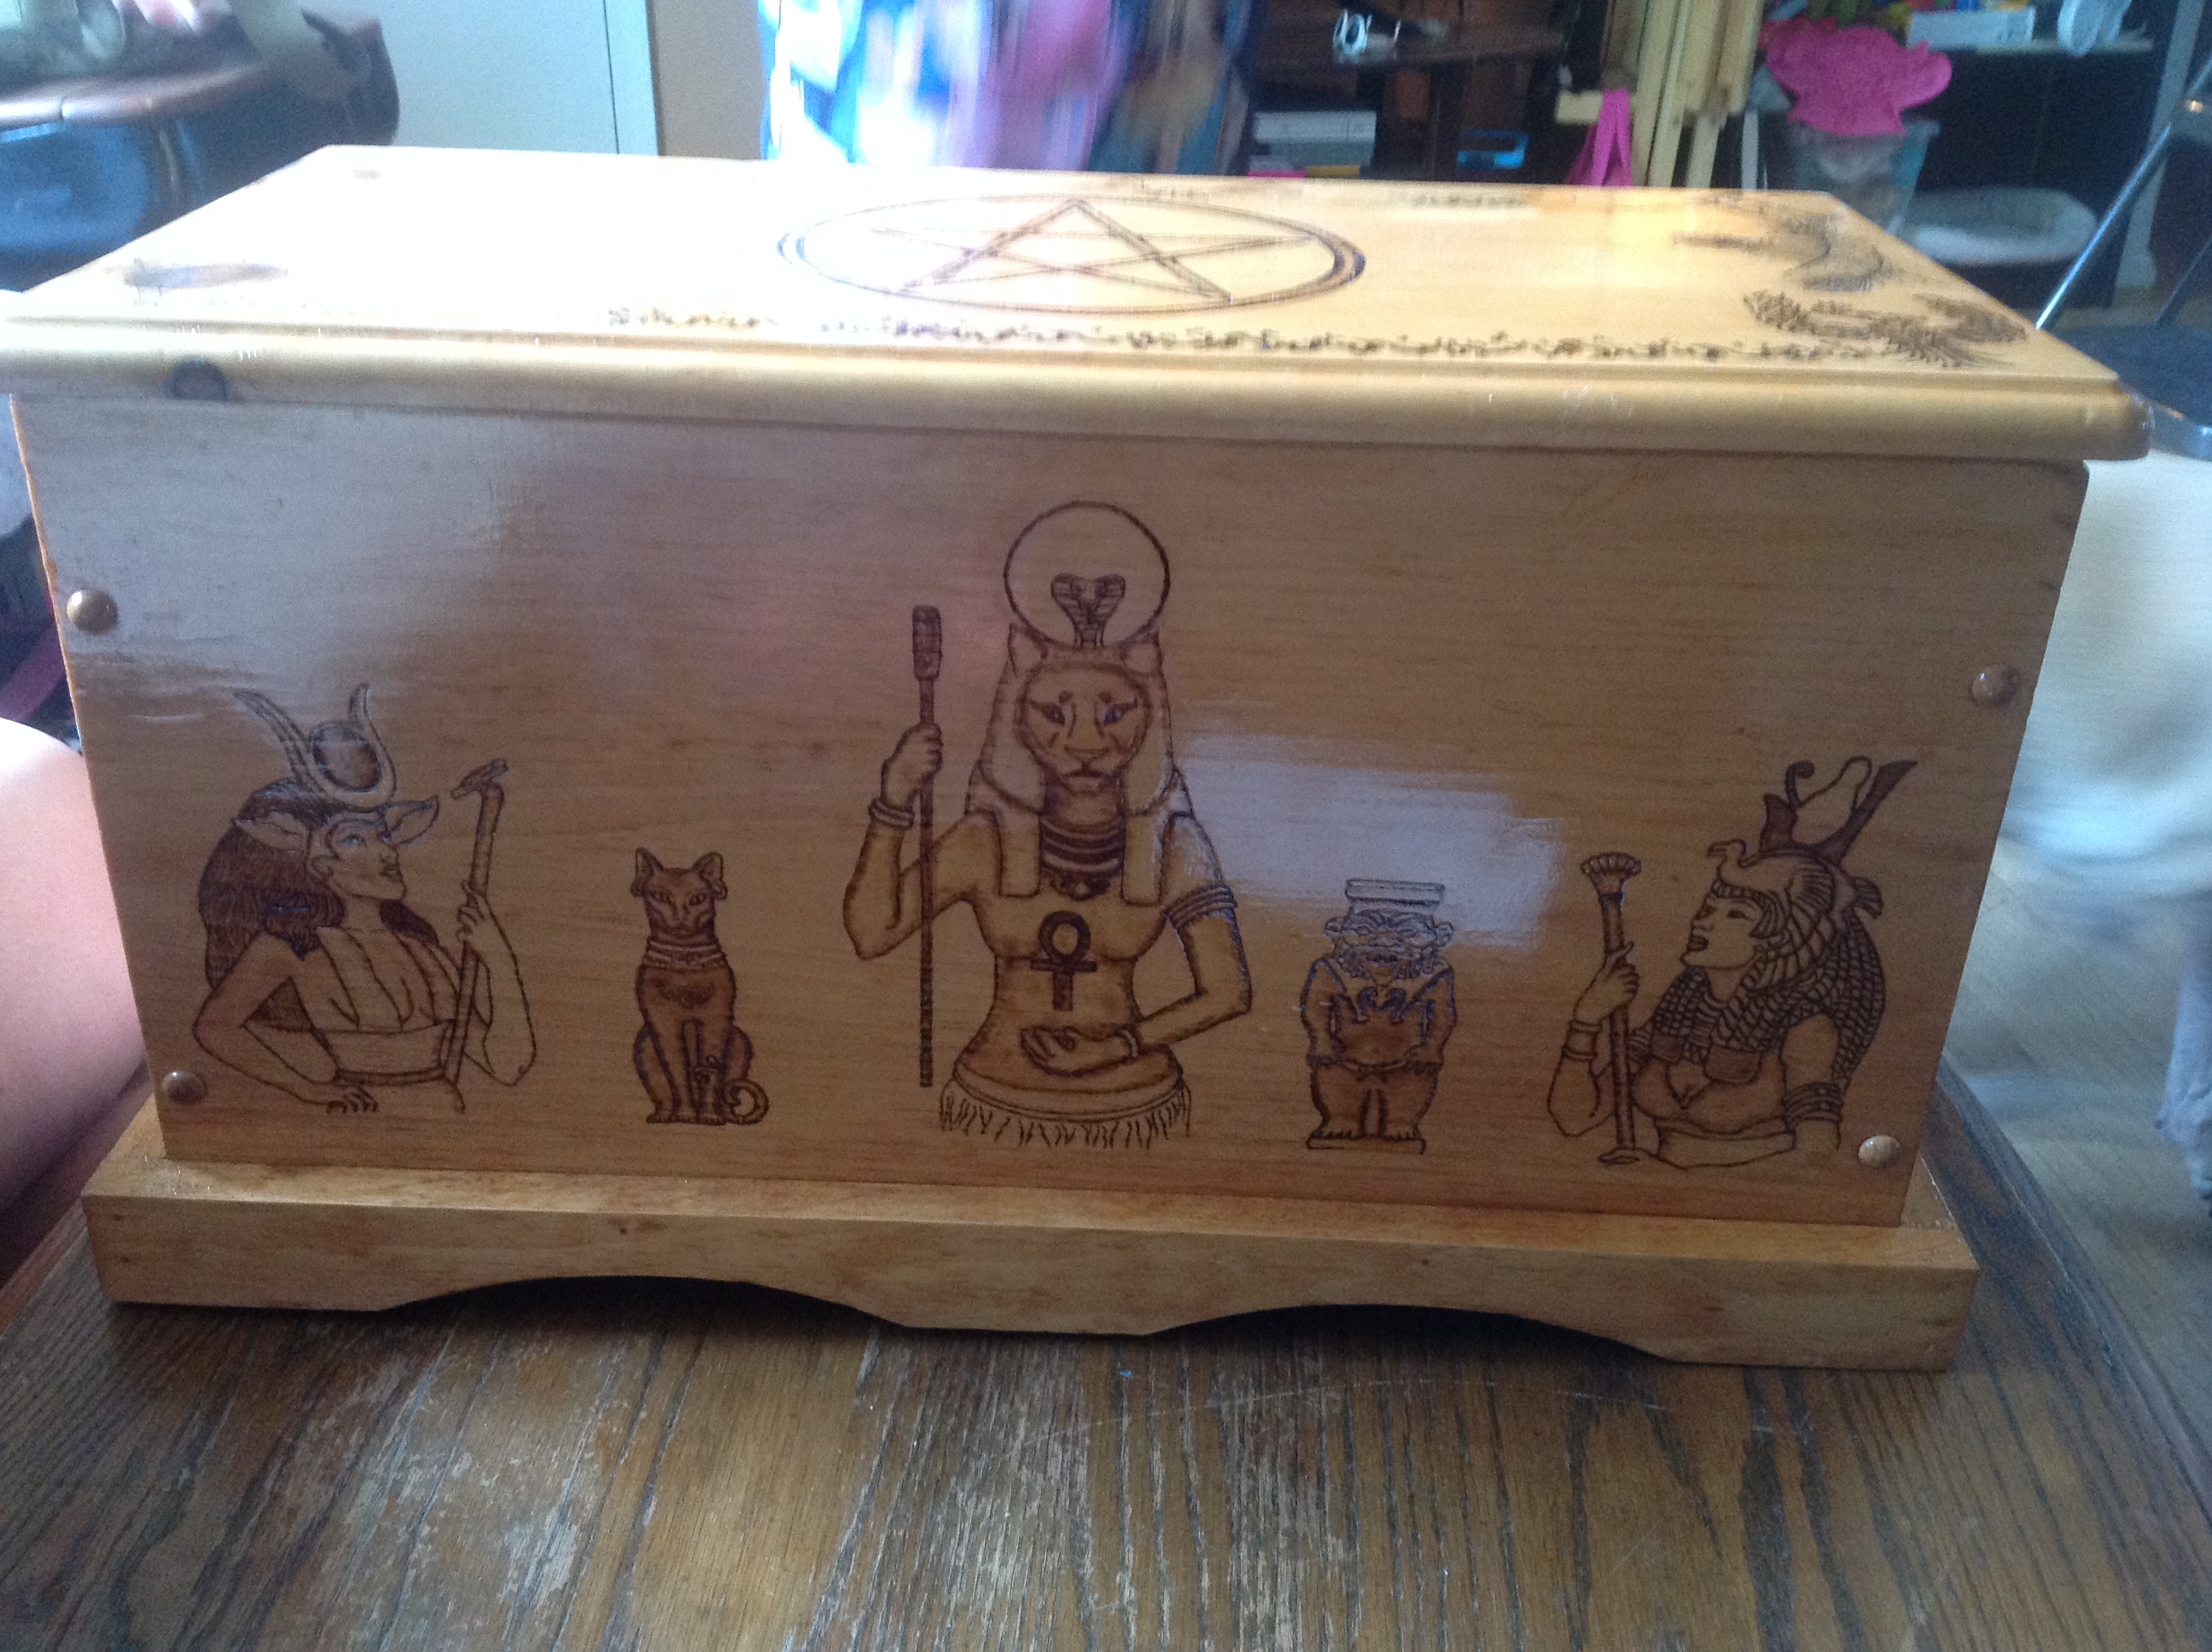
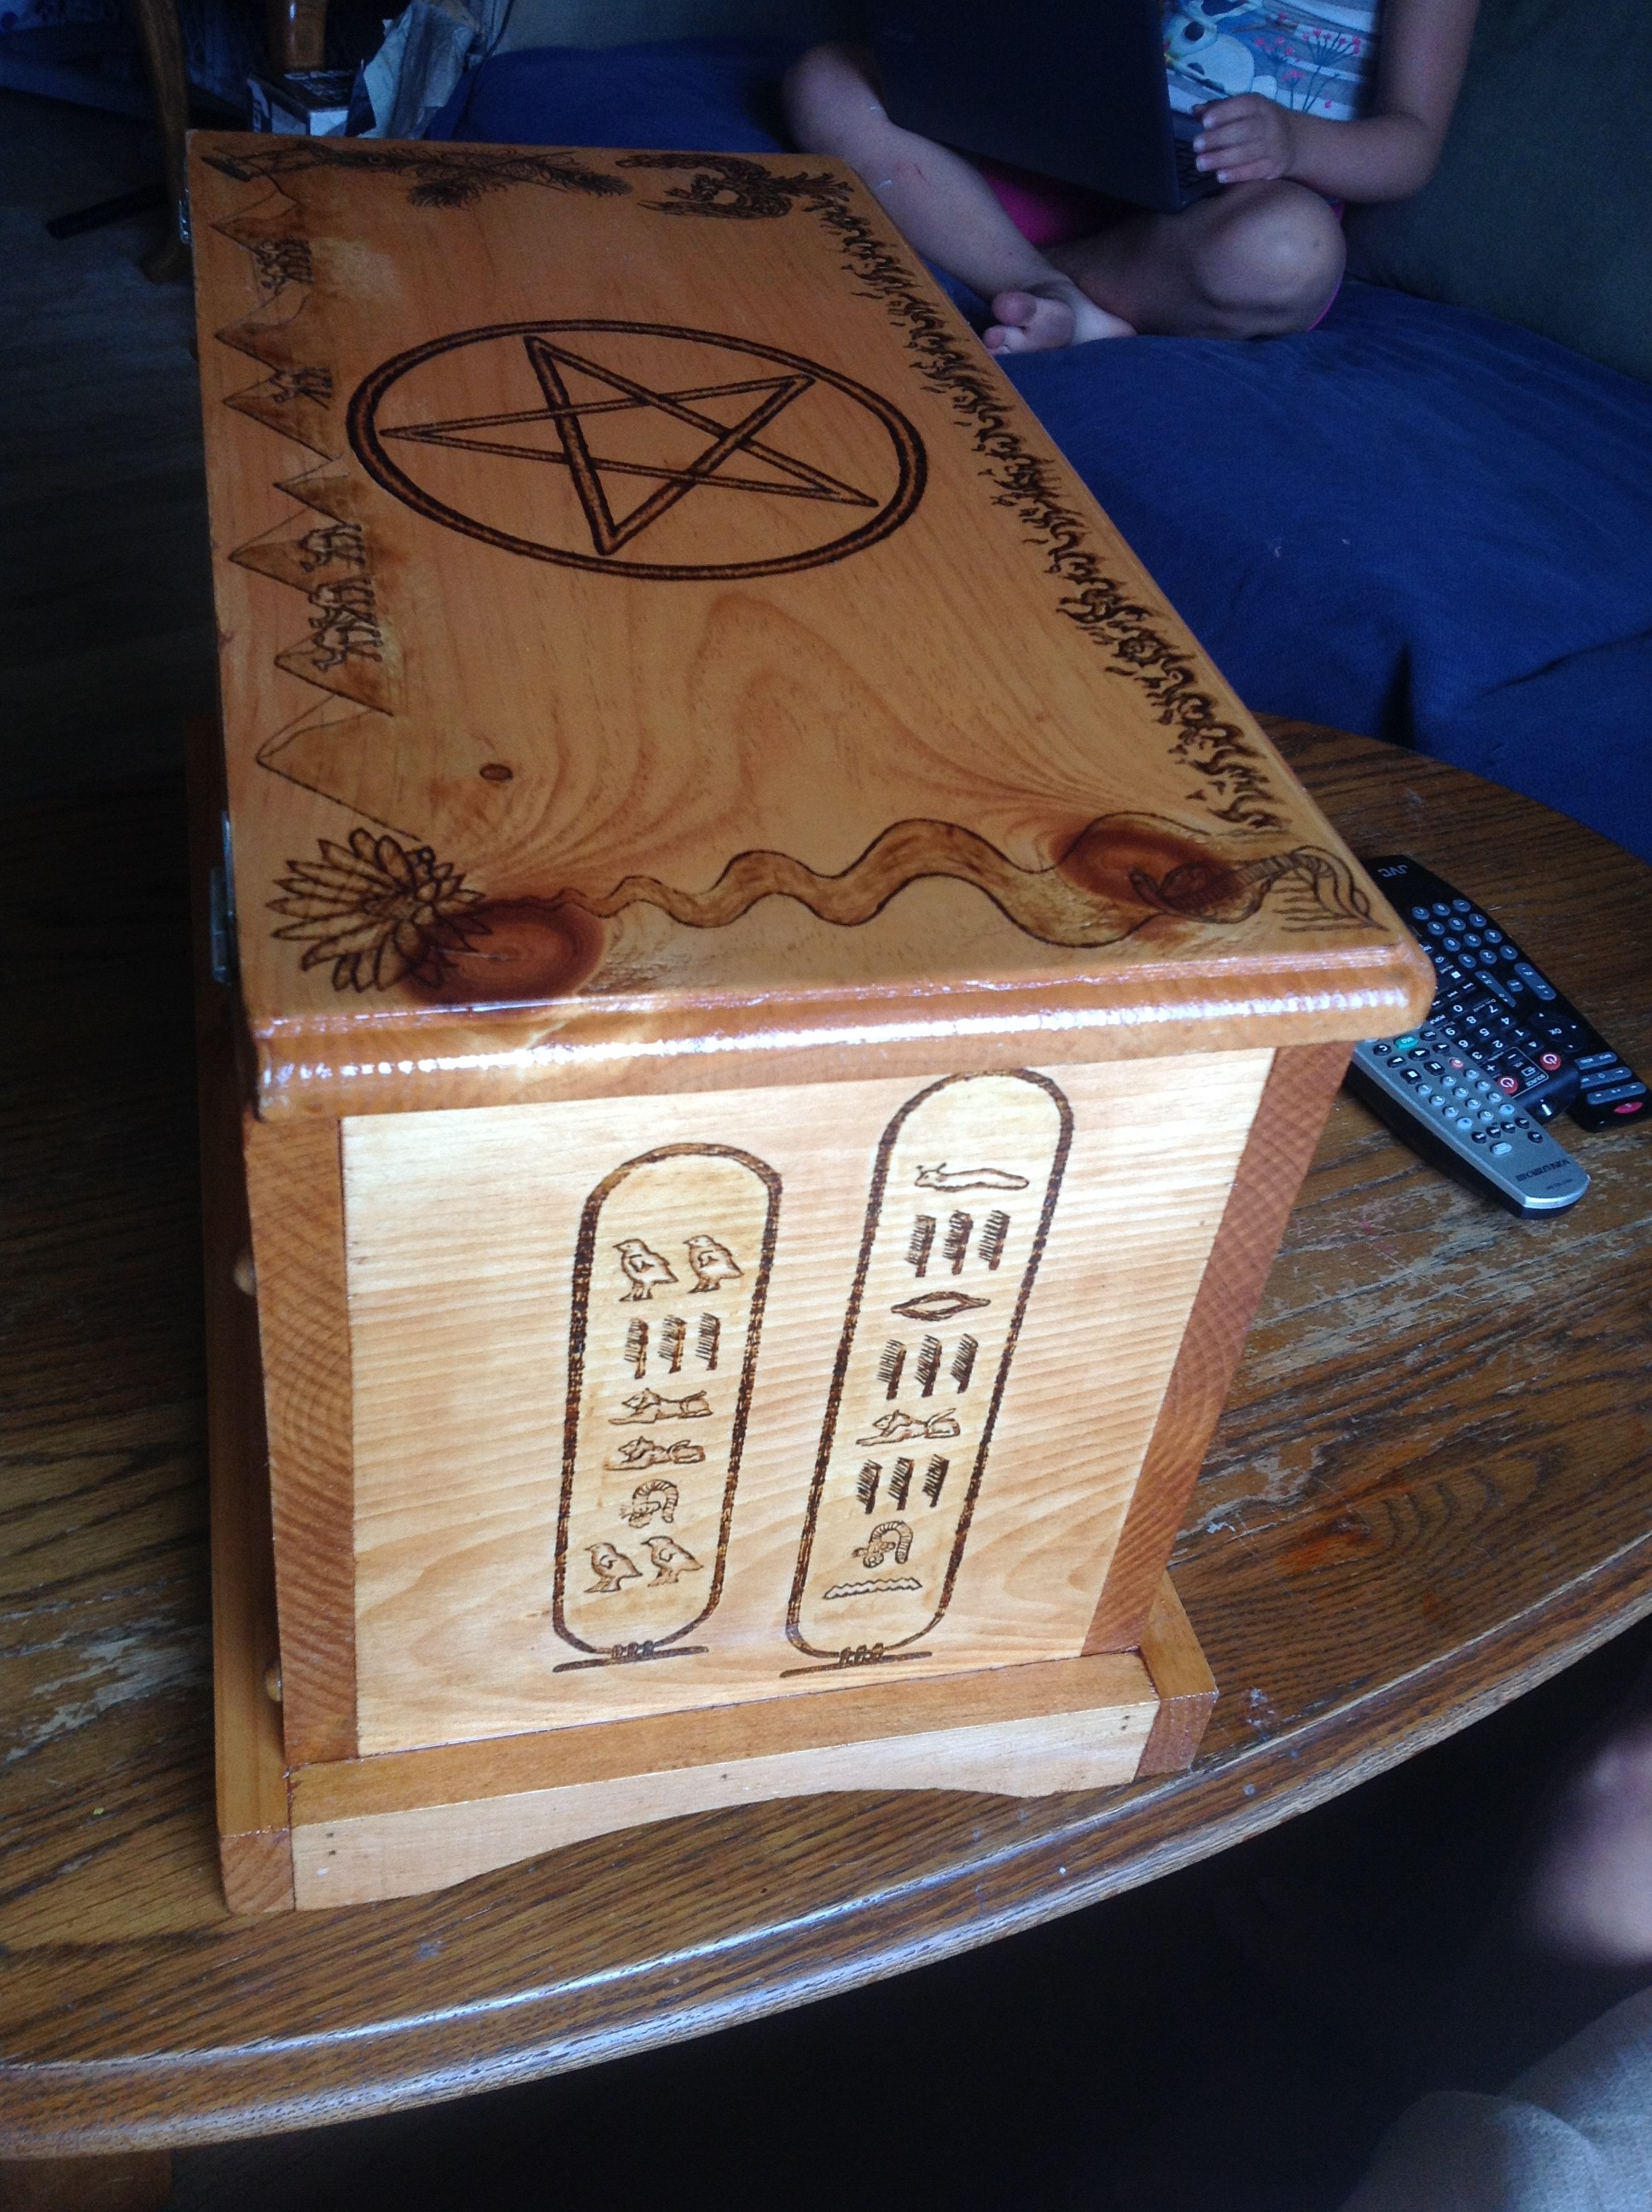
SO. Some final images here.
So you can get a feel for the glossy tone.So you can see how the stain and varnish brought out the grain without overpowering the images.
All in all, I’m very happy with this project, and I’ll be adding it to my pinterest board. I’m very proud indeed, and Willow, the owner, is exceedingly happy with it as well.
It’s been six months, and a lot of sanding, but it’s my best work yet.