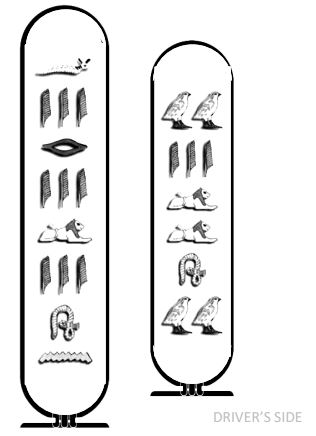
I was contacted by a friend, Willow, who asked me to make a ritual box for her. Something she could store some tools in, could bring with her to make a temporary altar, and be a tribute to the deity she was working with, Sekhmet. That was how this whole thing started. LOL!
Started.
So she ships me the box (she had to ship it twice because Michael’s sent the first one and it was damaged) and I get it and bring it home. I’m very excited because it’s the biggest canvas I have ever had to work with.


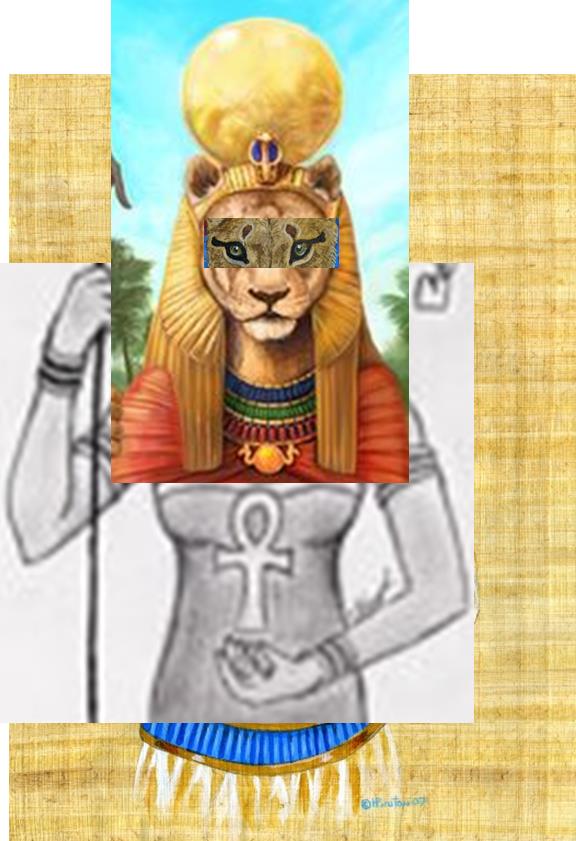
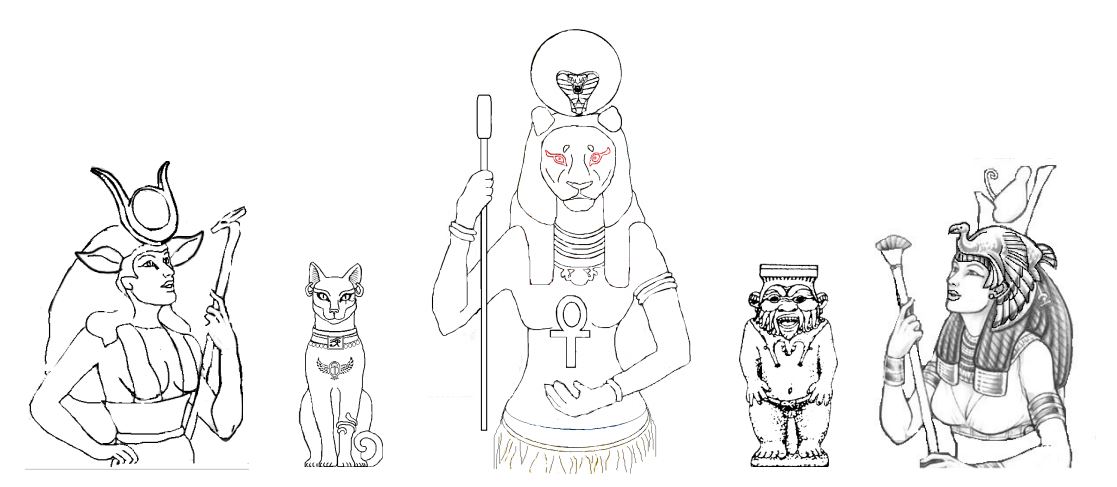
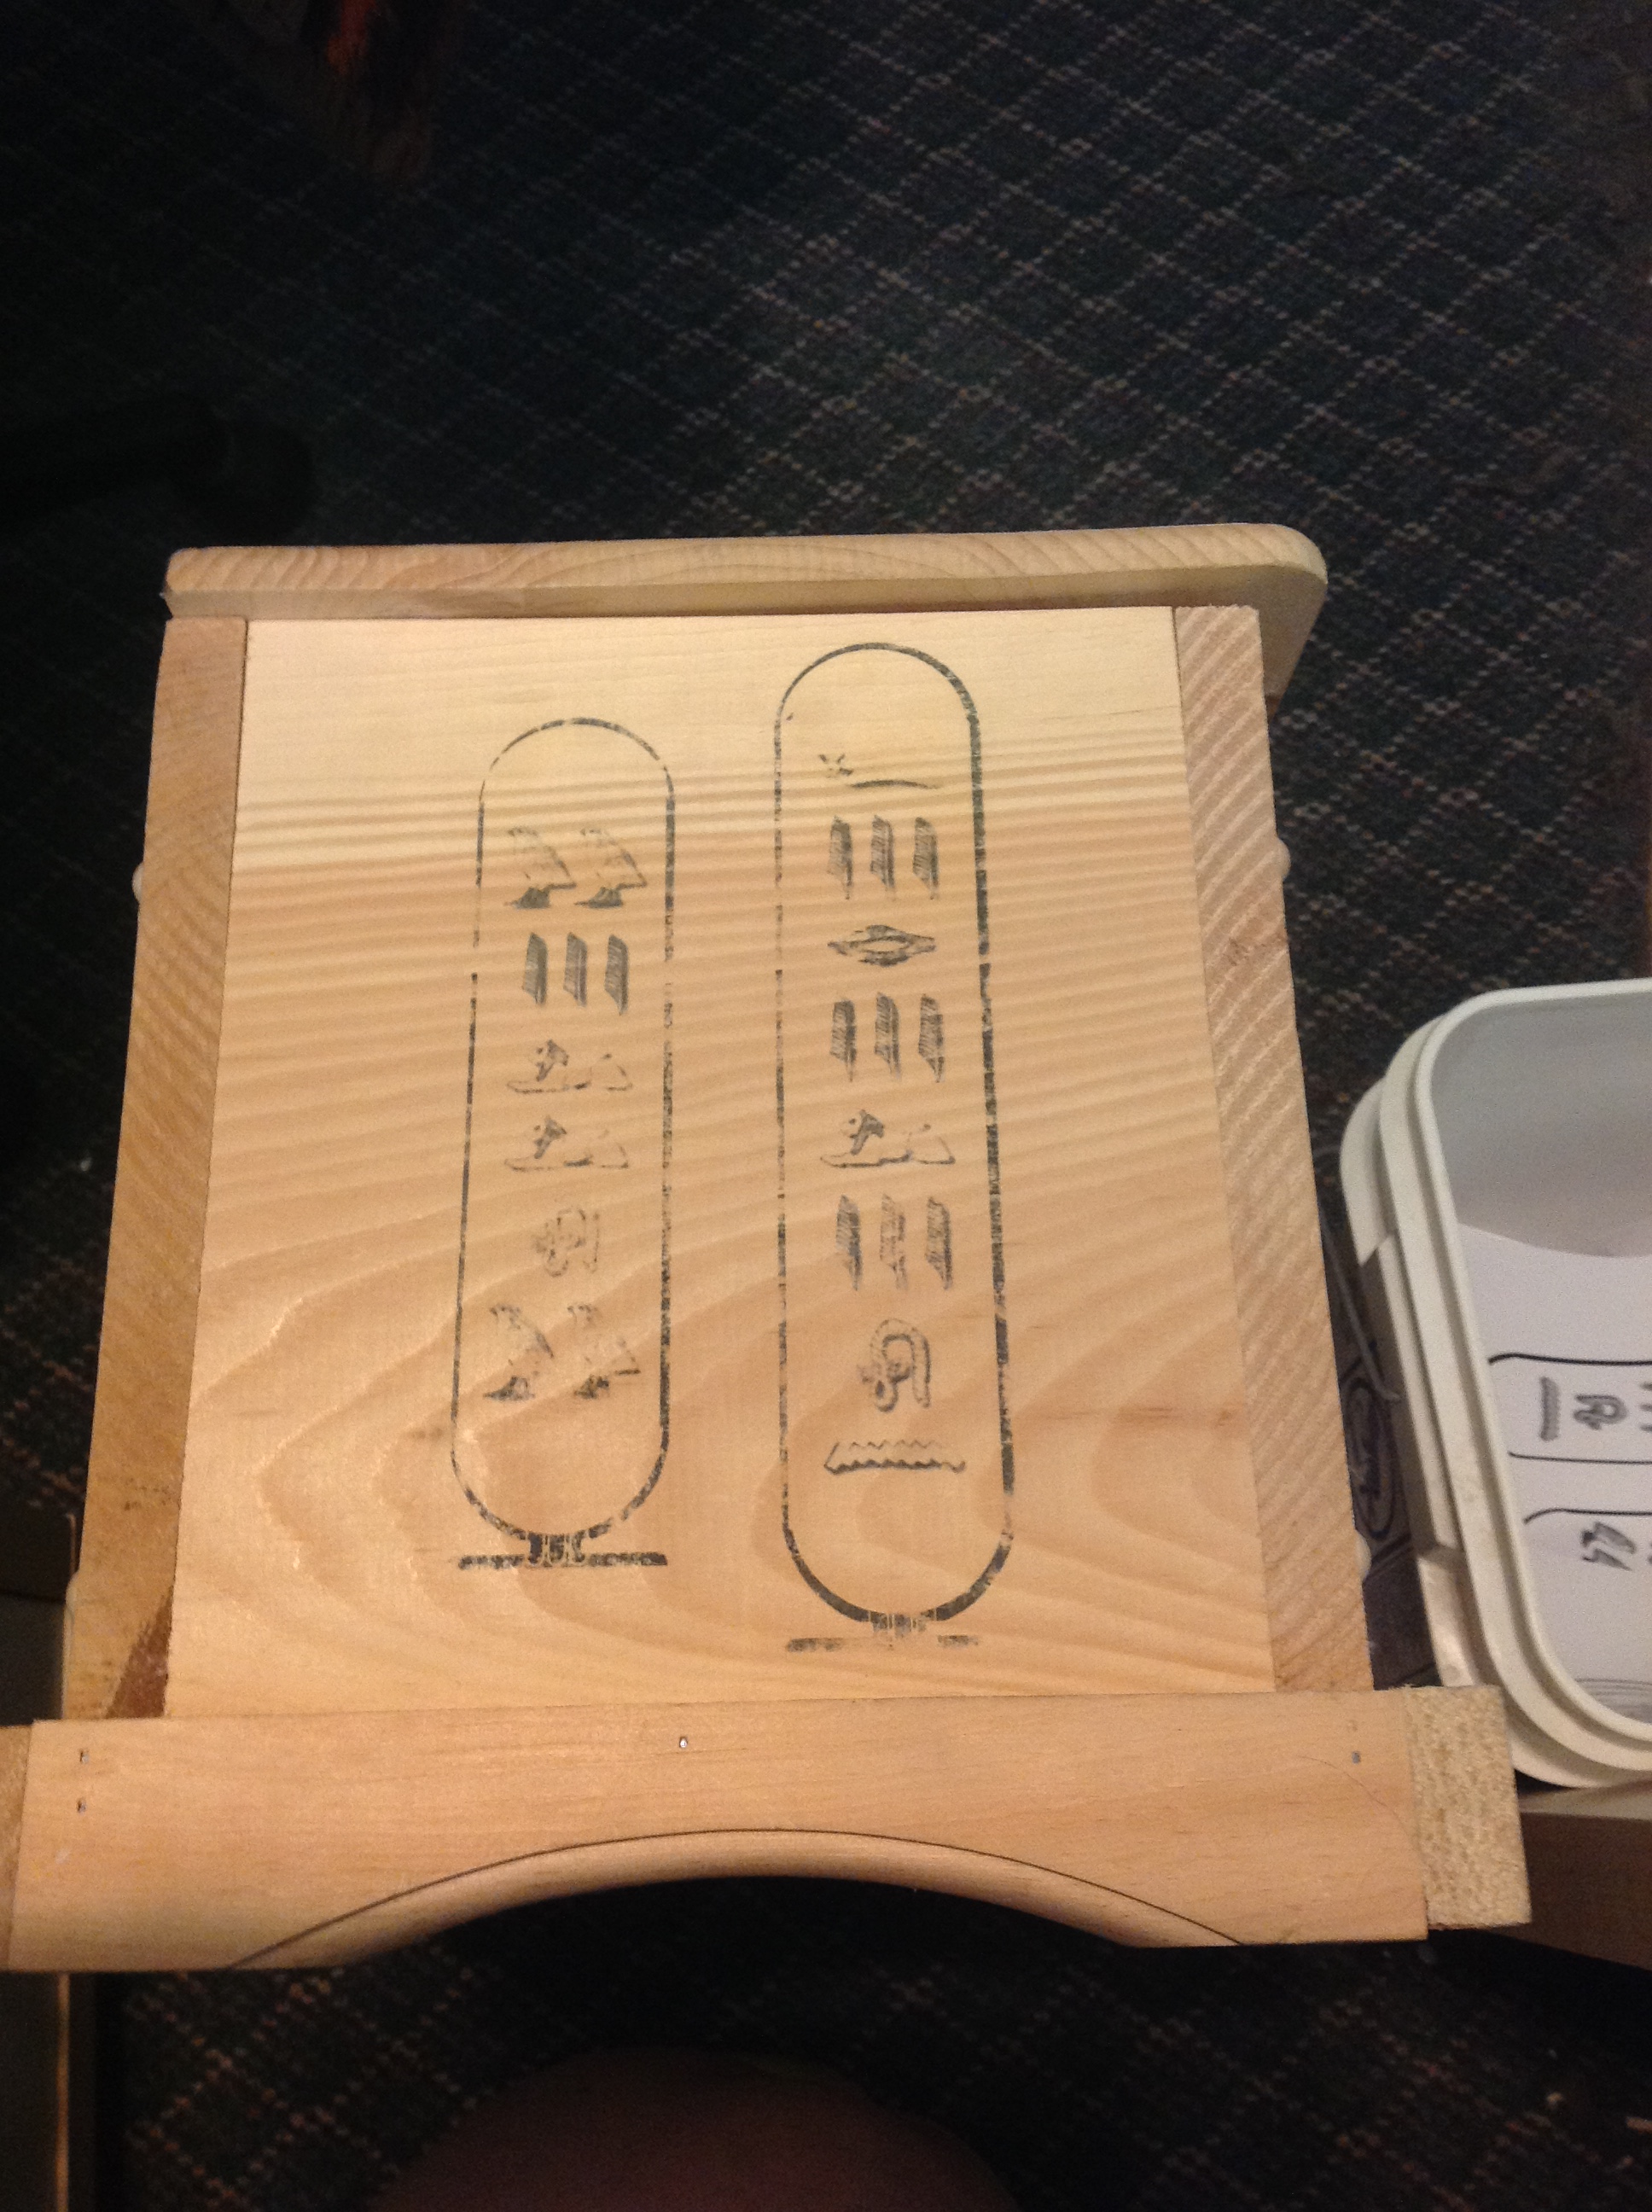
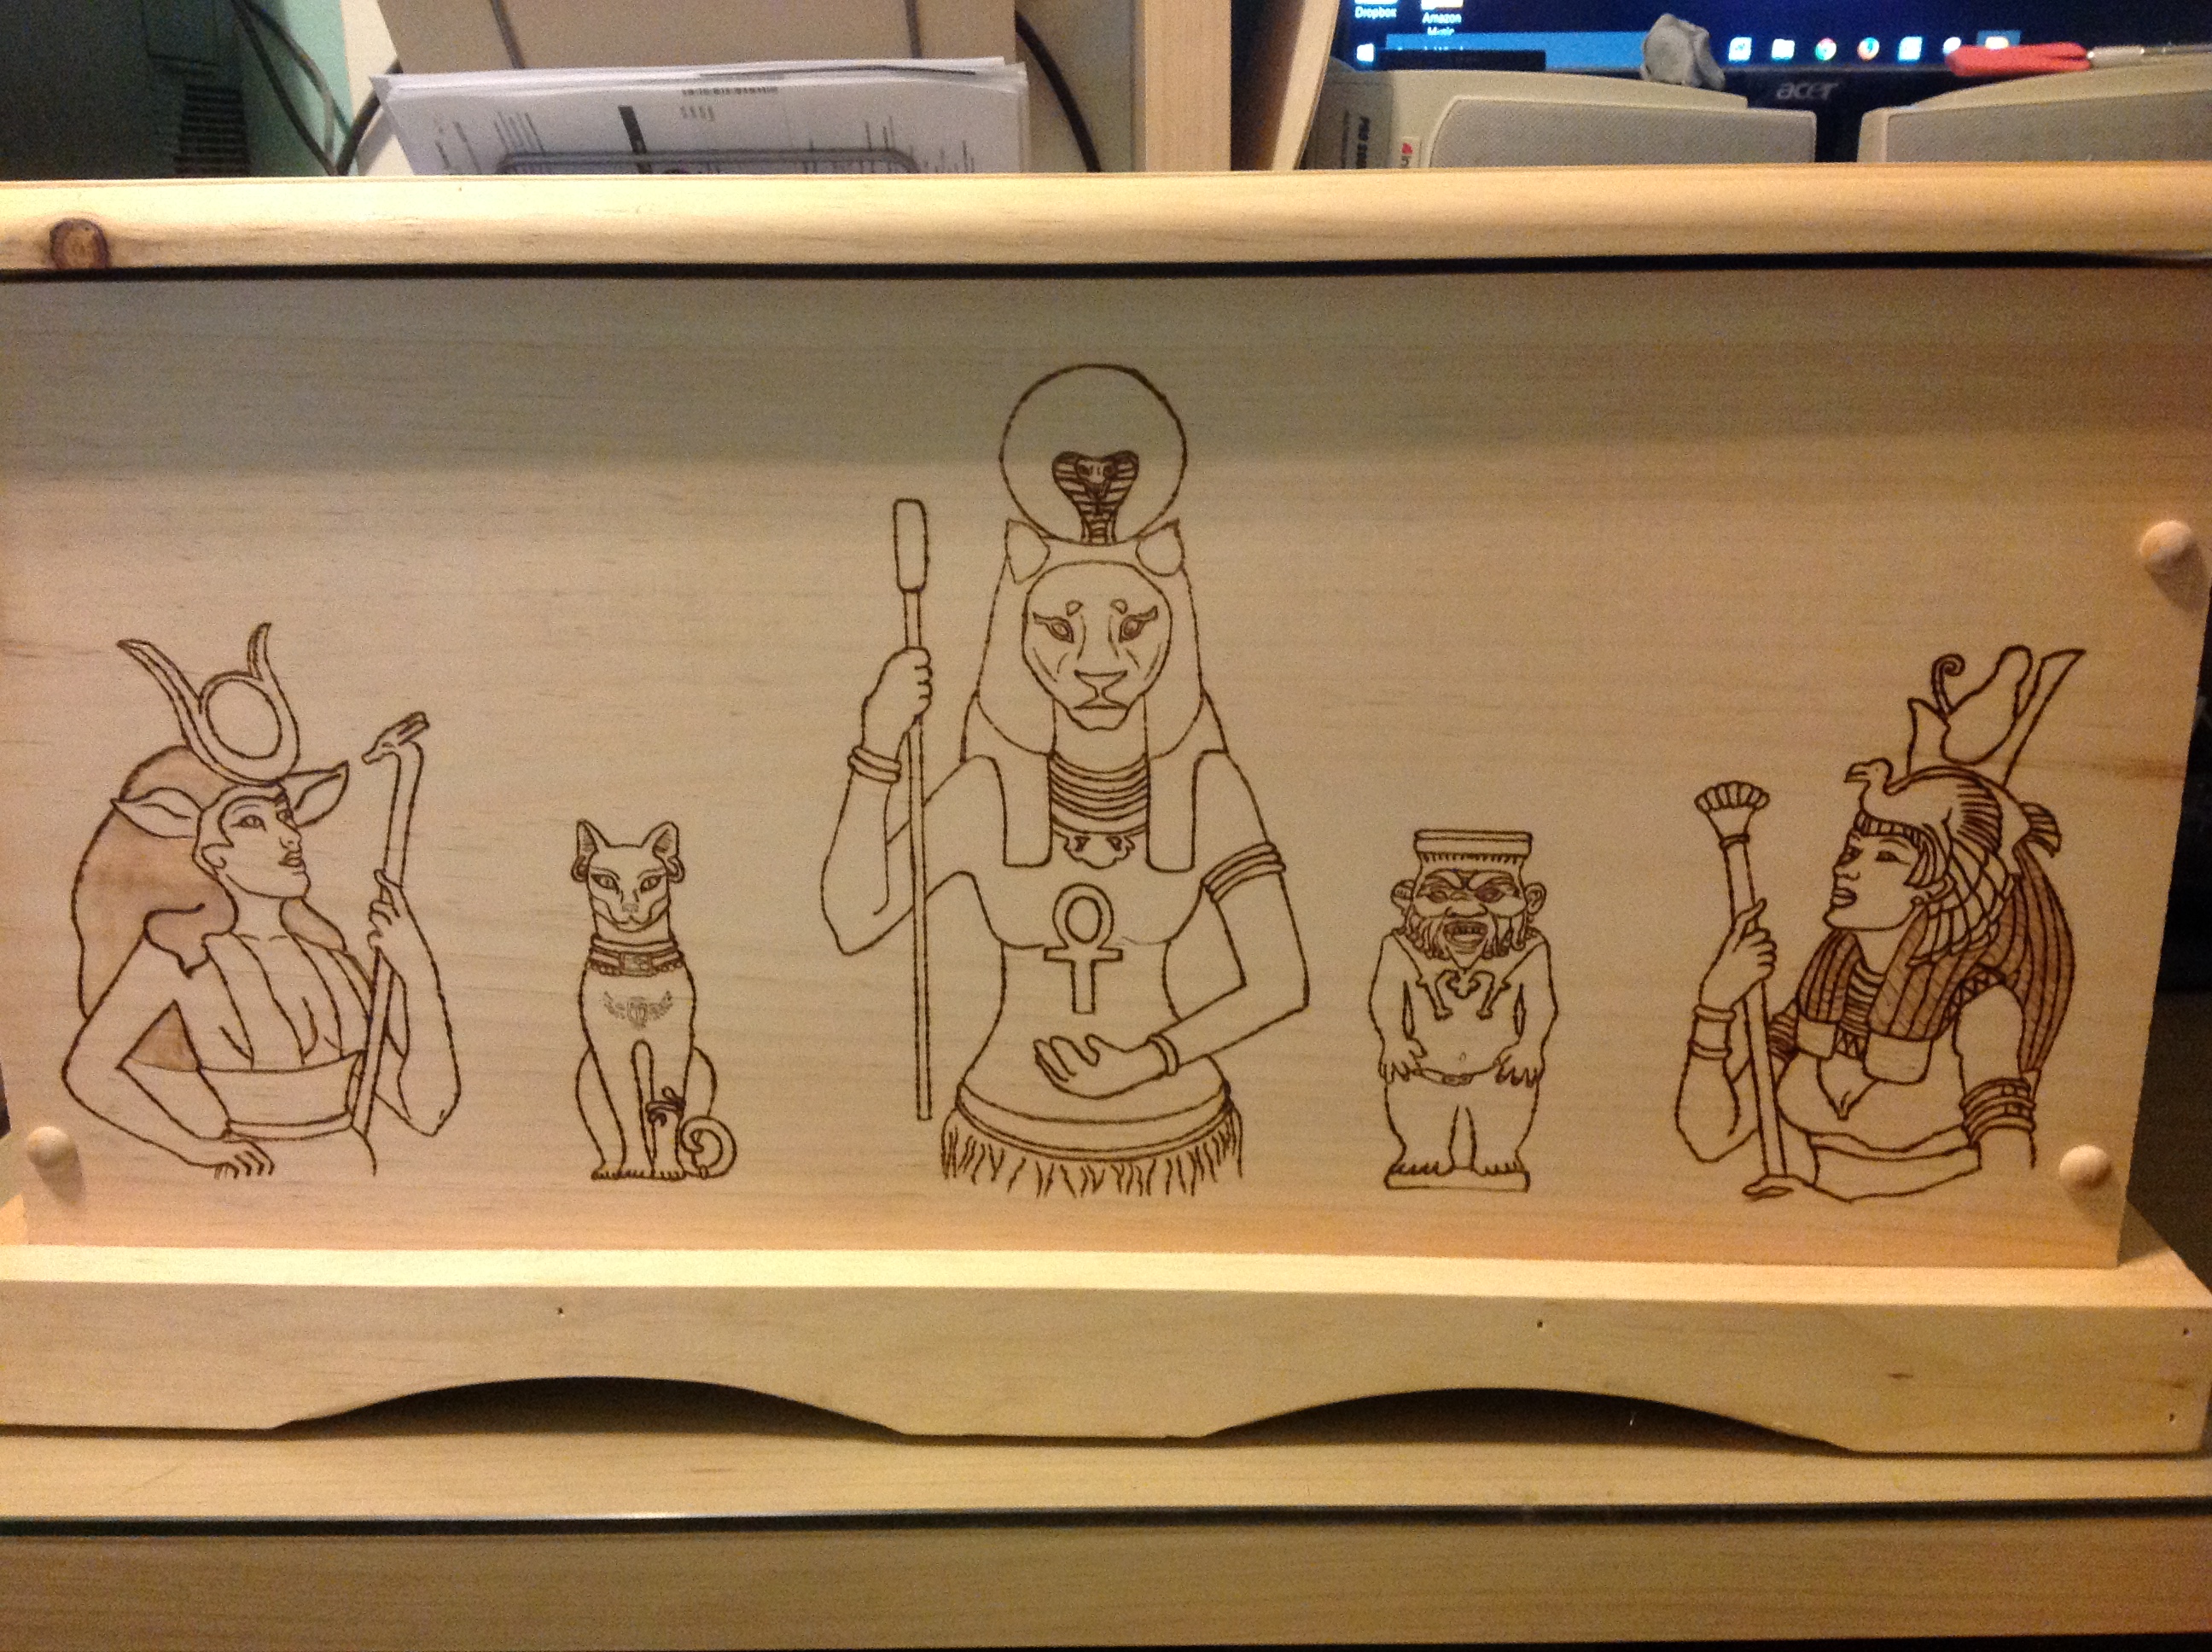
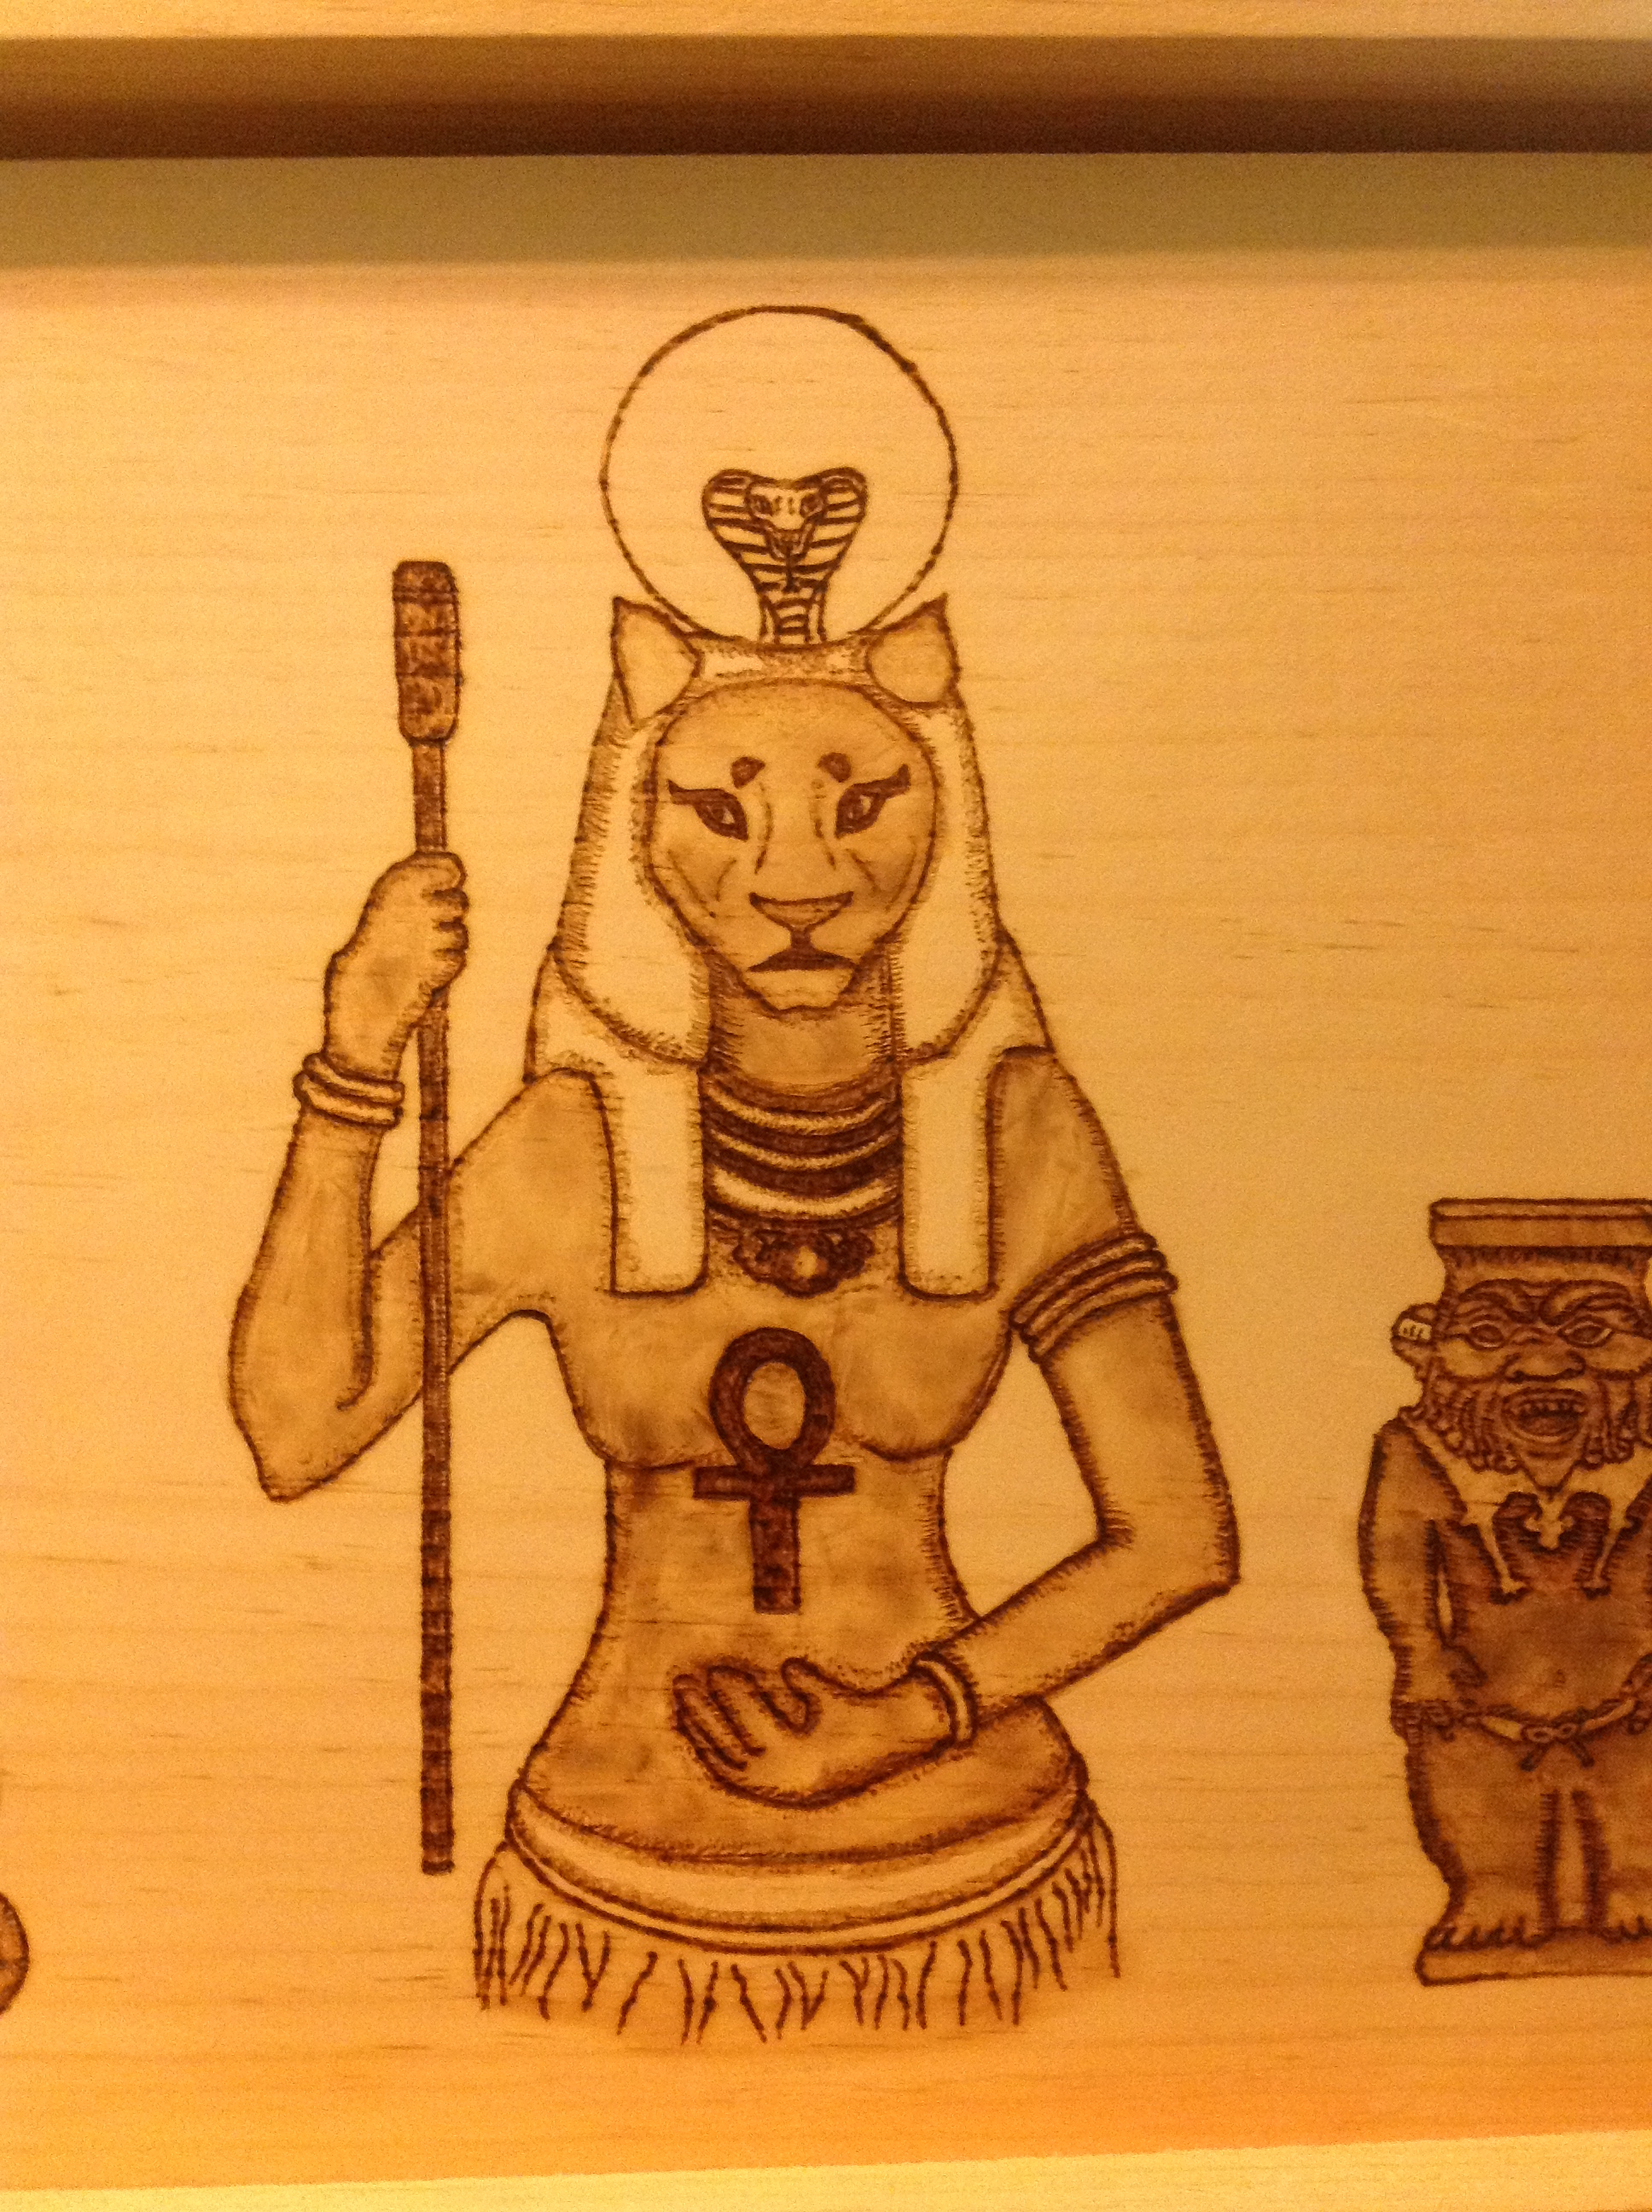
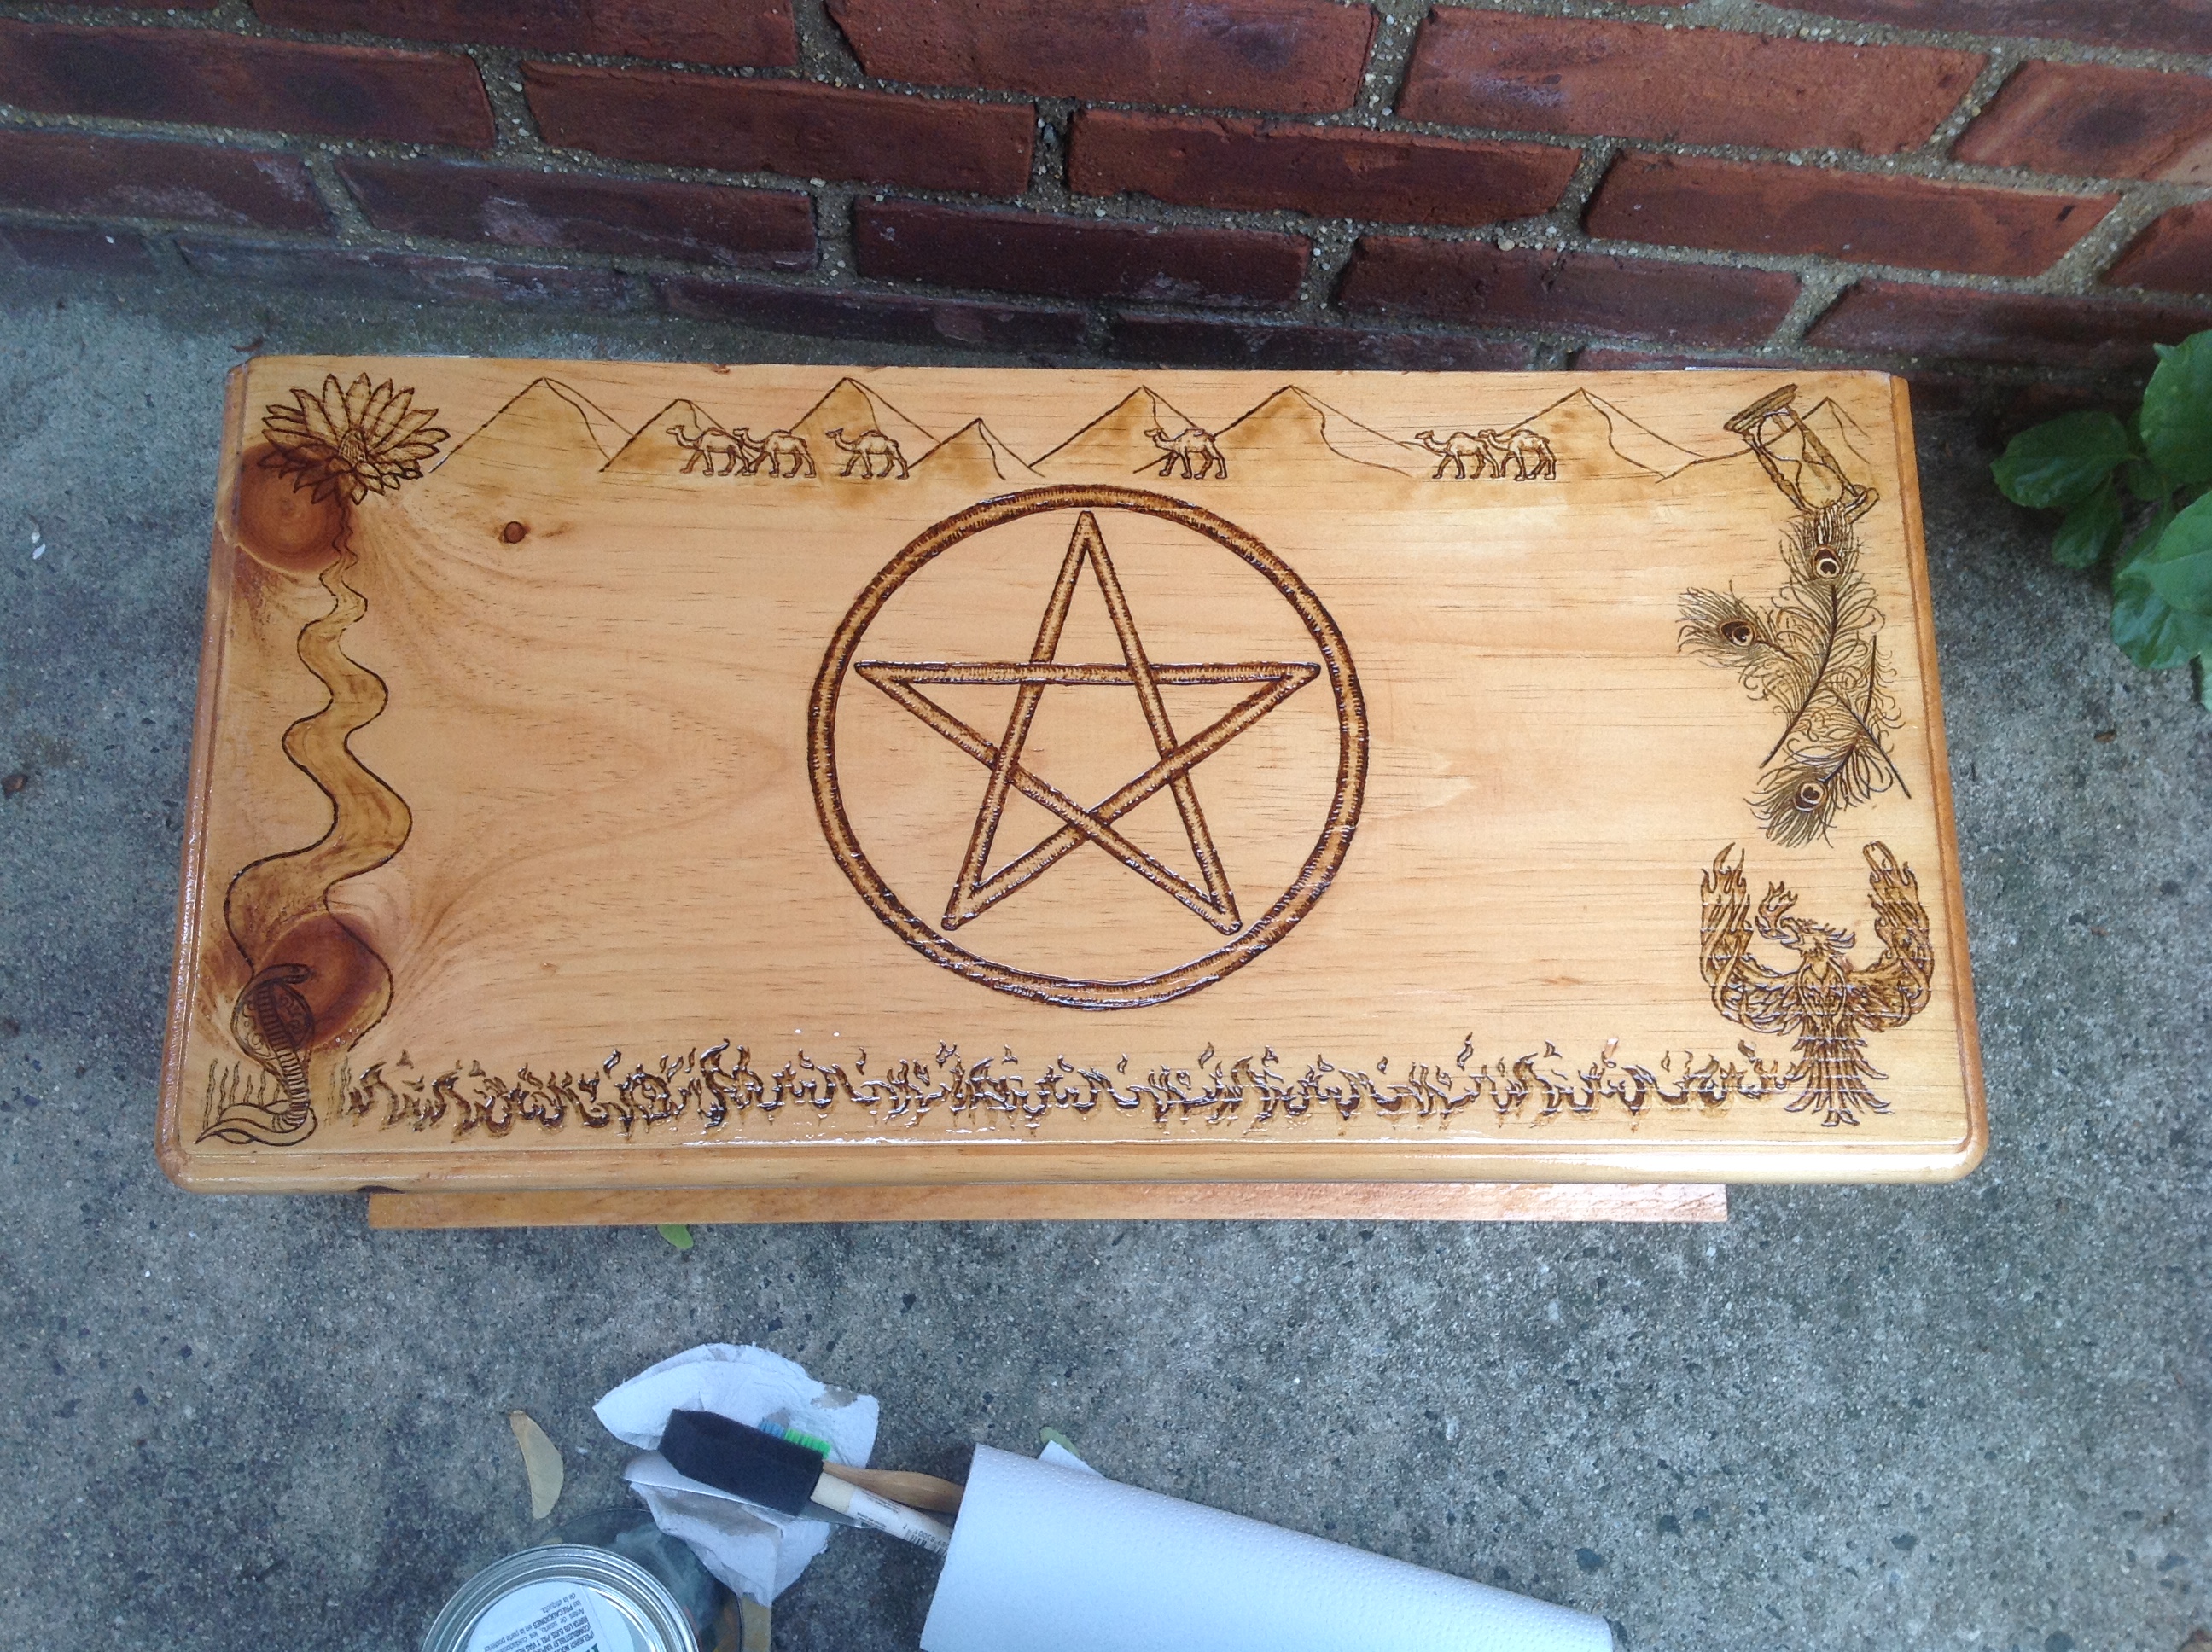
So we started looking at images of Sekhmet and choosing the kind of look she was going for. Did she want vicious? Dignified? Warrior? Mother? I mean, Sekhmet has a varied history, meaning that she goes from violence to regret, and runs the gamut of emotion. So what did she want? Eventually we cobbled it down to the following image, which was pulled together from a bunch of different images as you can see.
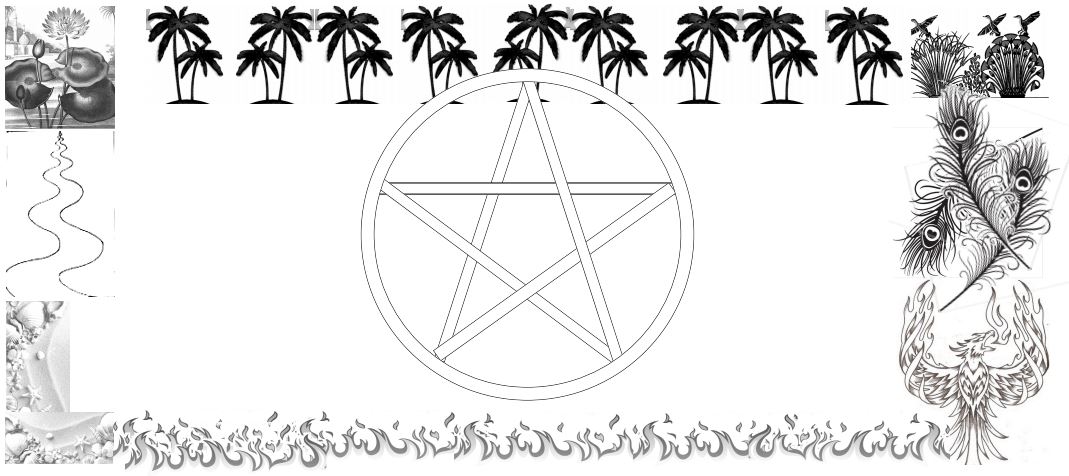
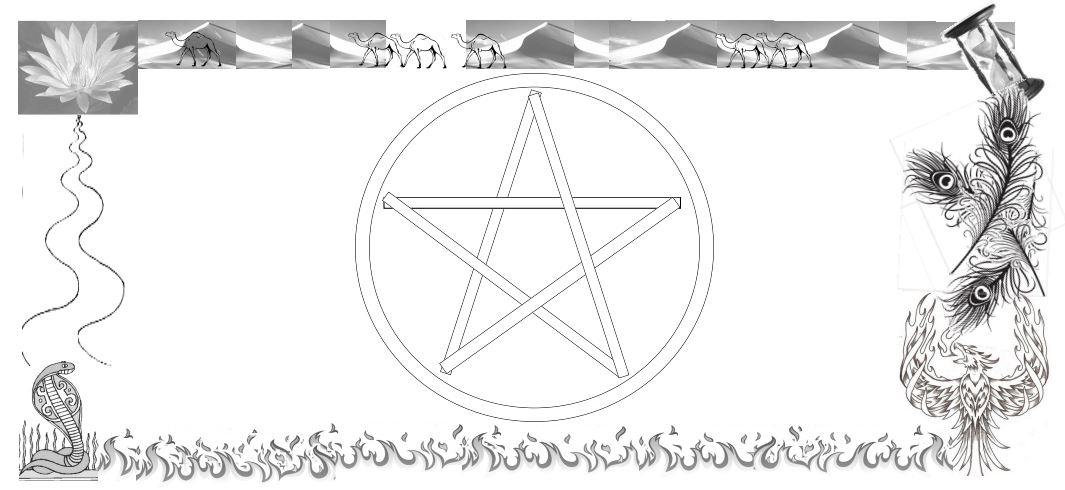
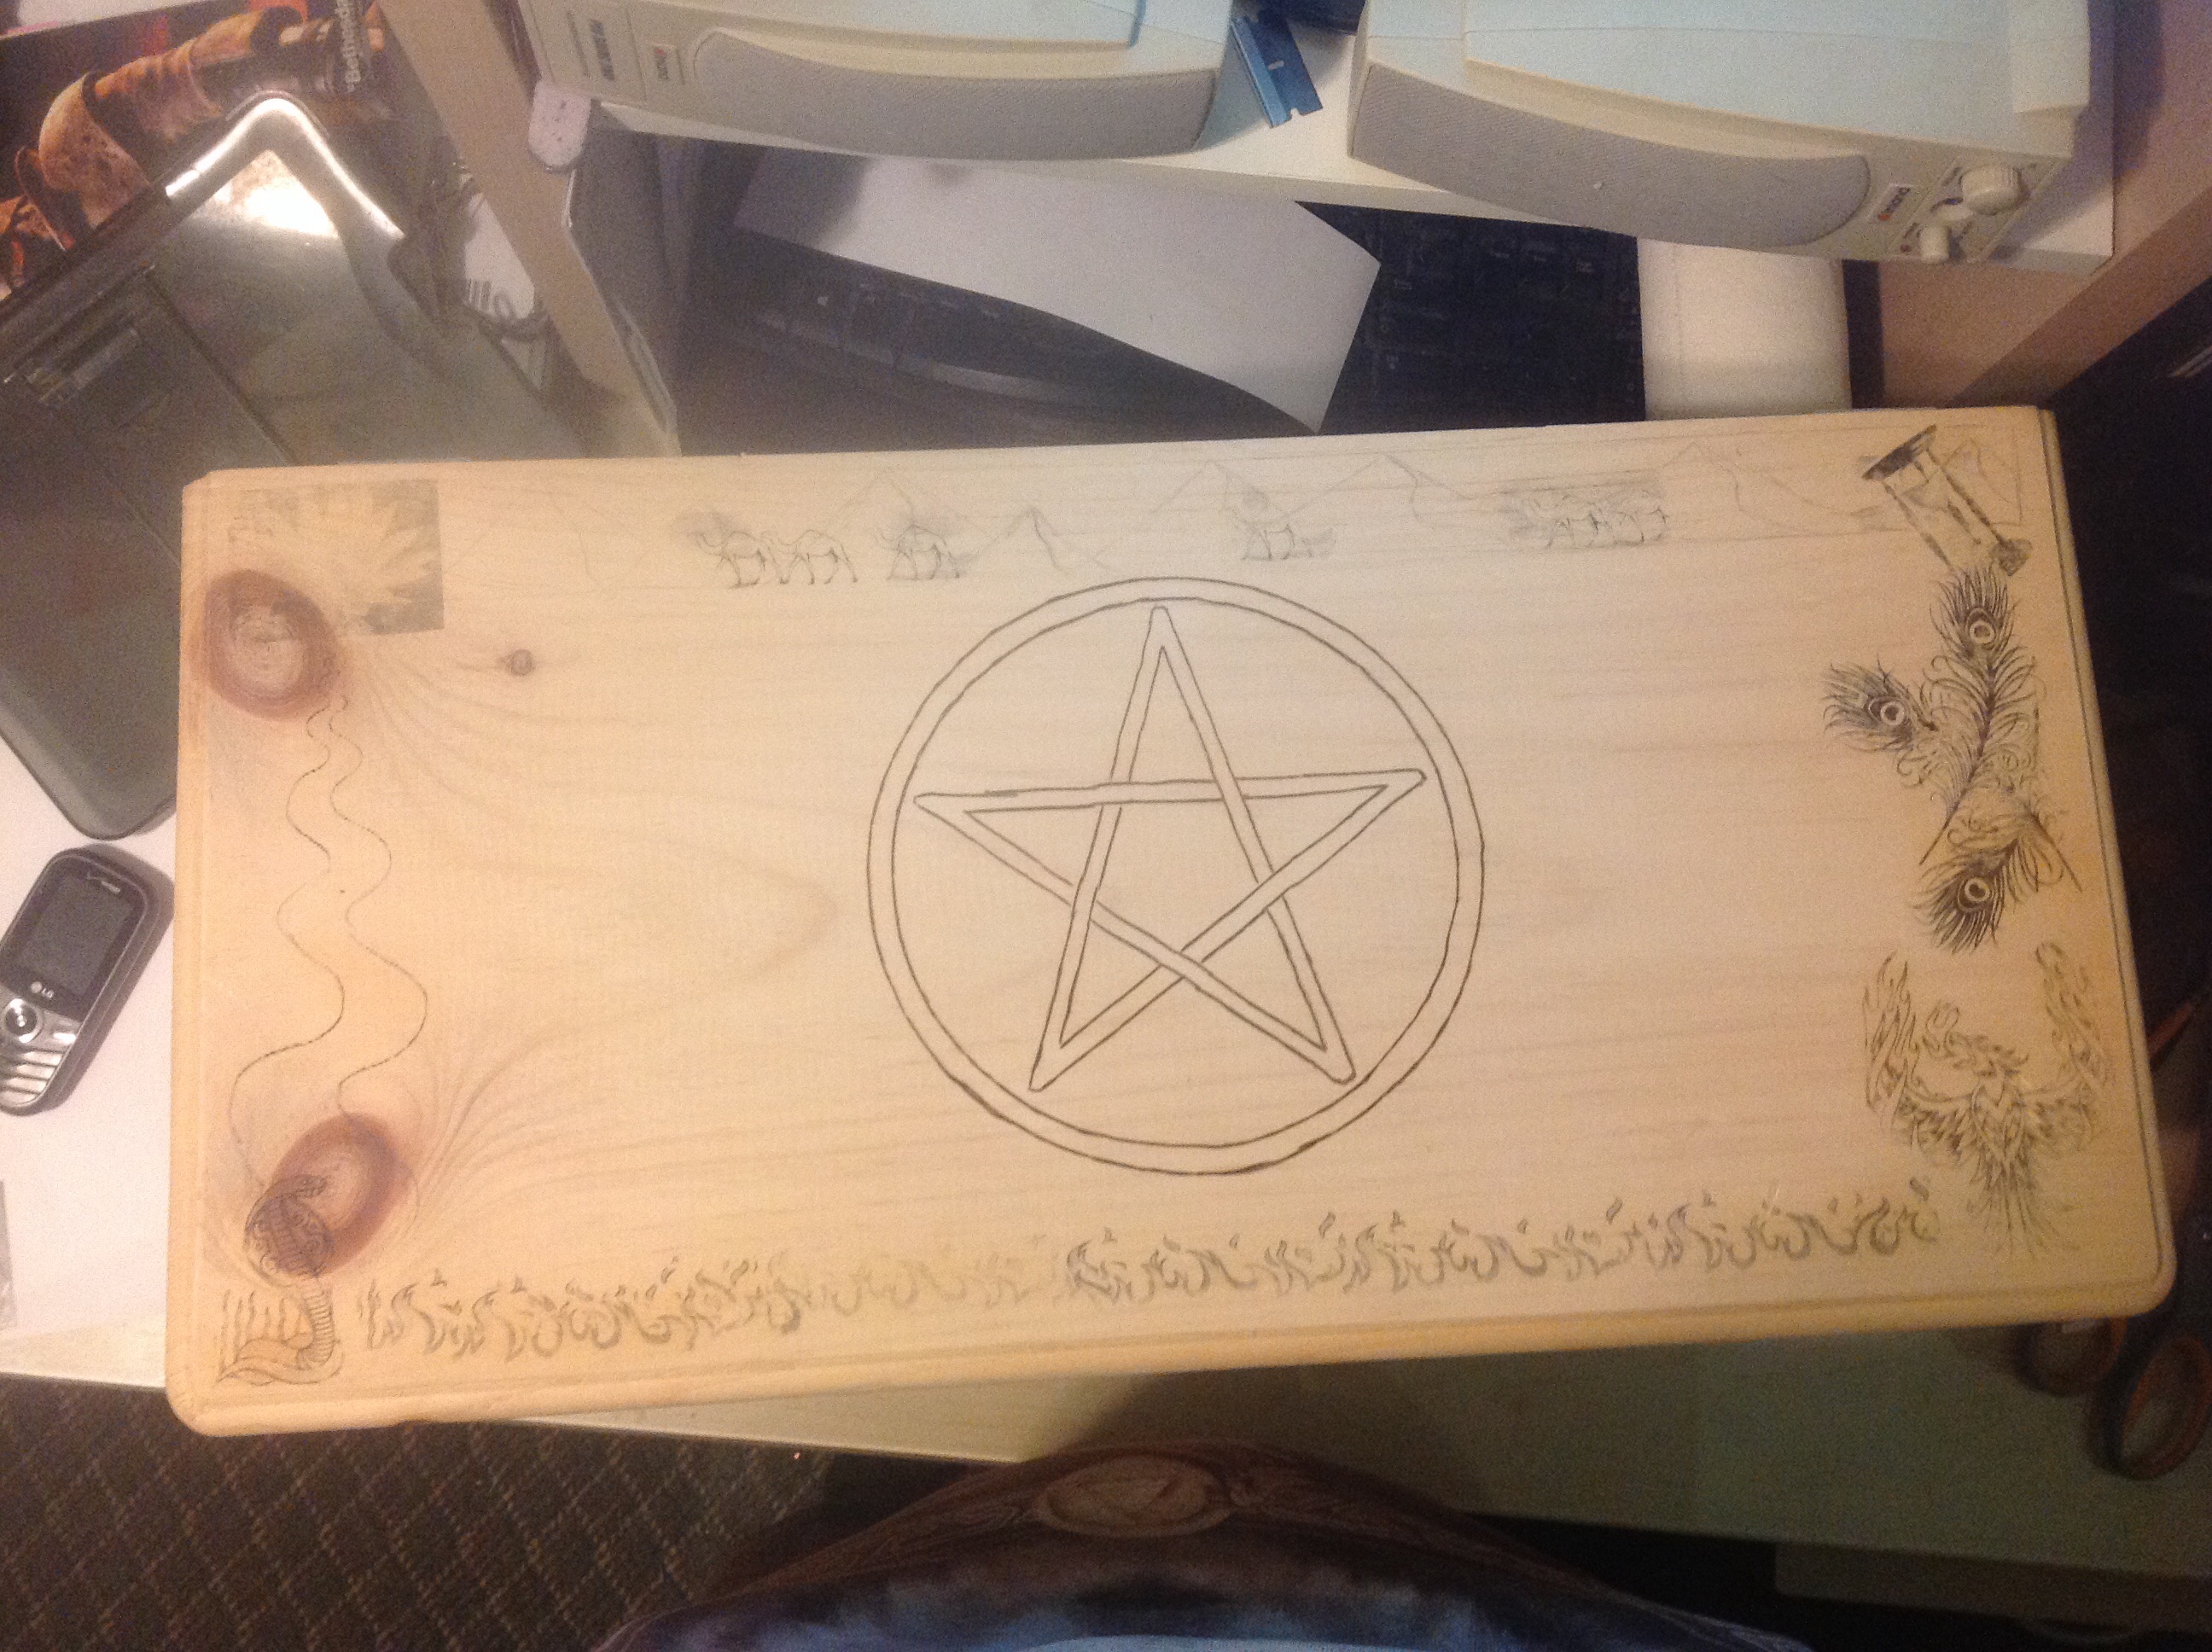
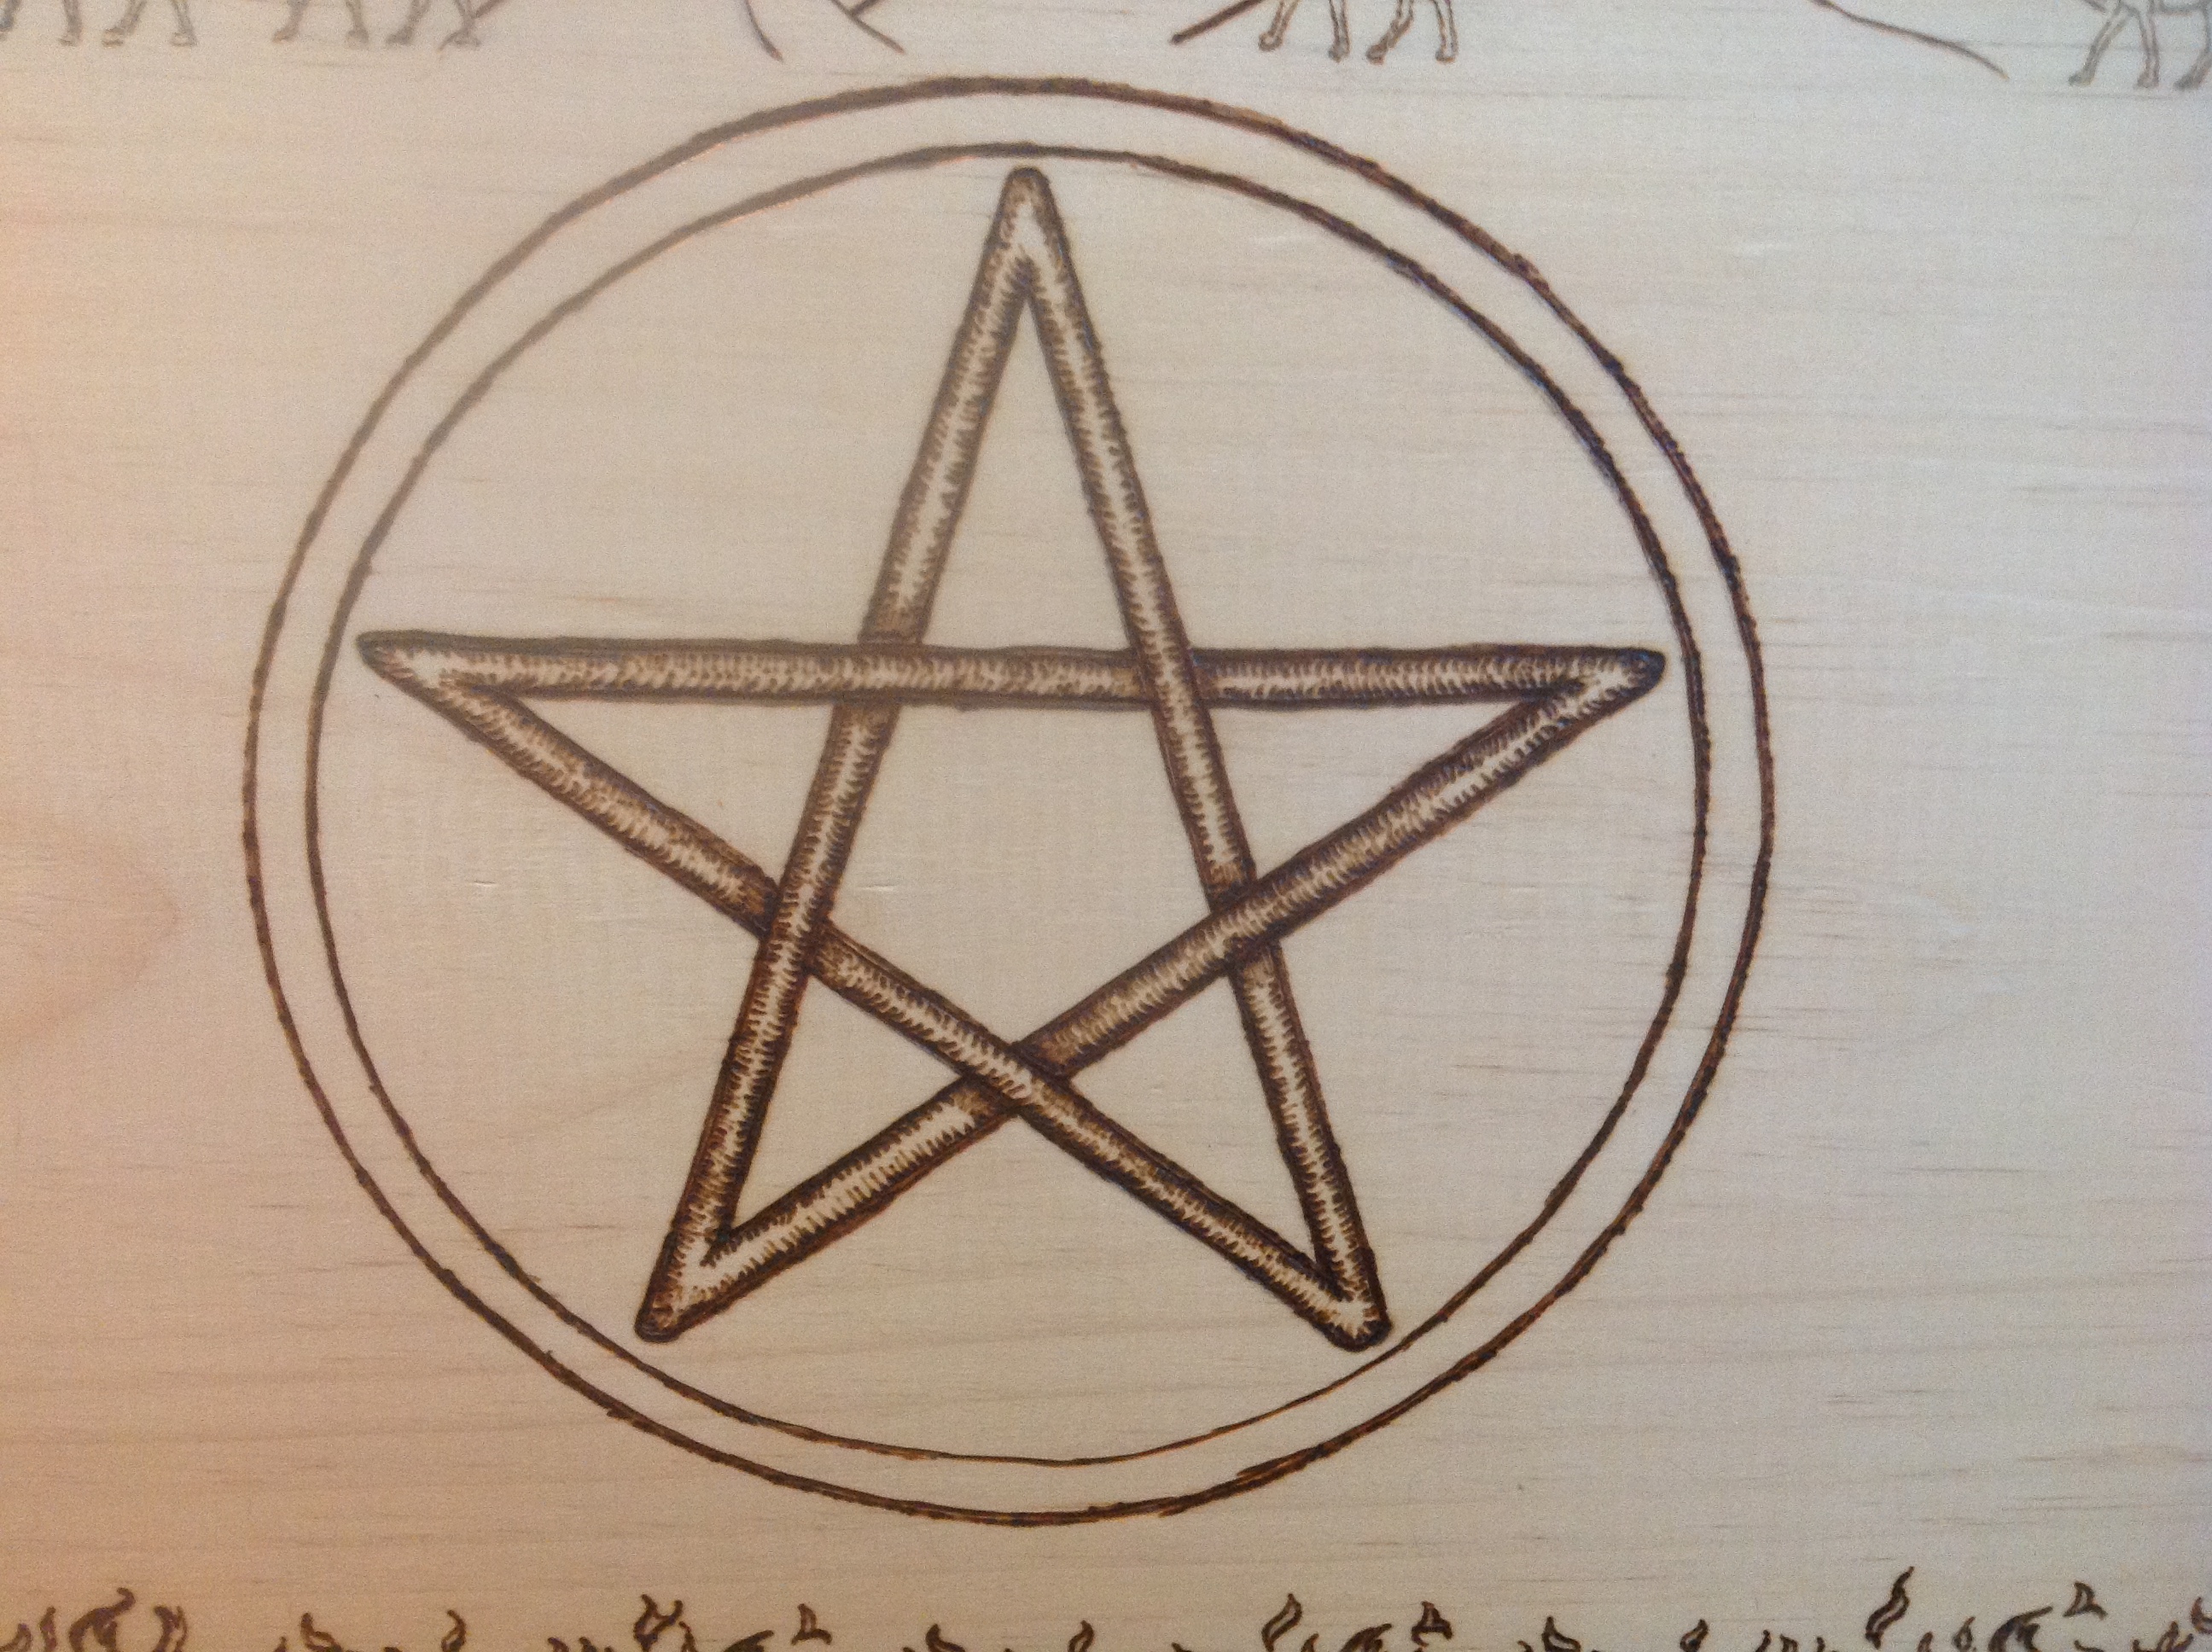
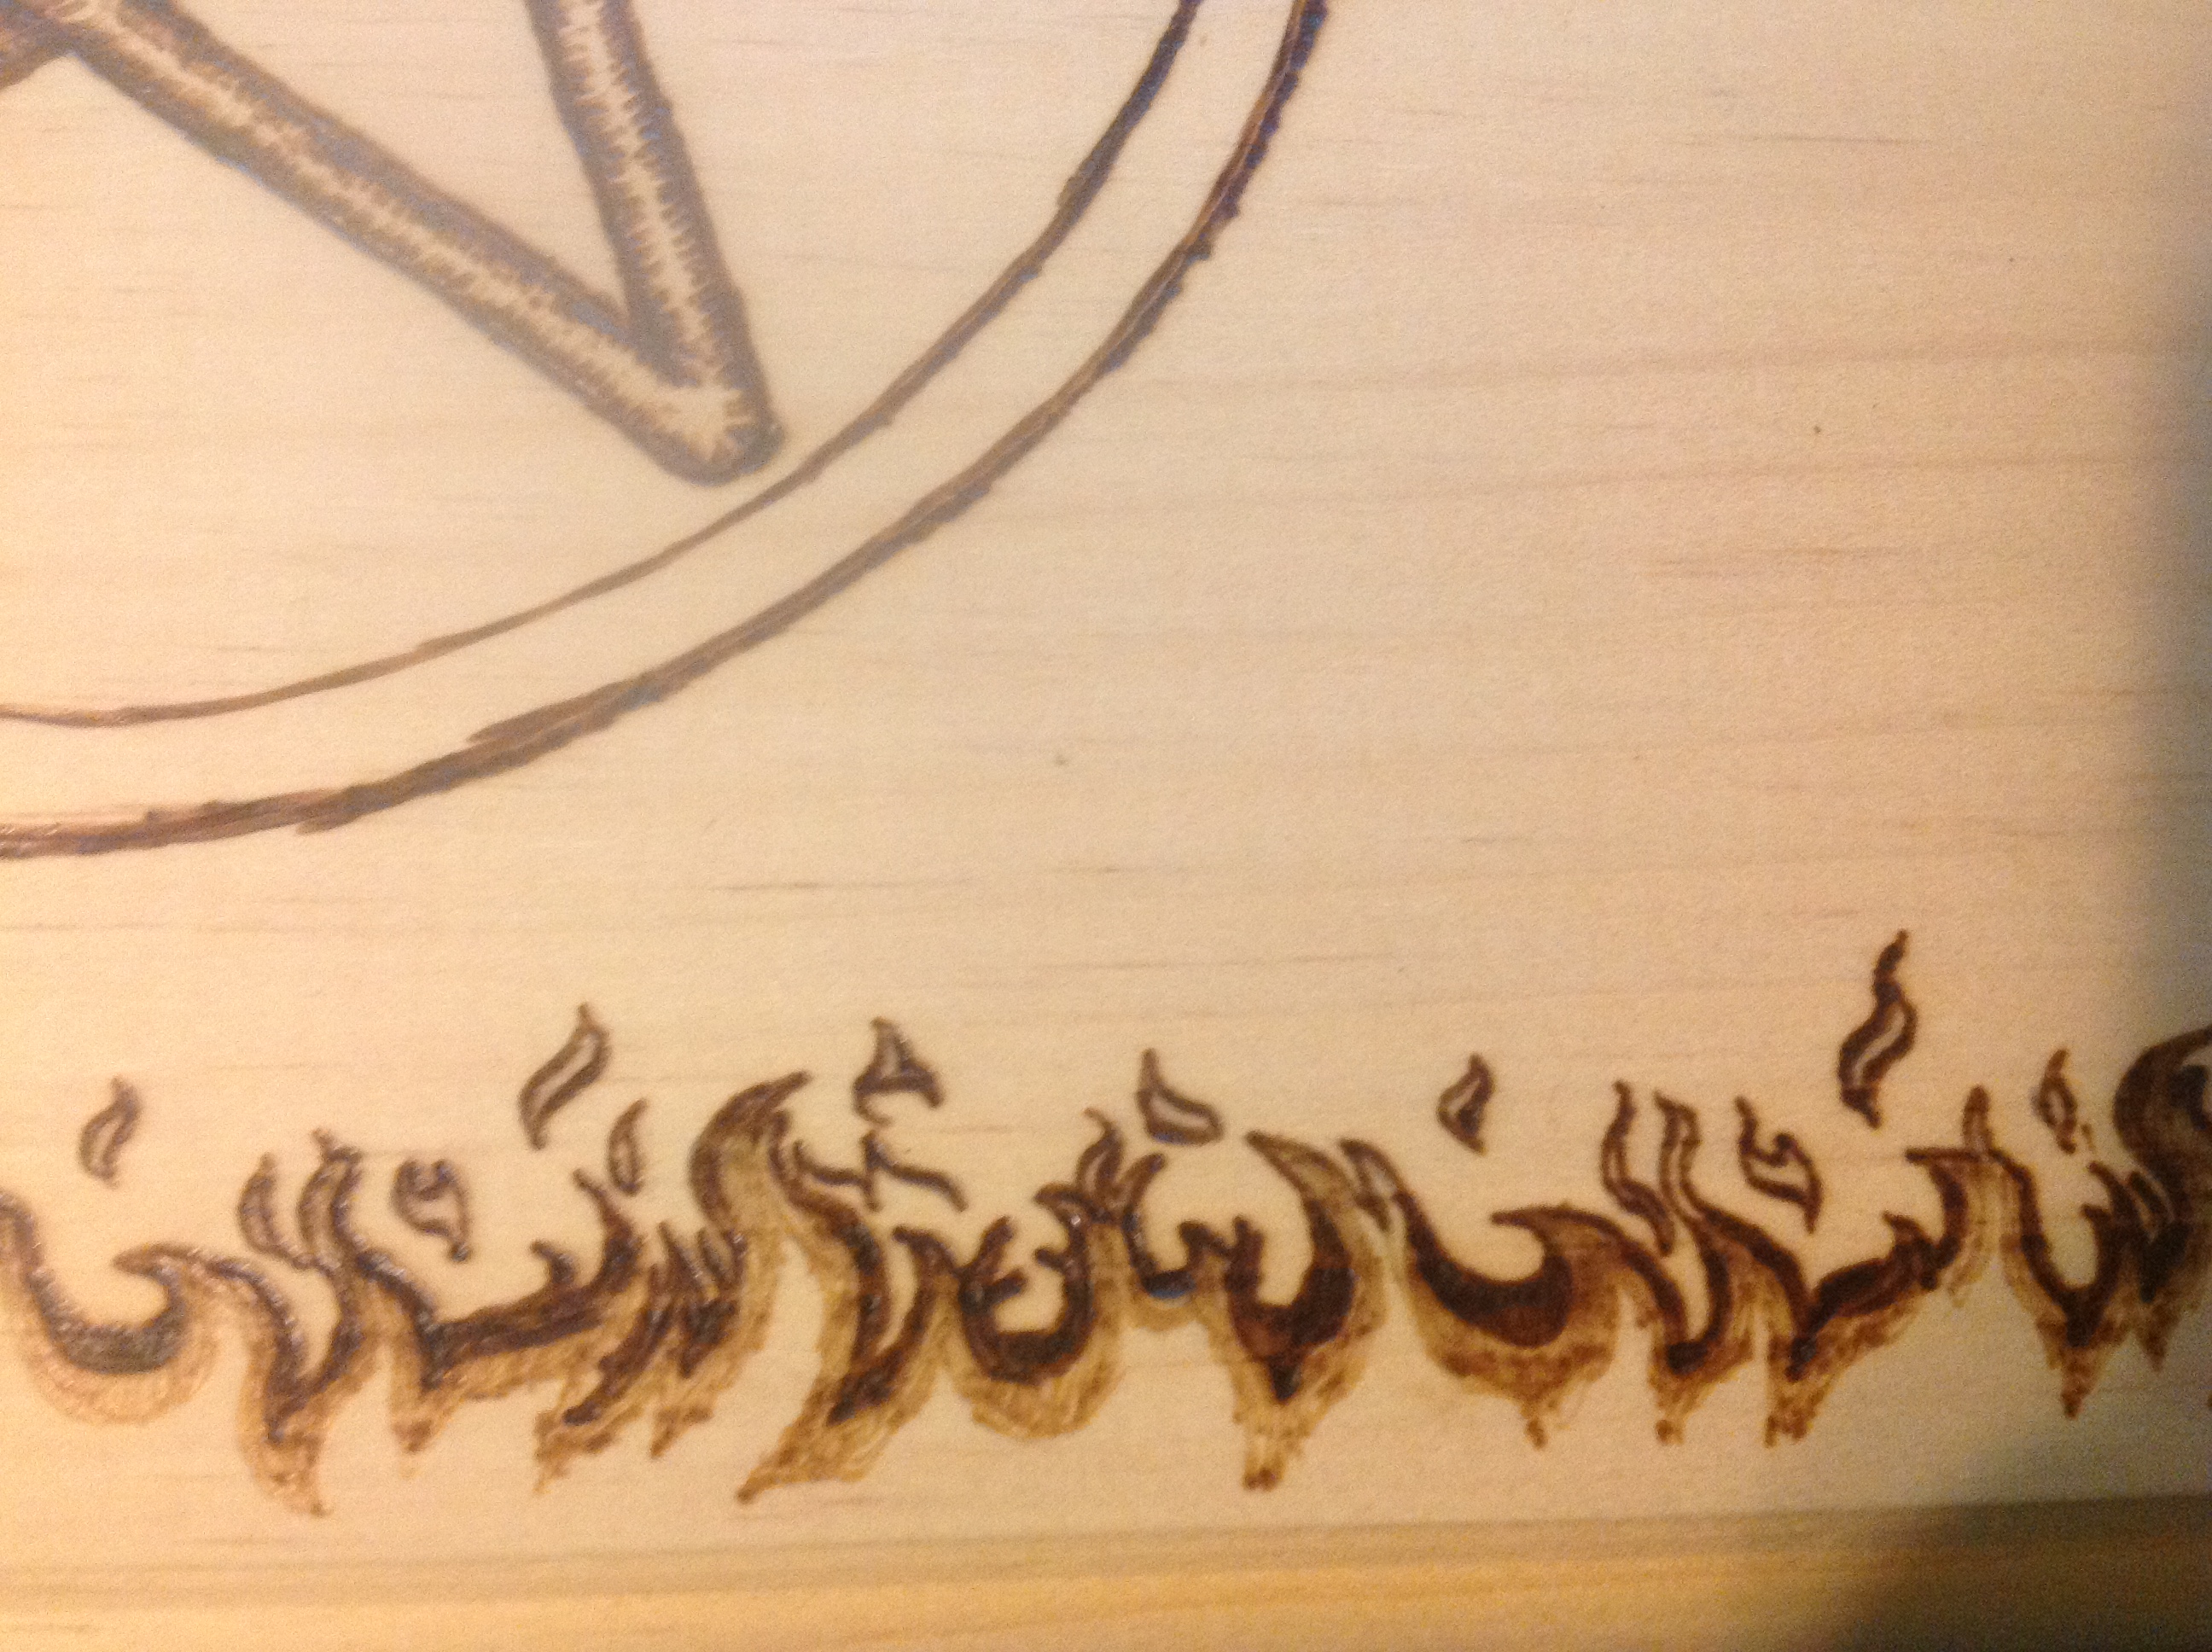
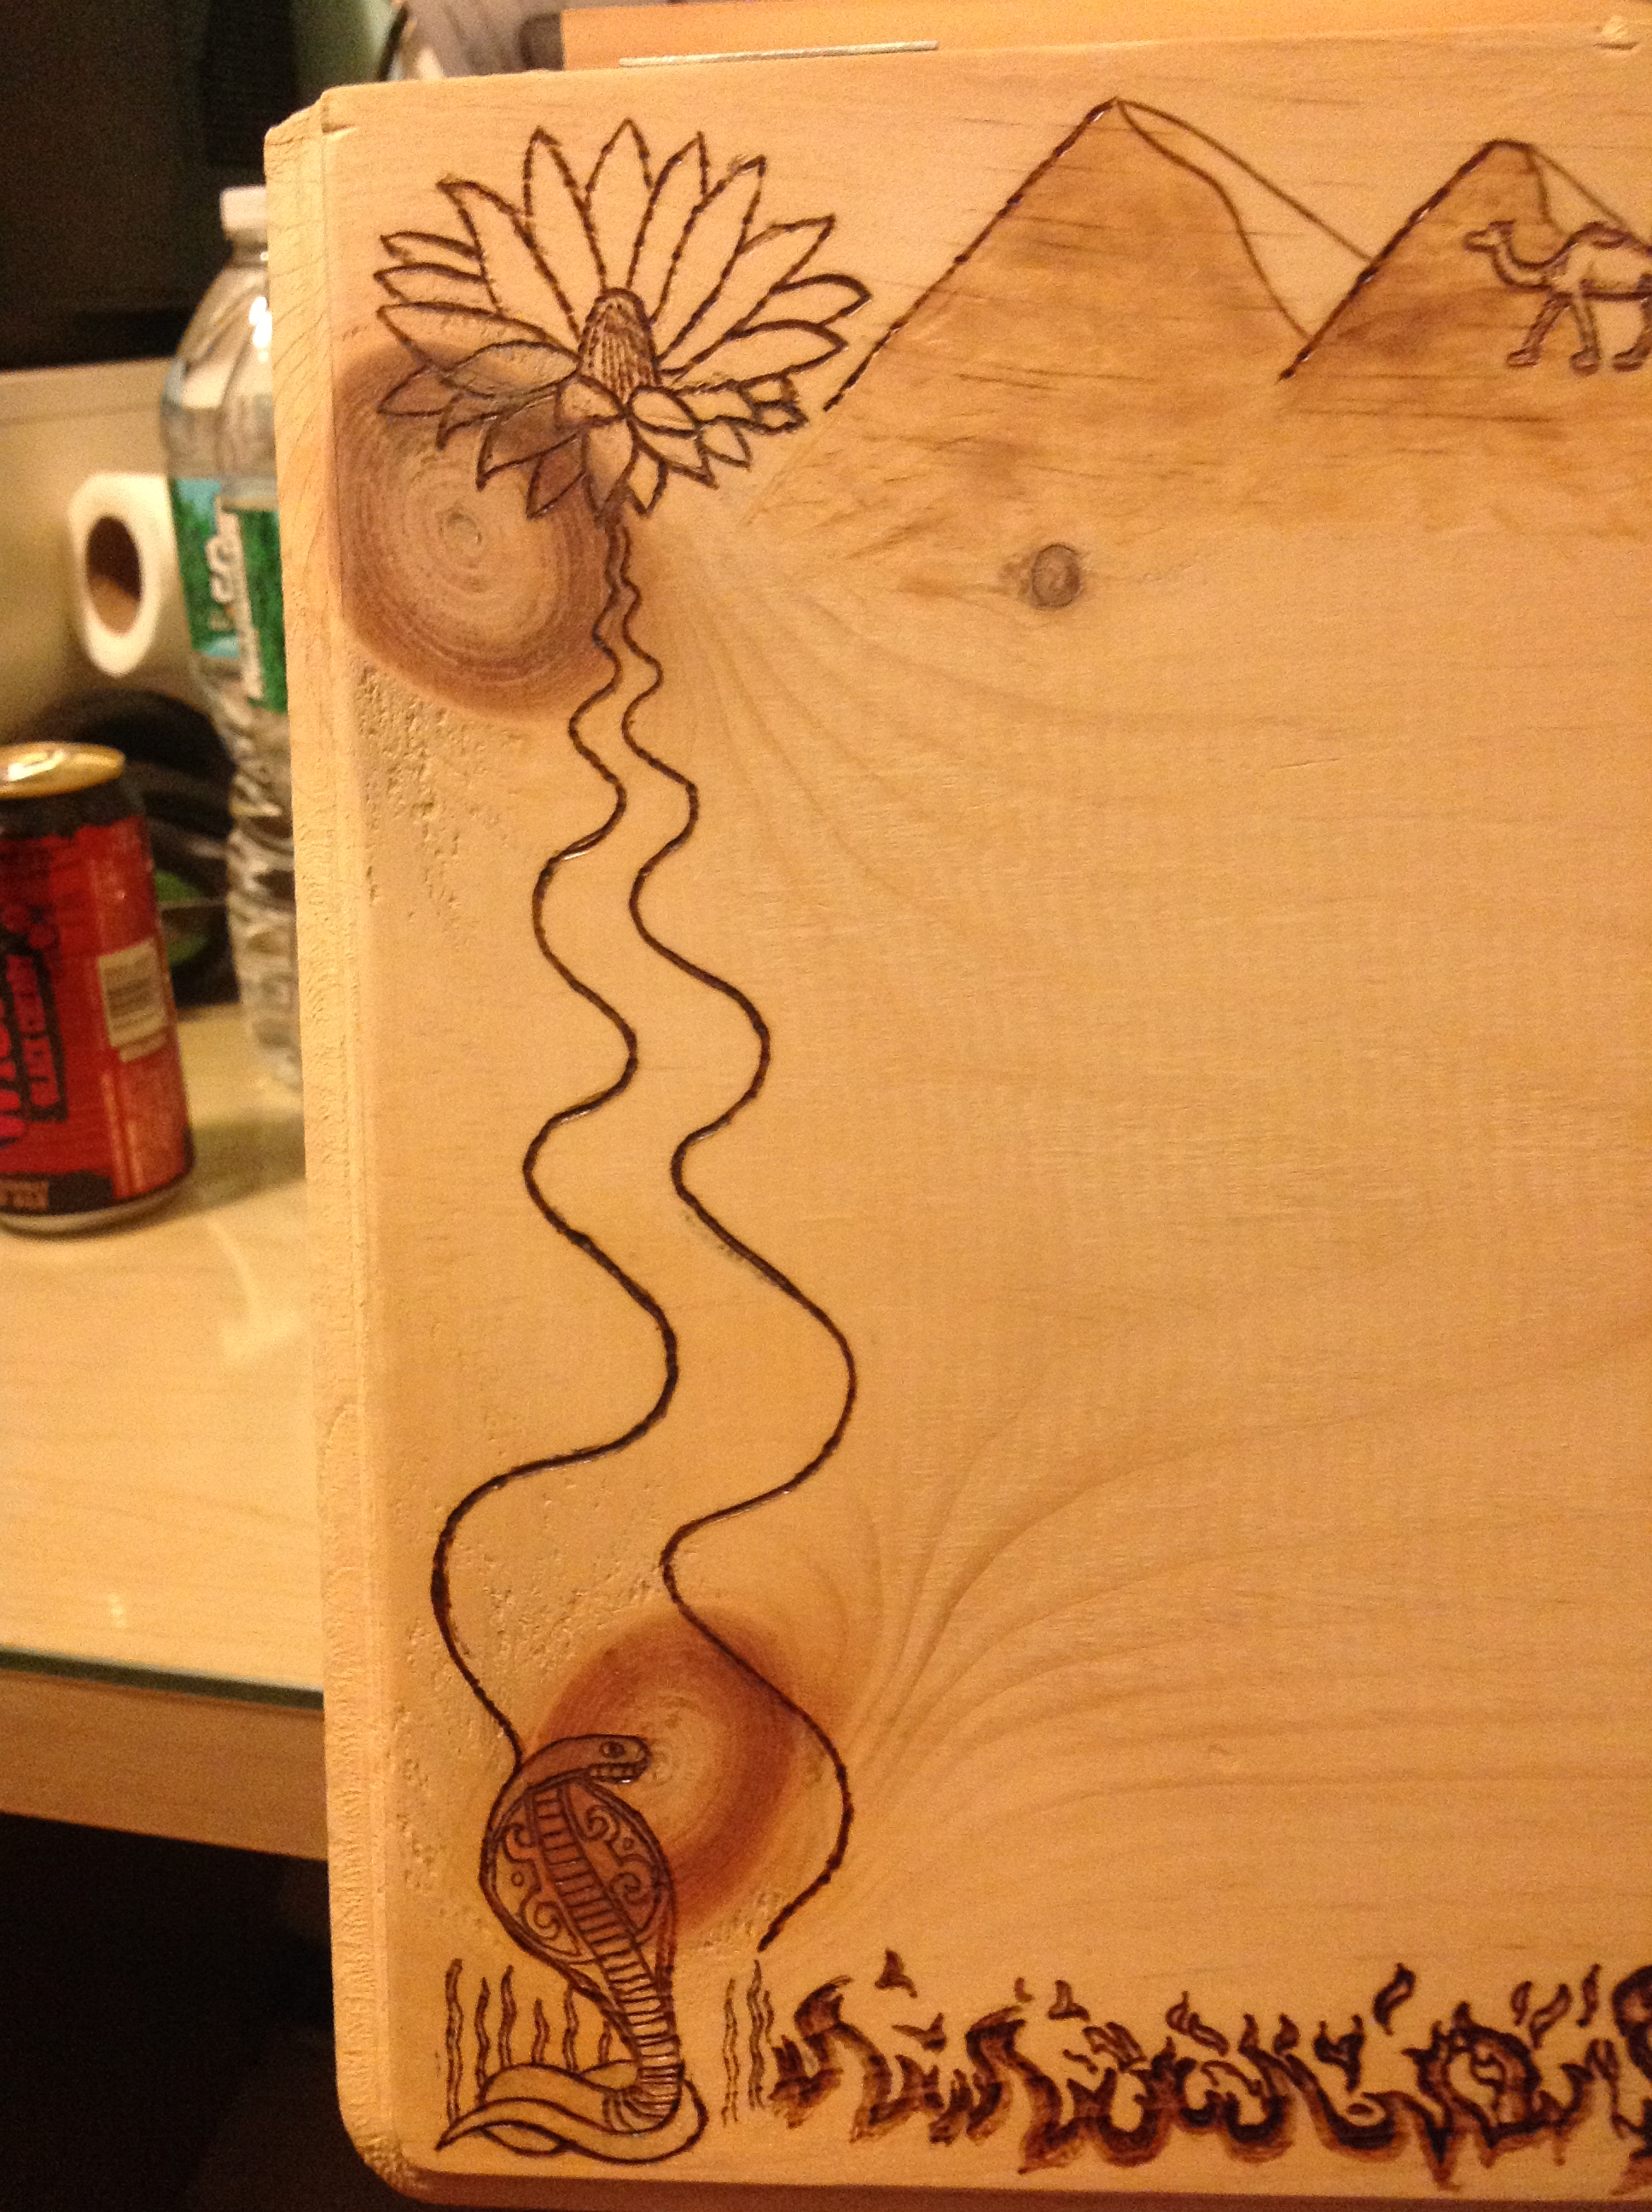
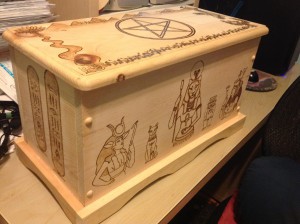
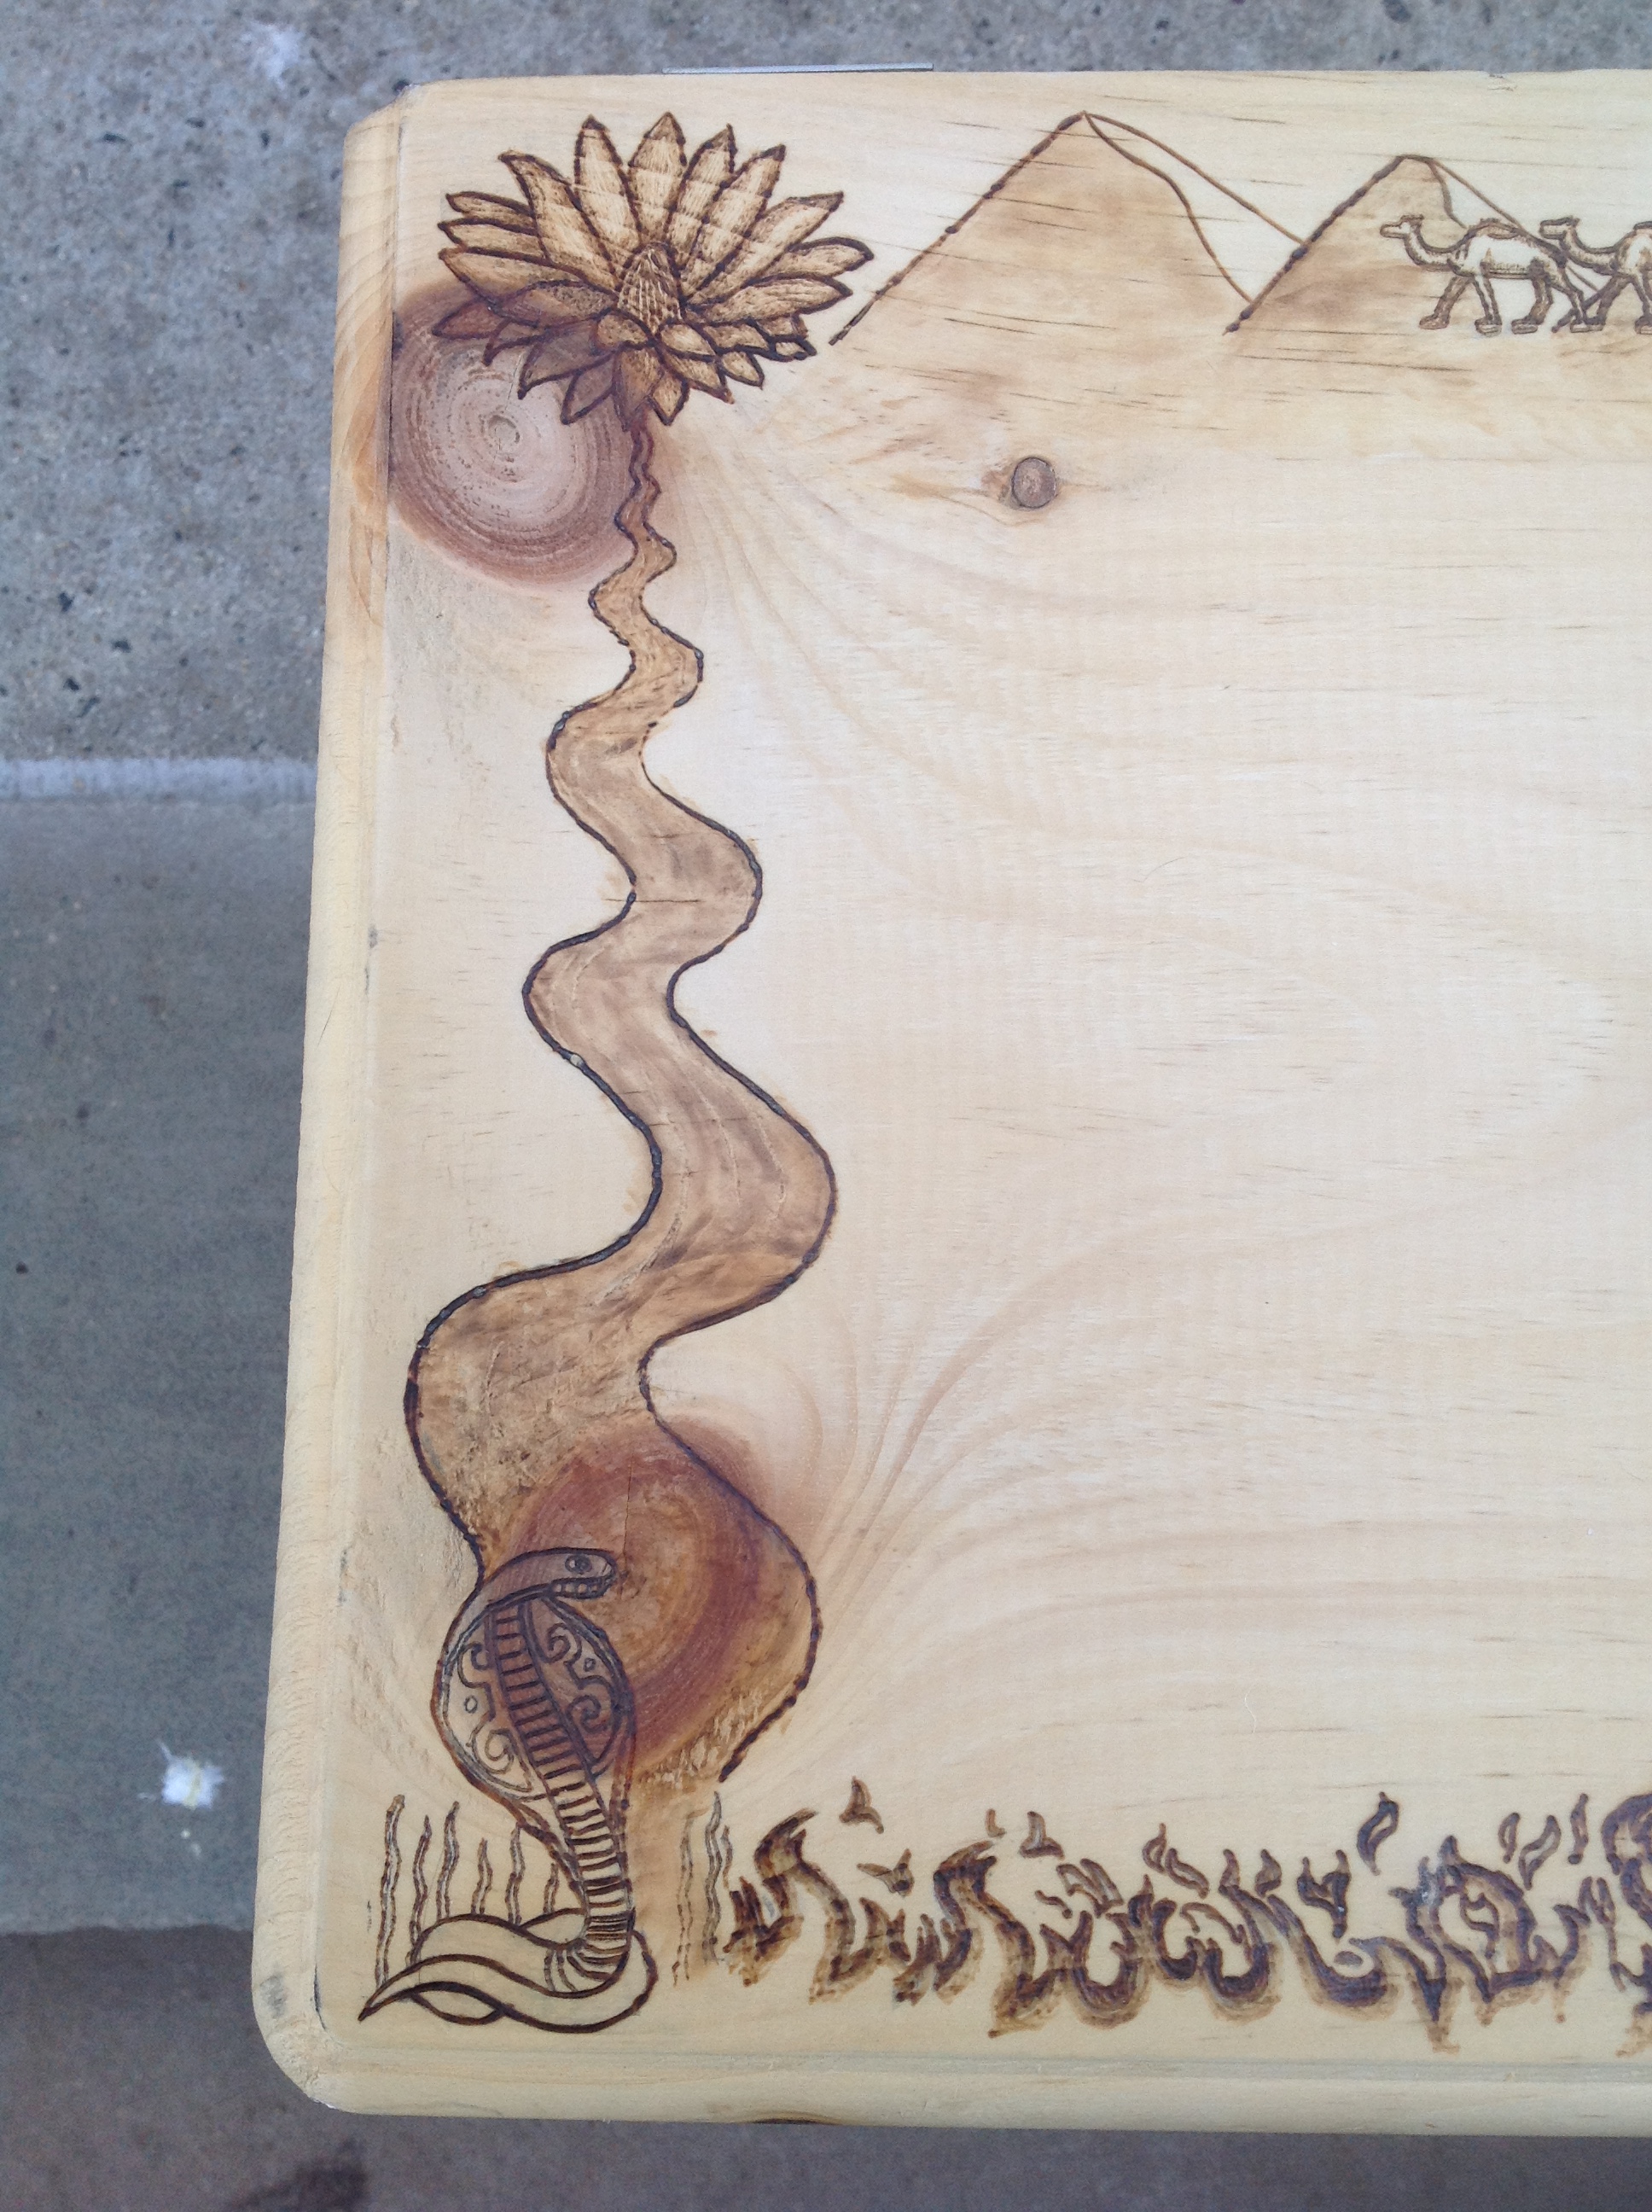
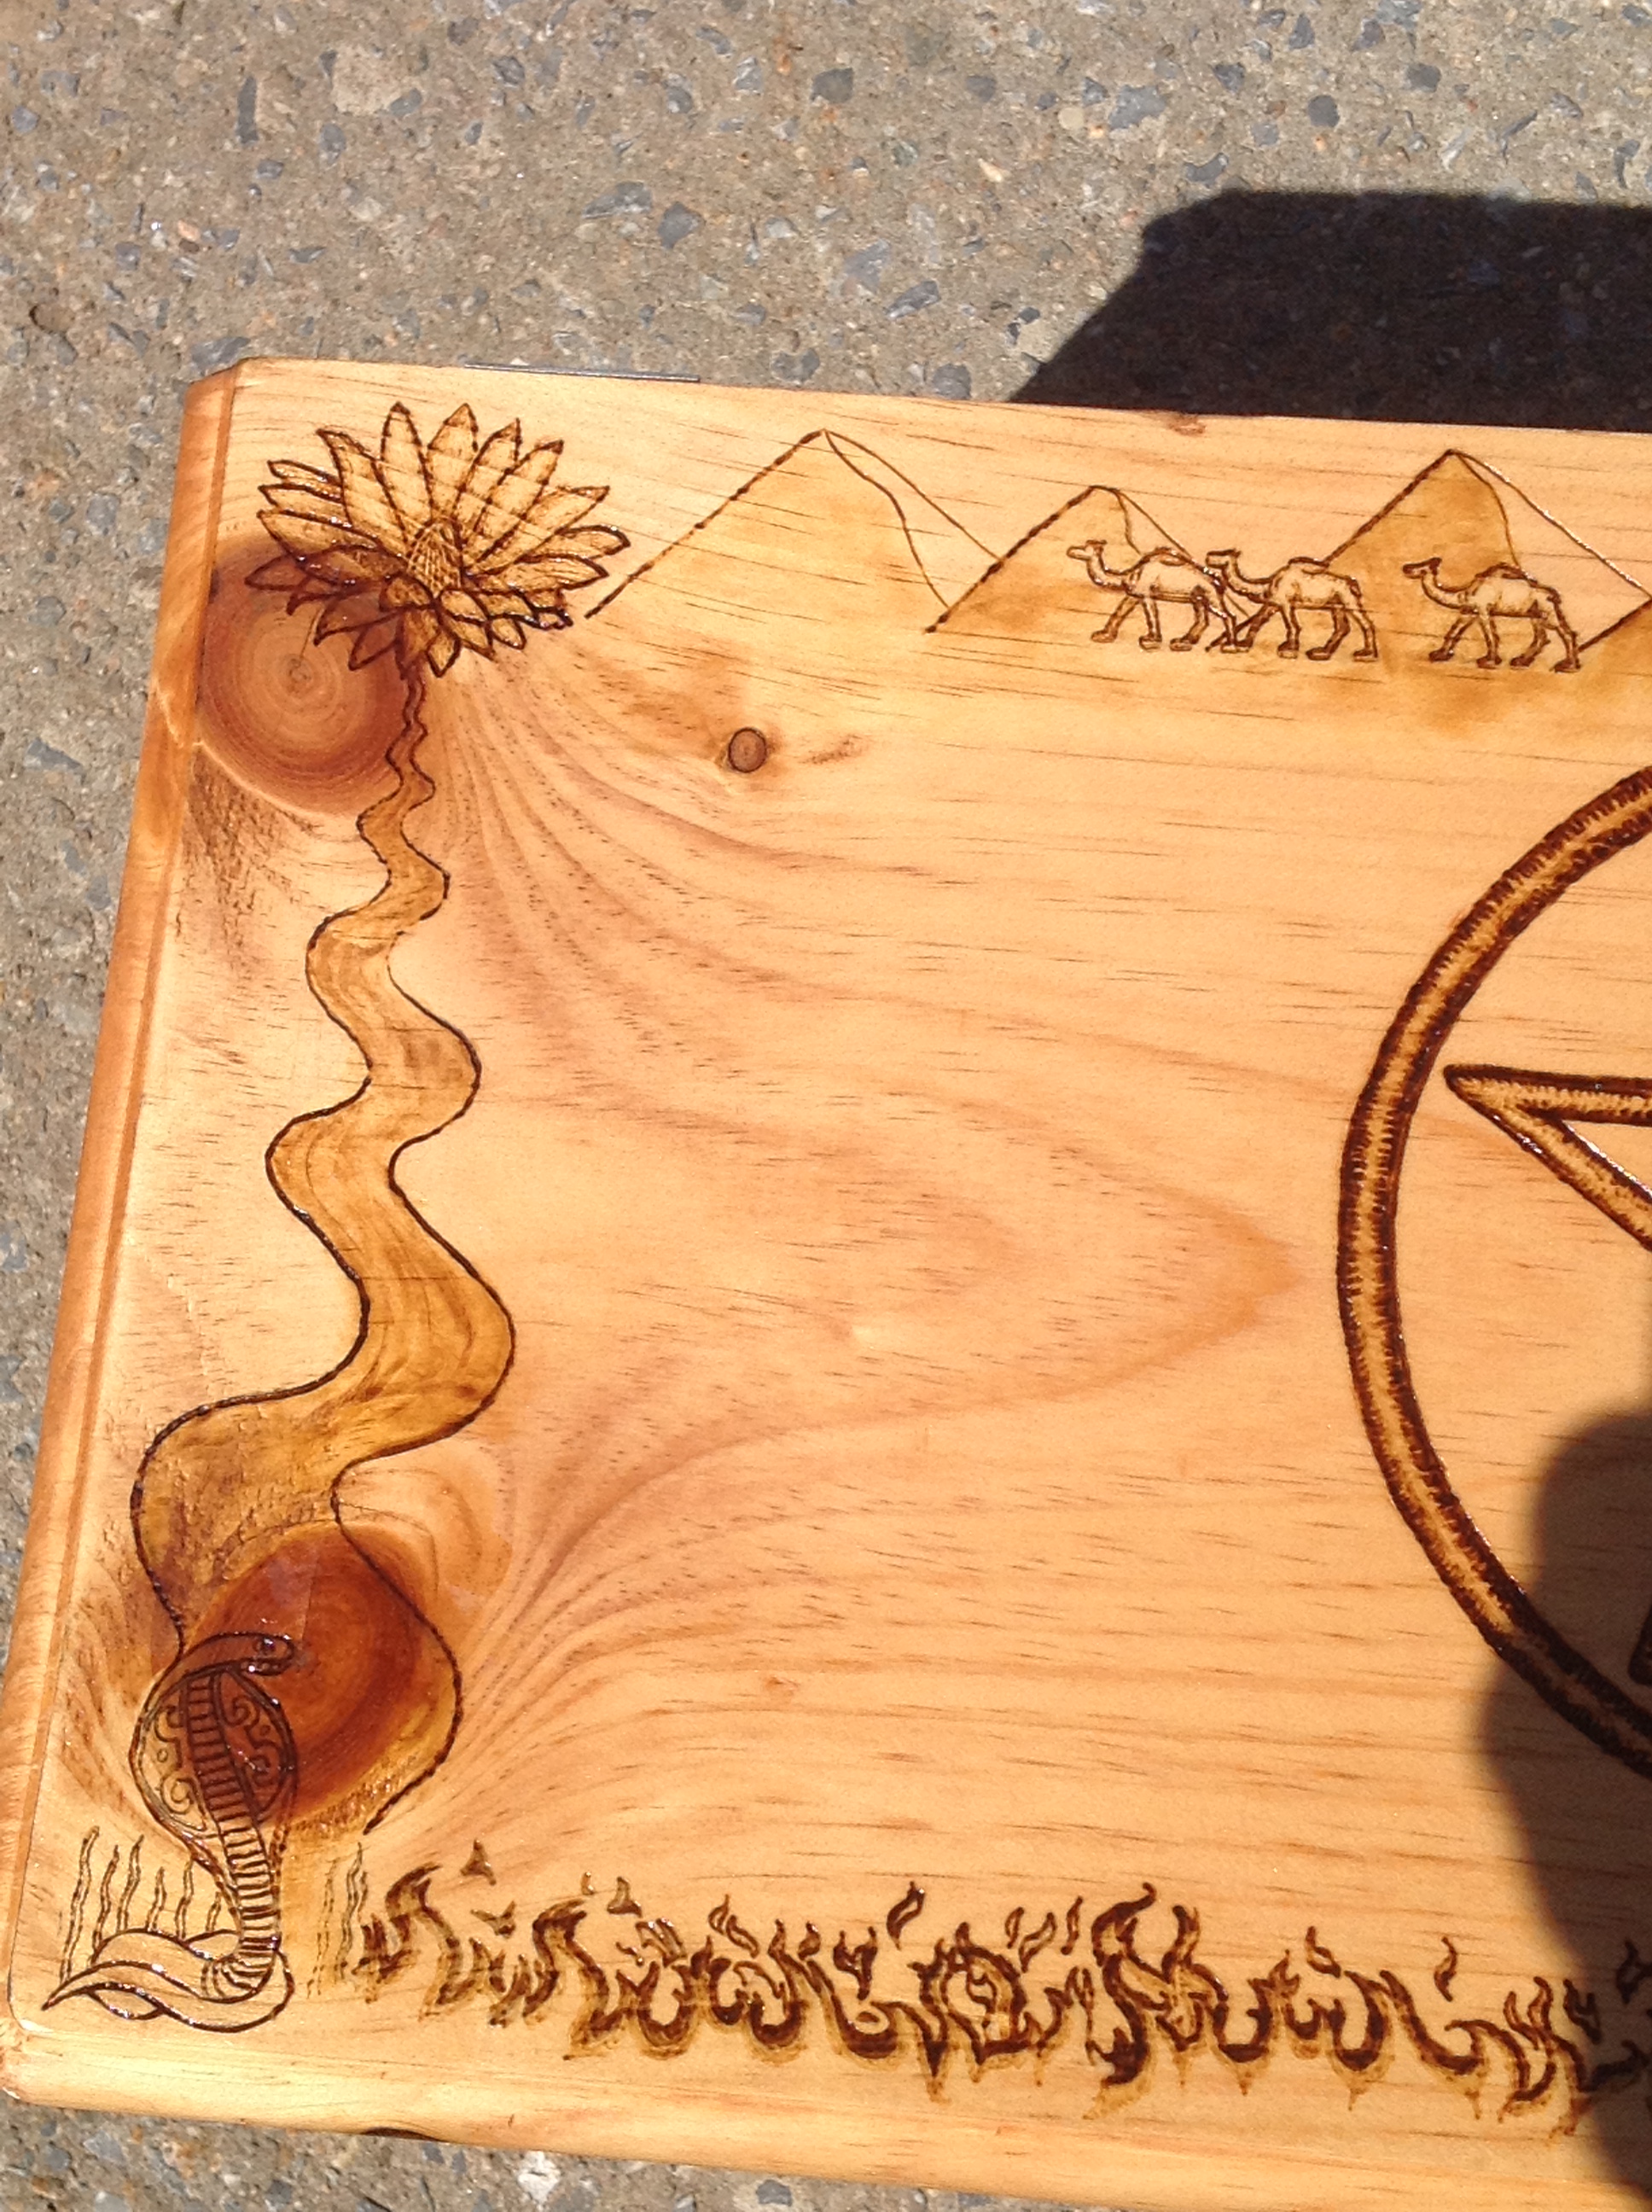
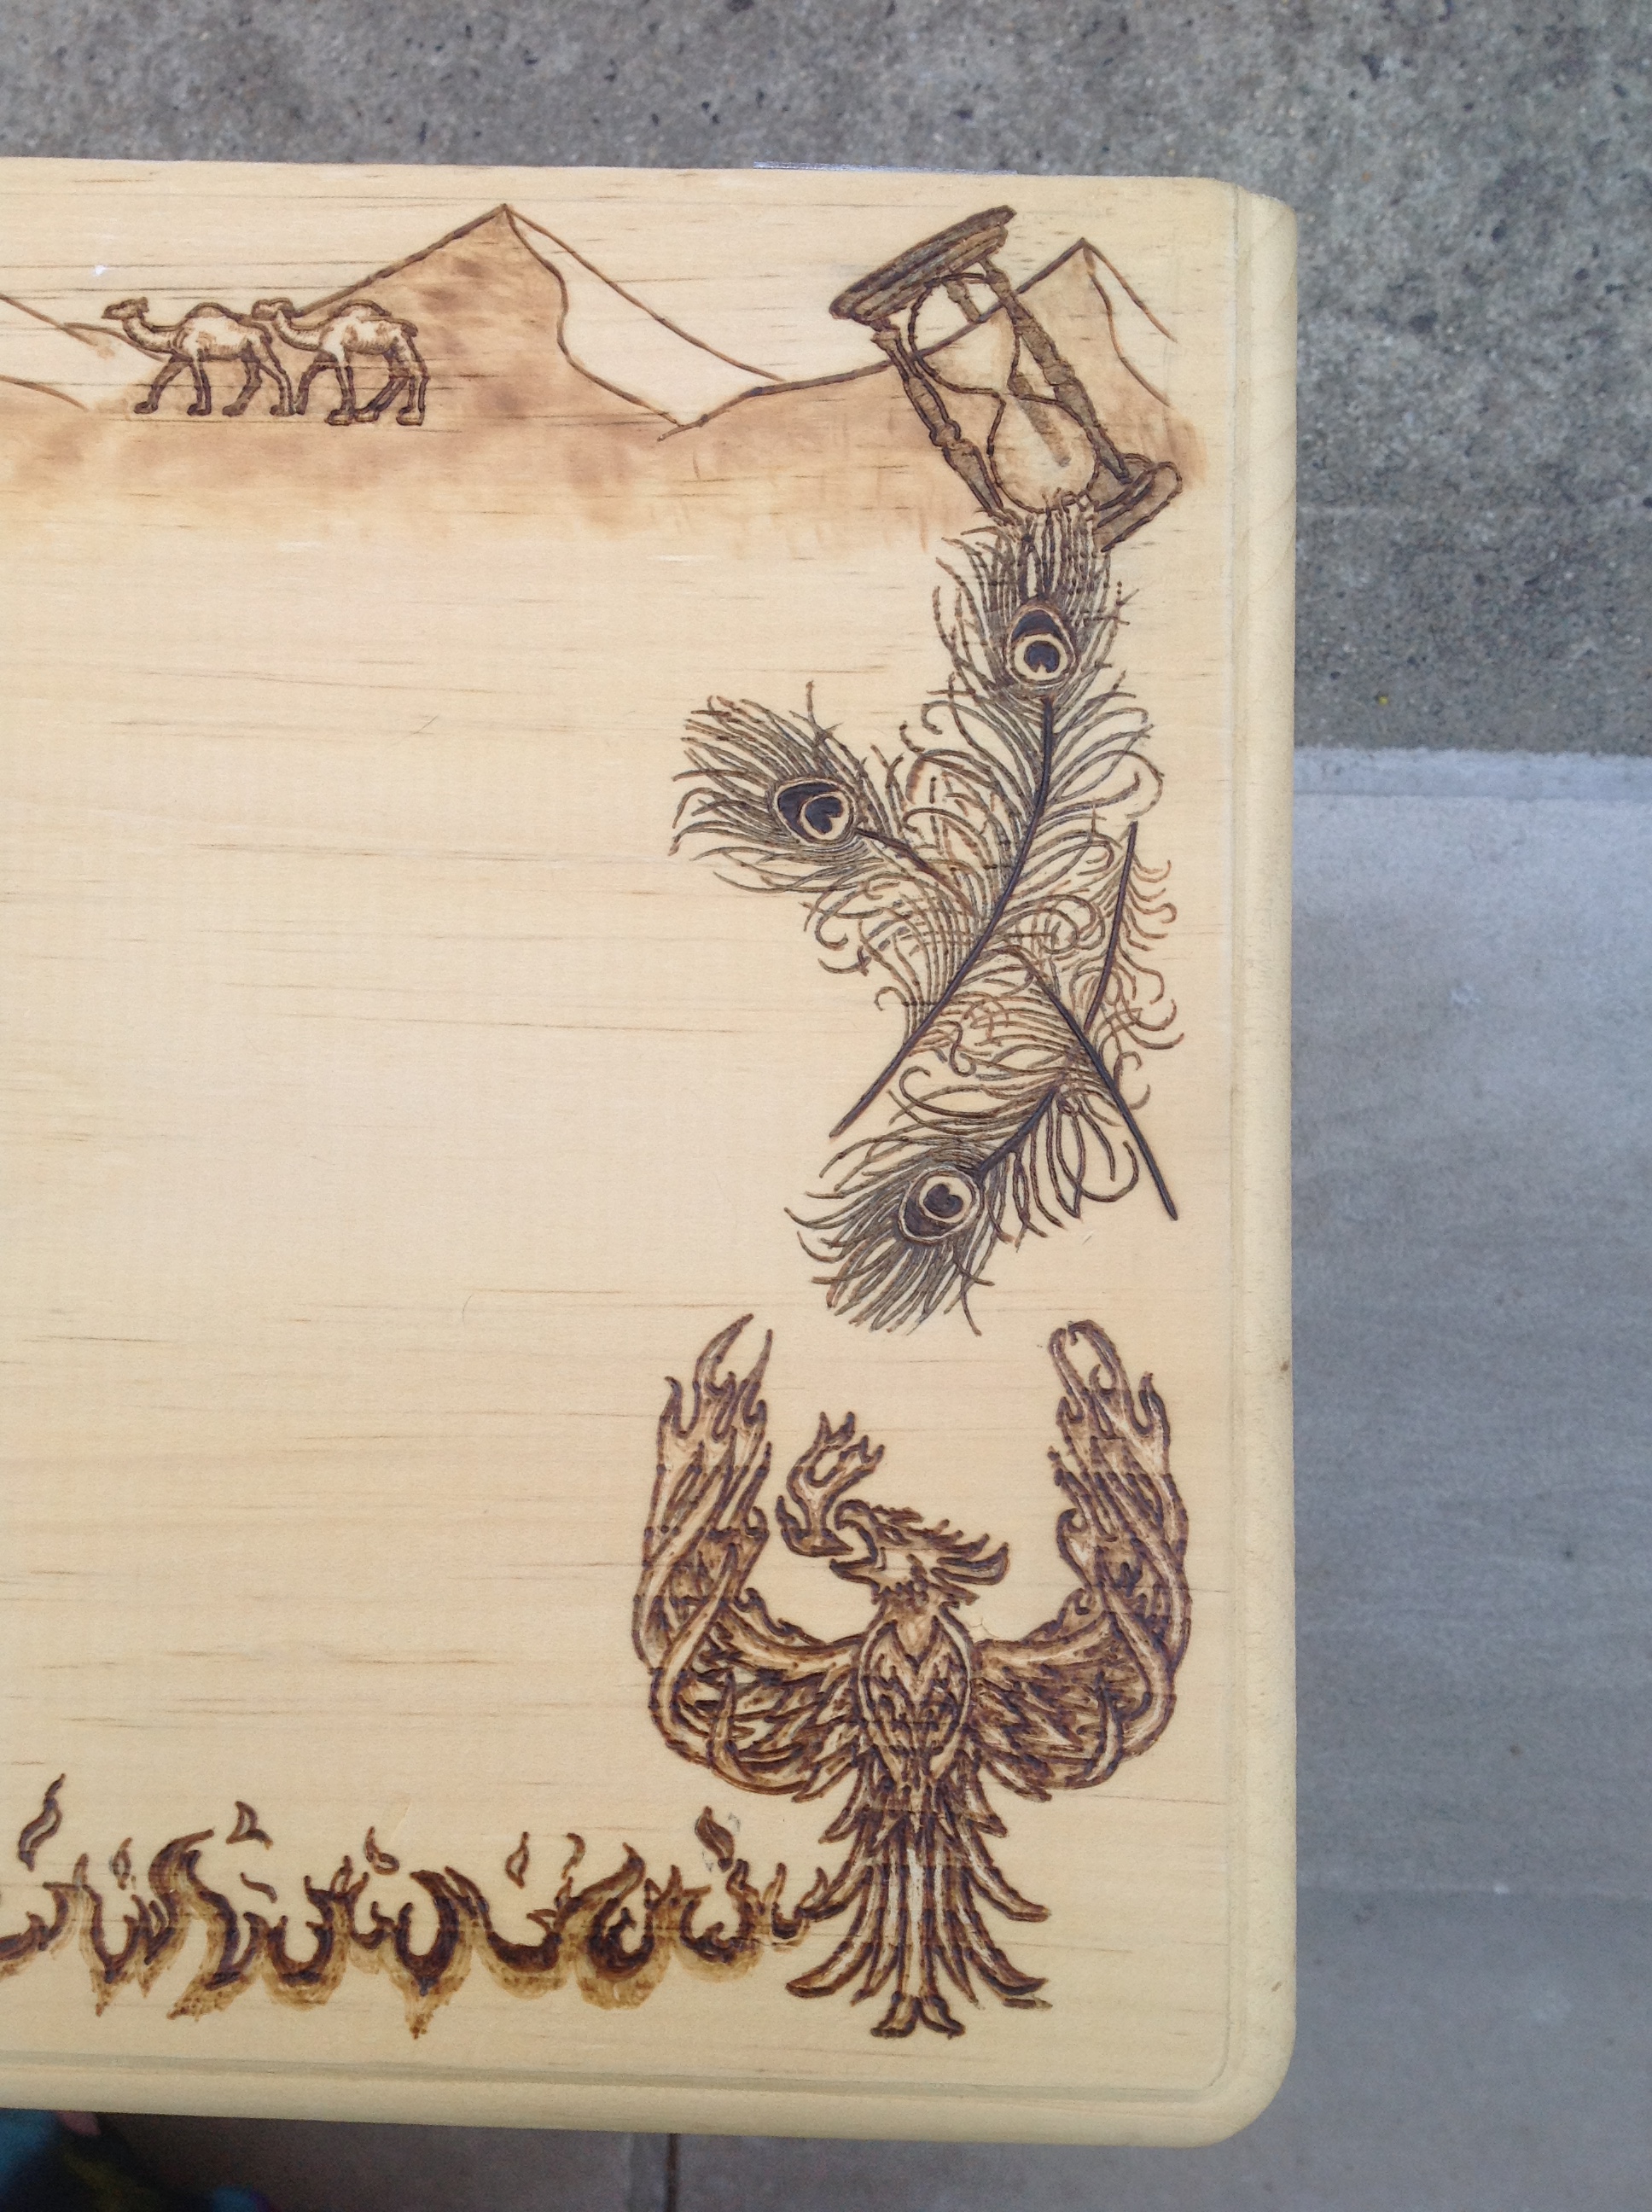
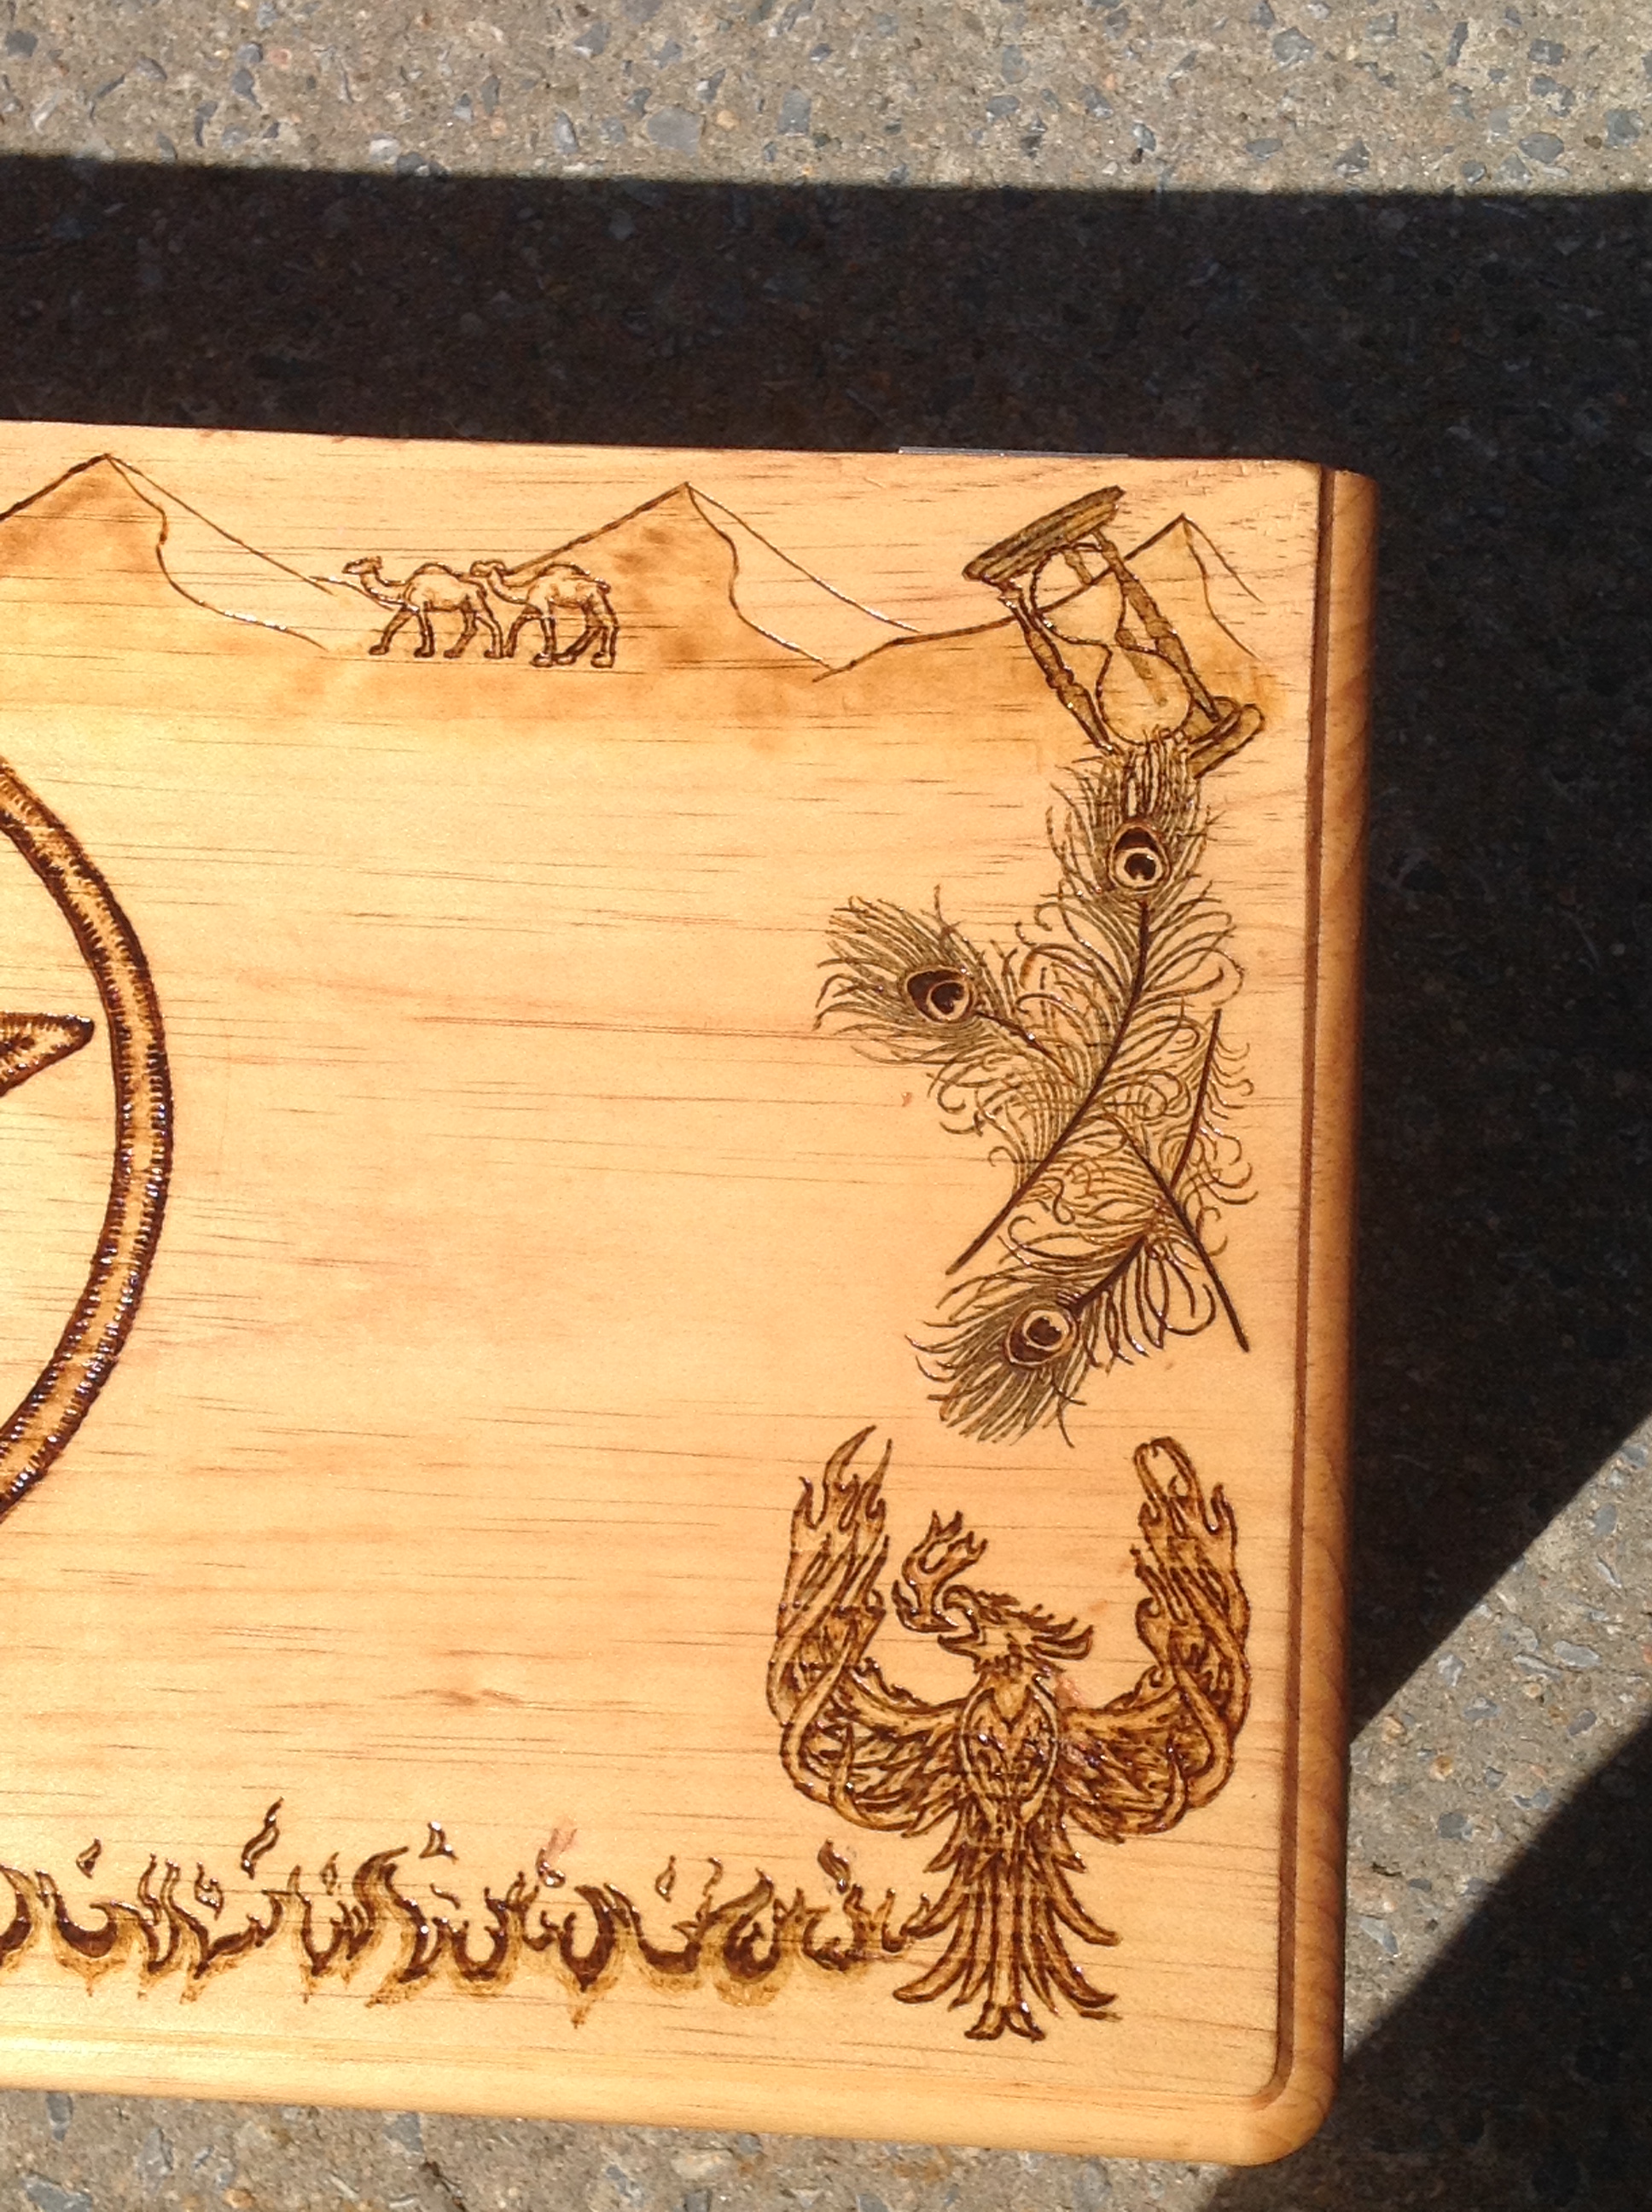
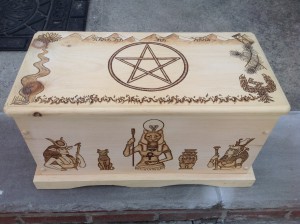
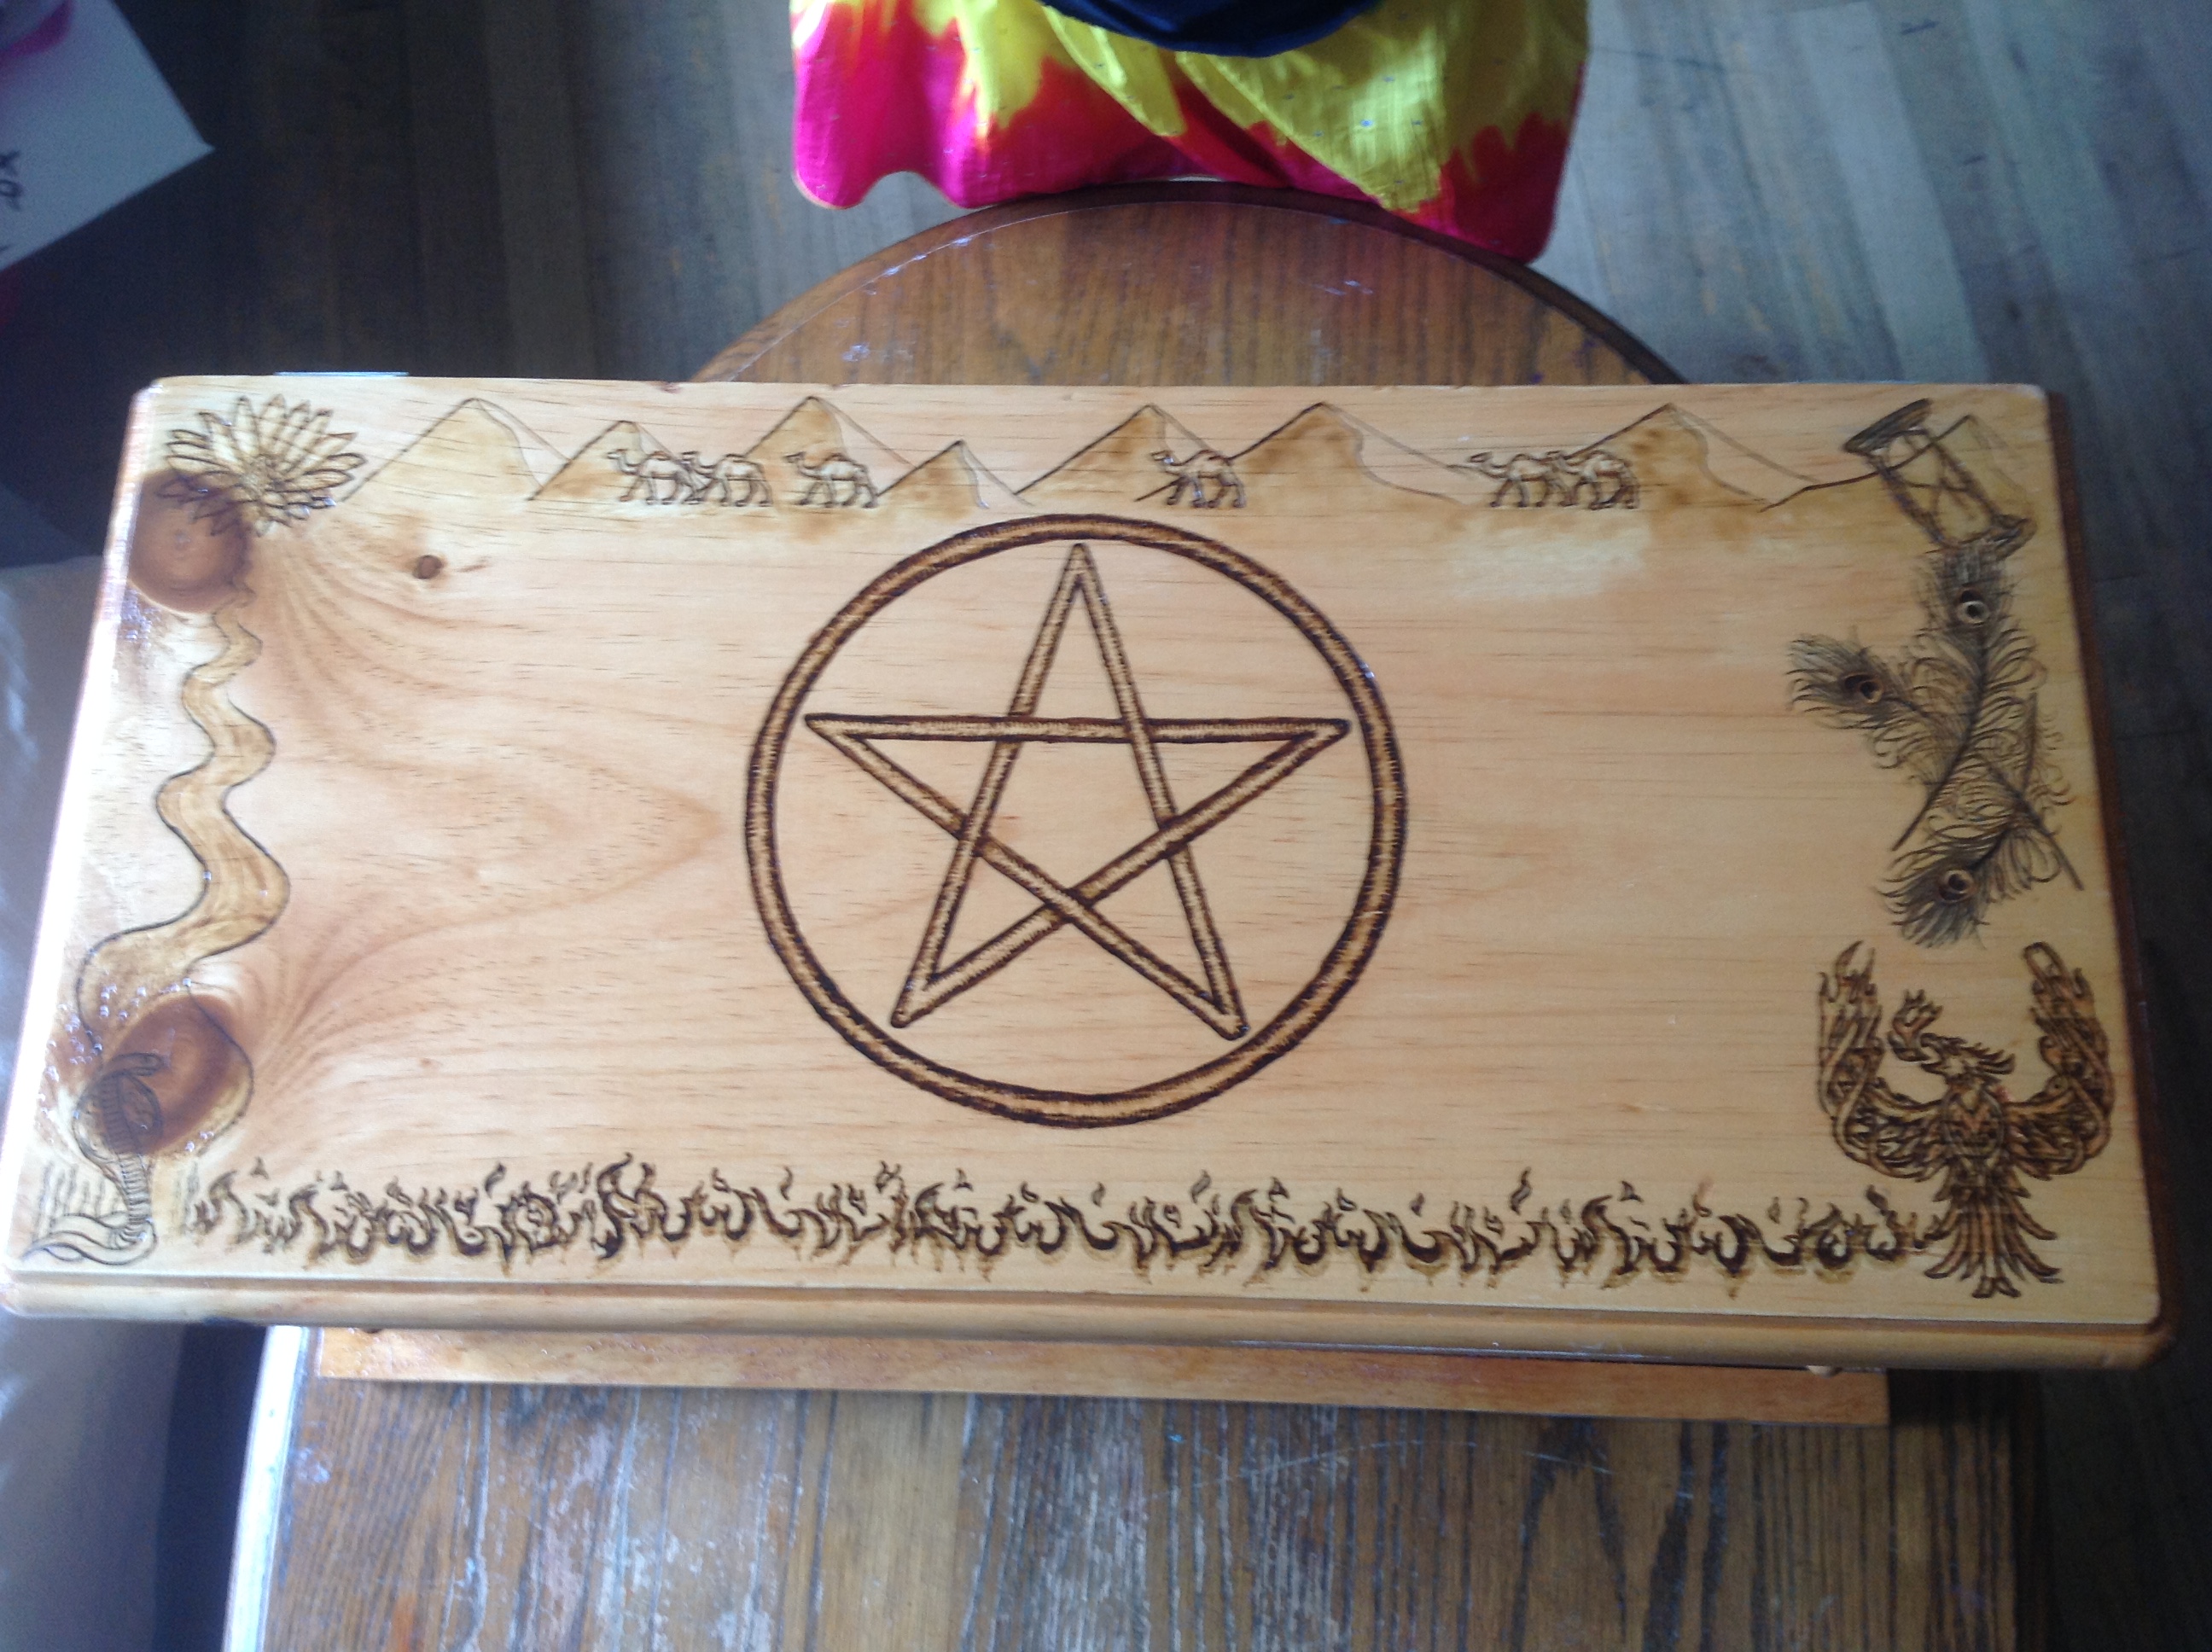
As I was working that down into one line drawing image, other deities and ideas started popping up. We knew a pentacle would go on top. She wanted representation of the elements in the appropriate directions. I came up with the idea that, if it’s really all about Sekhmet, then all the images should be Egyptian themed. So we chose sand dunes in the North, peacock feathers for the east, fire is fire for south, and the Nile river in the west. But what about the corners?
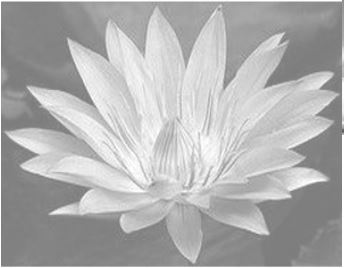
Mud is obviously the combination of West and North…but how do you represent that? Then I heard a friend who was talking about hardships say, “No mud, no lotus.” She said the lotus only grows in the mud, it can’t grow anywhere else. BOOYAH! I found a photograph I liked, and proceeded to try to turn it into a line drawing.
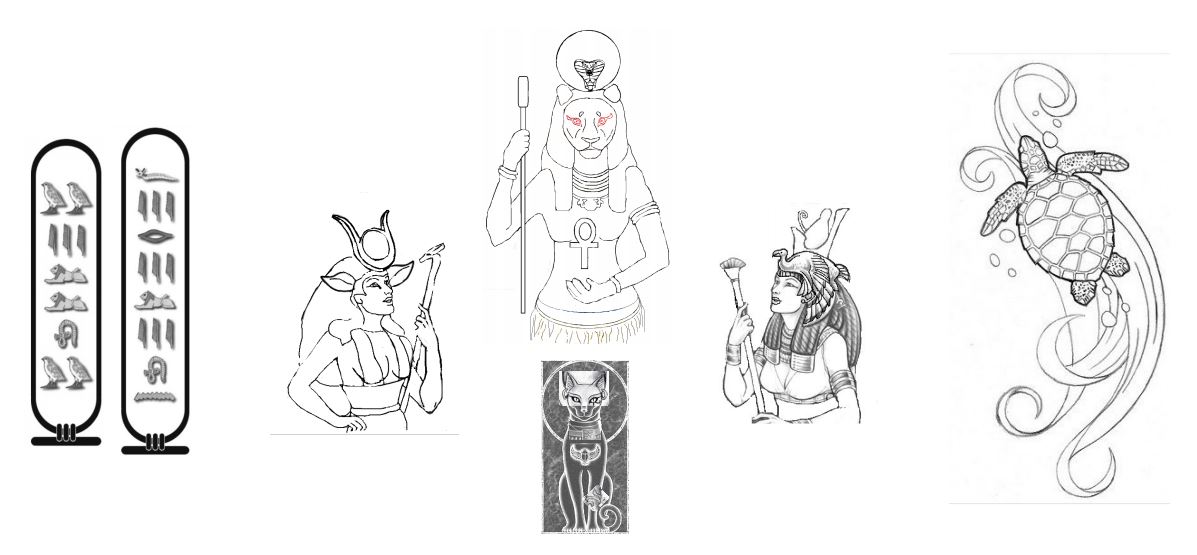
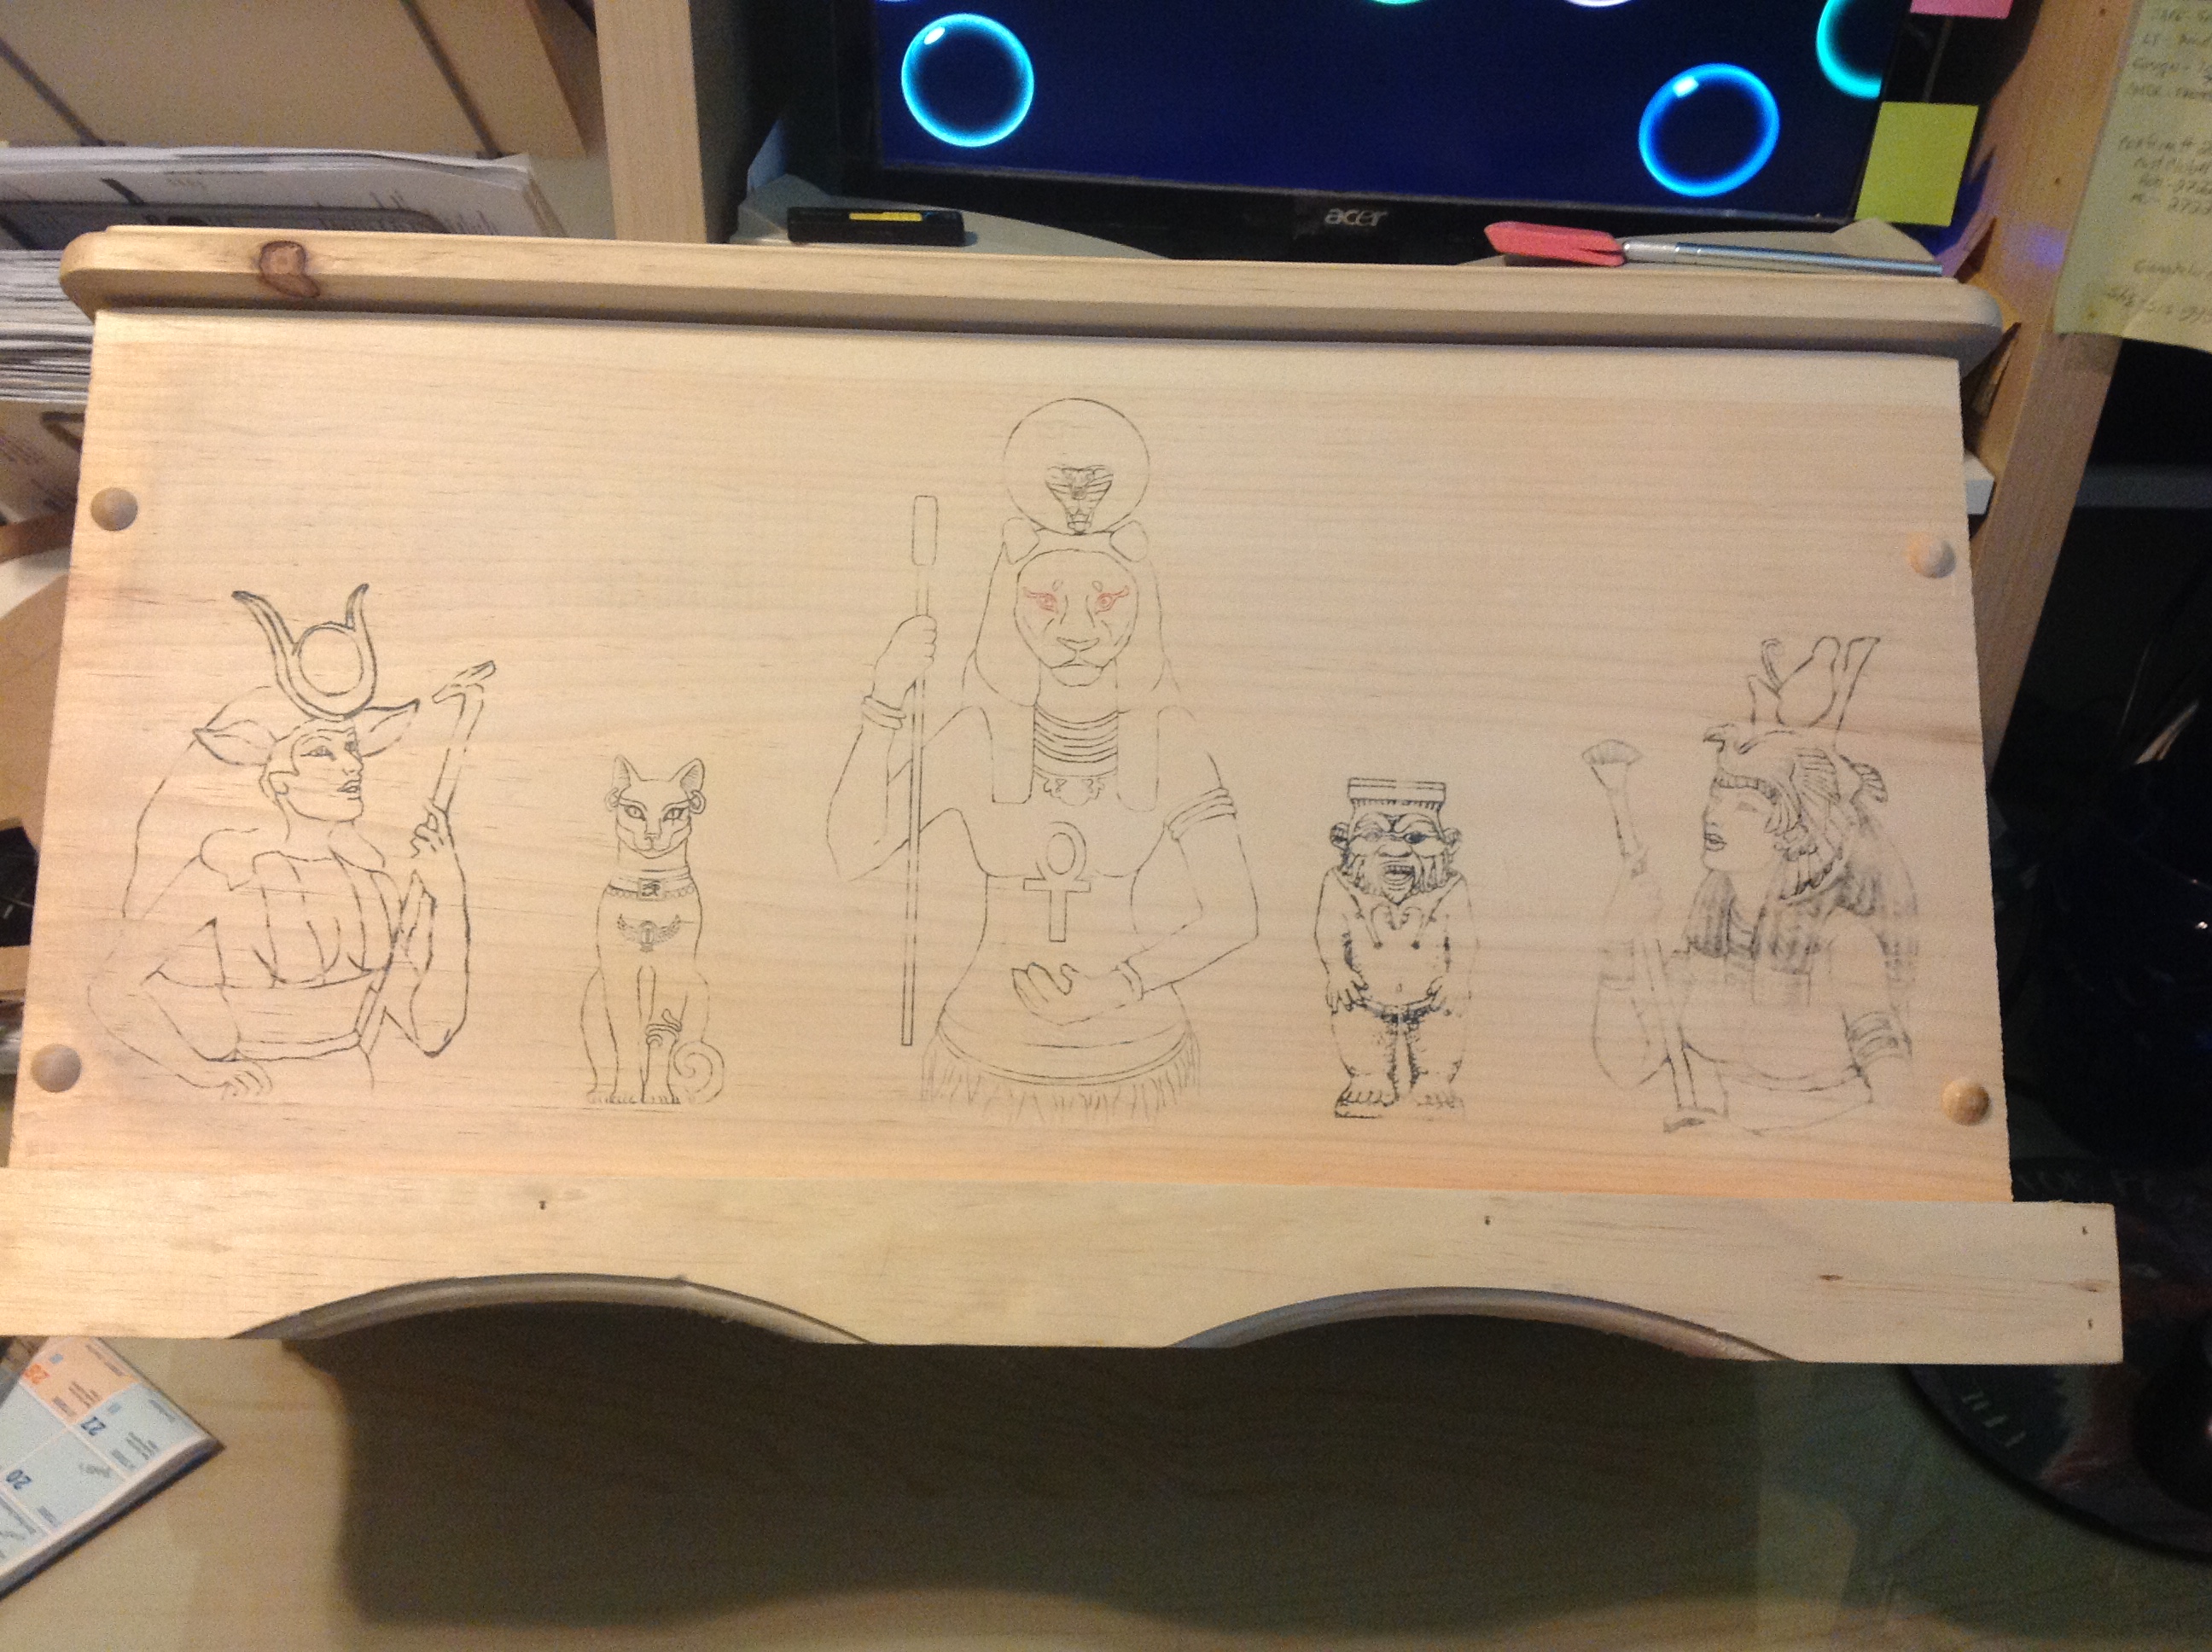
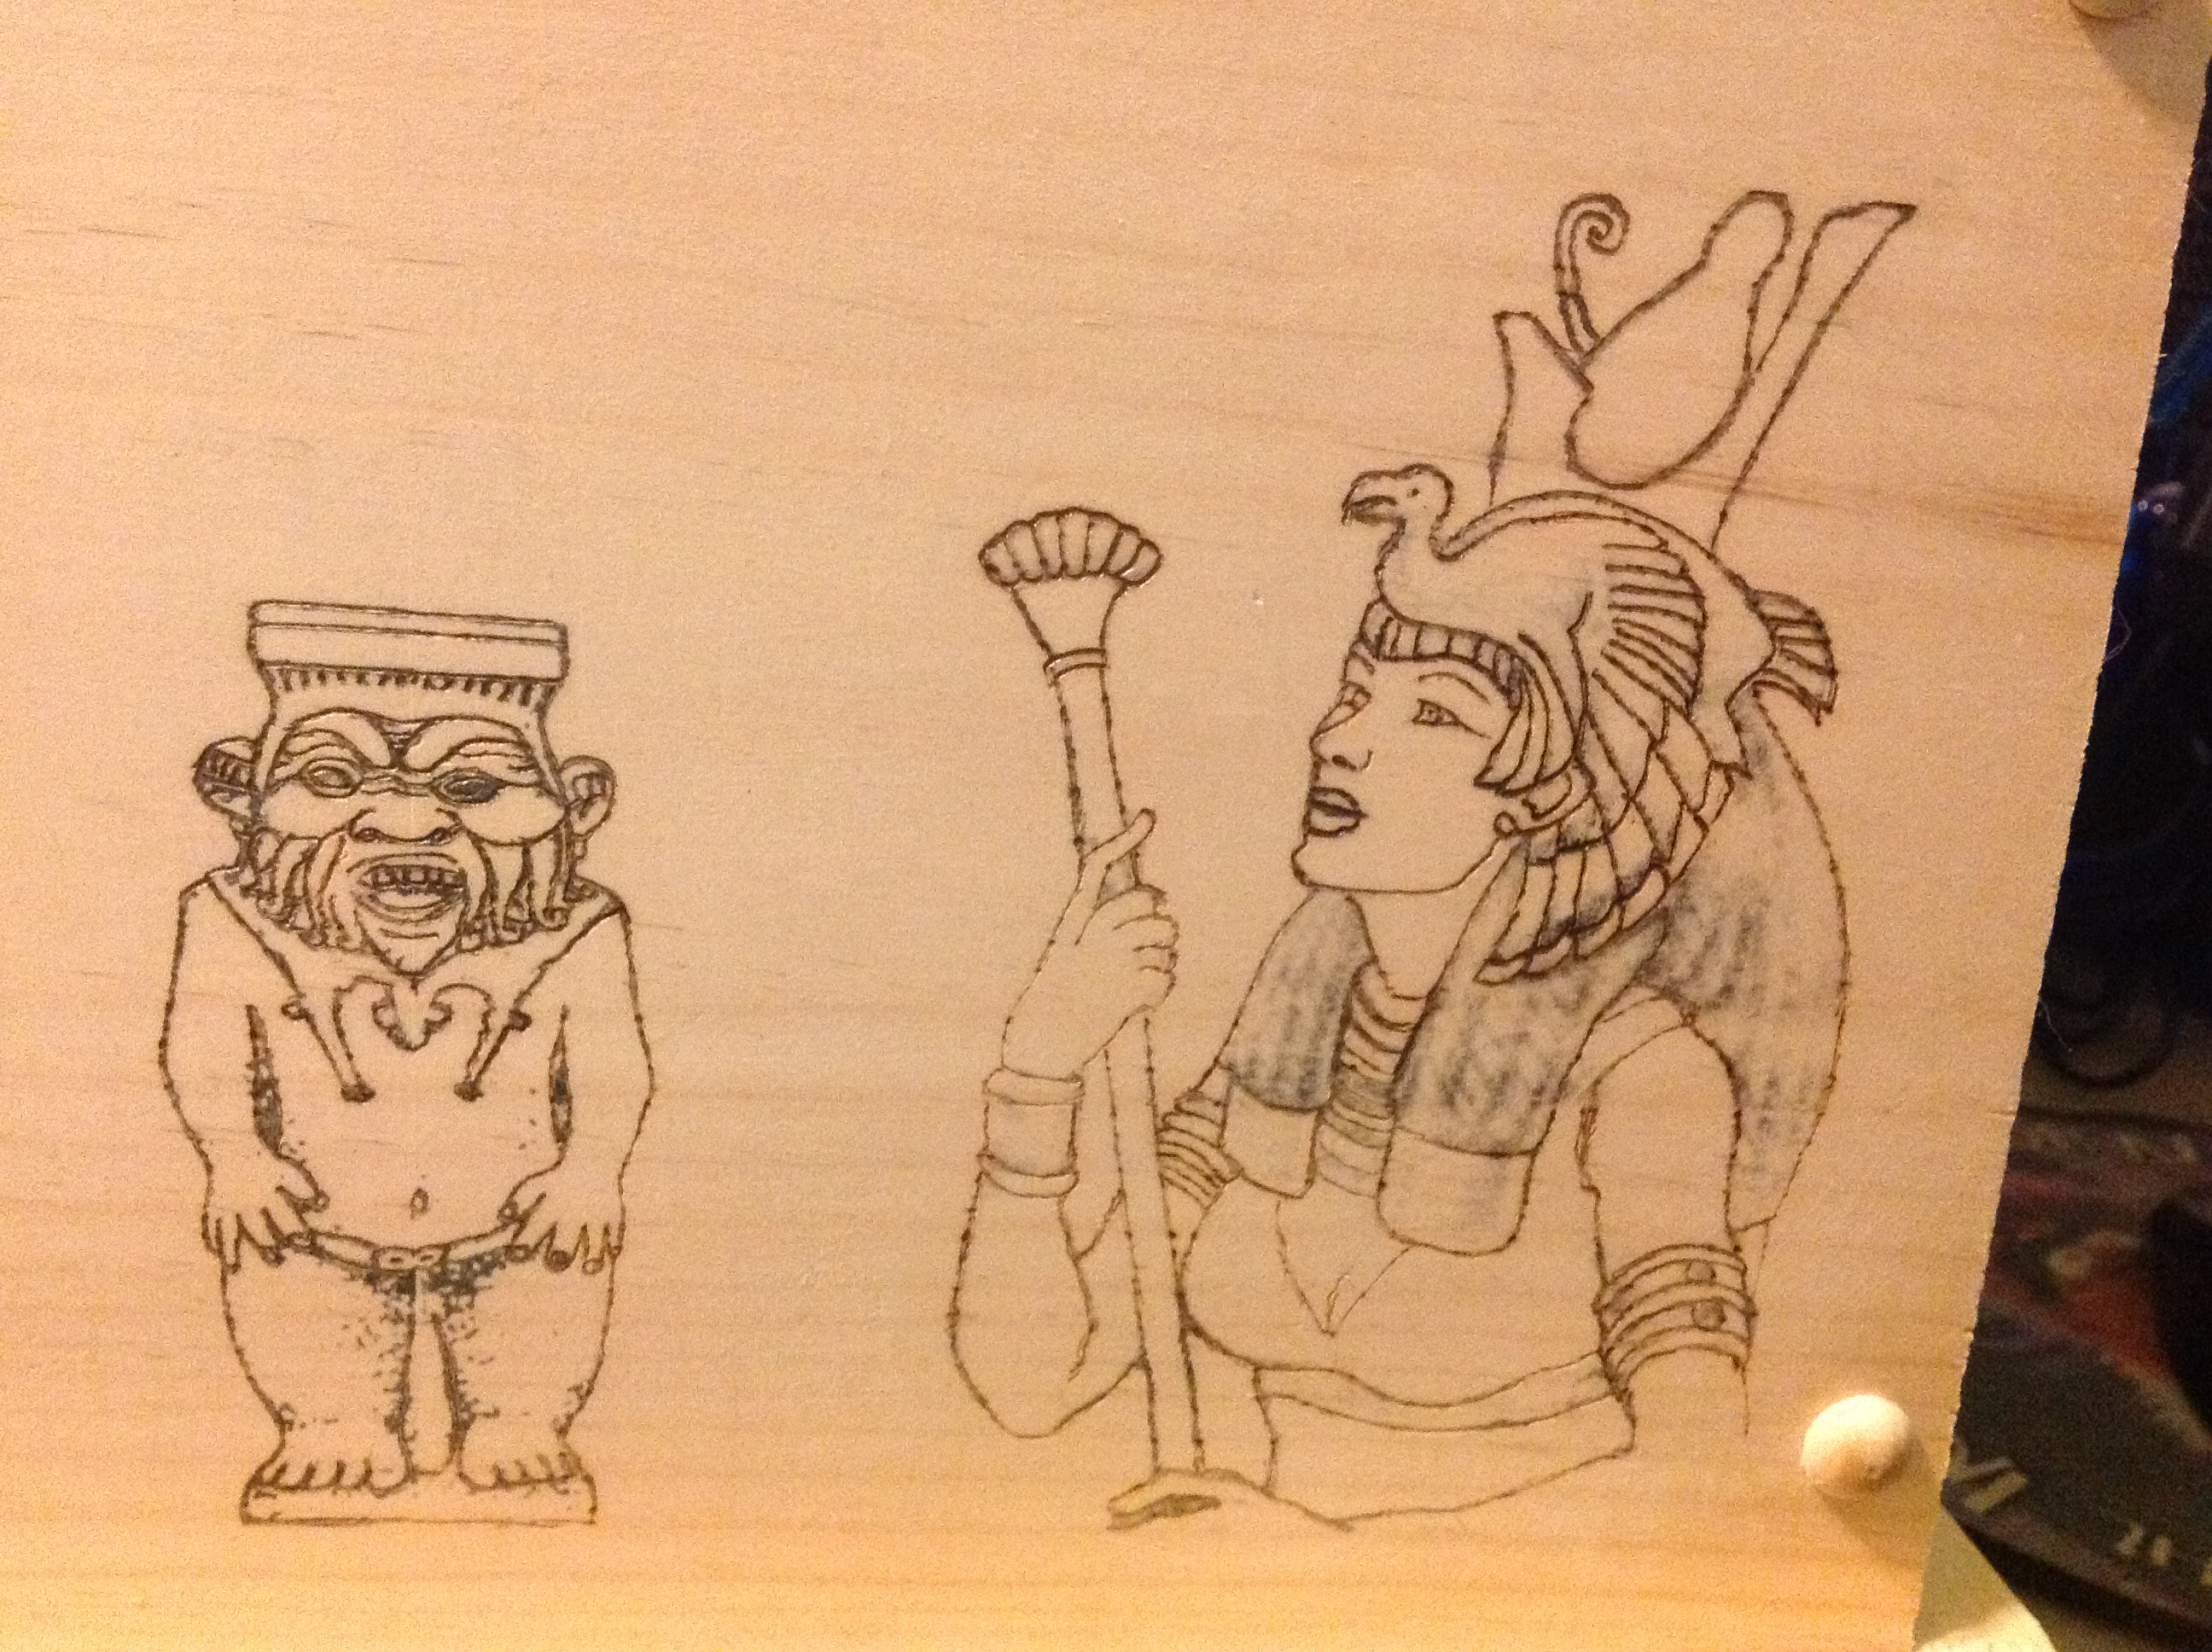
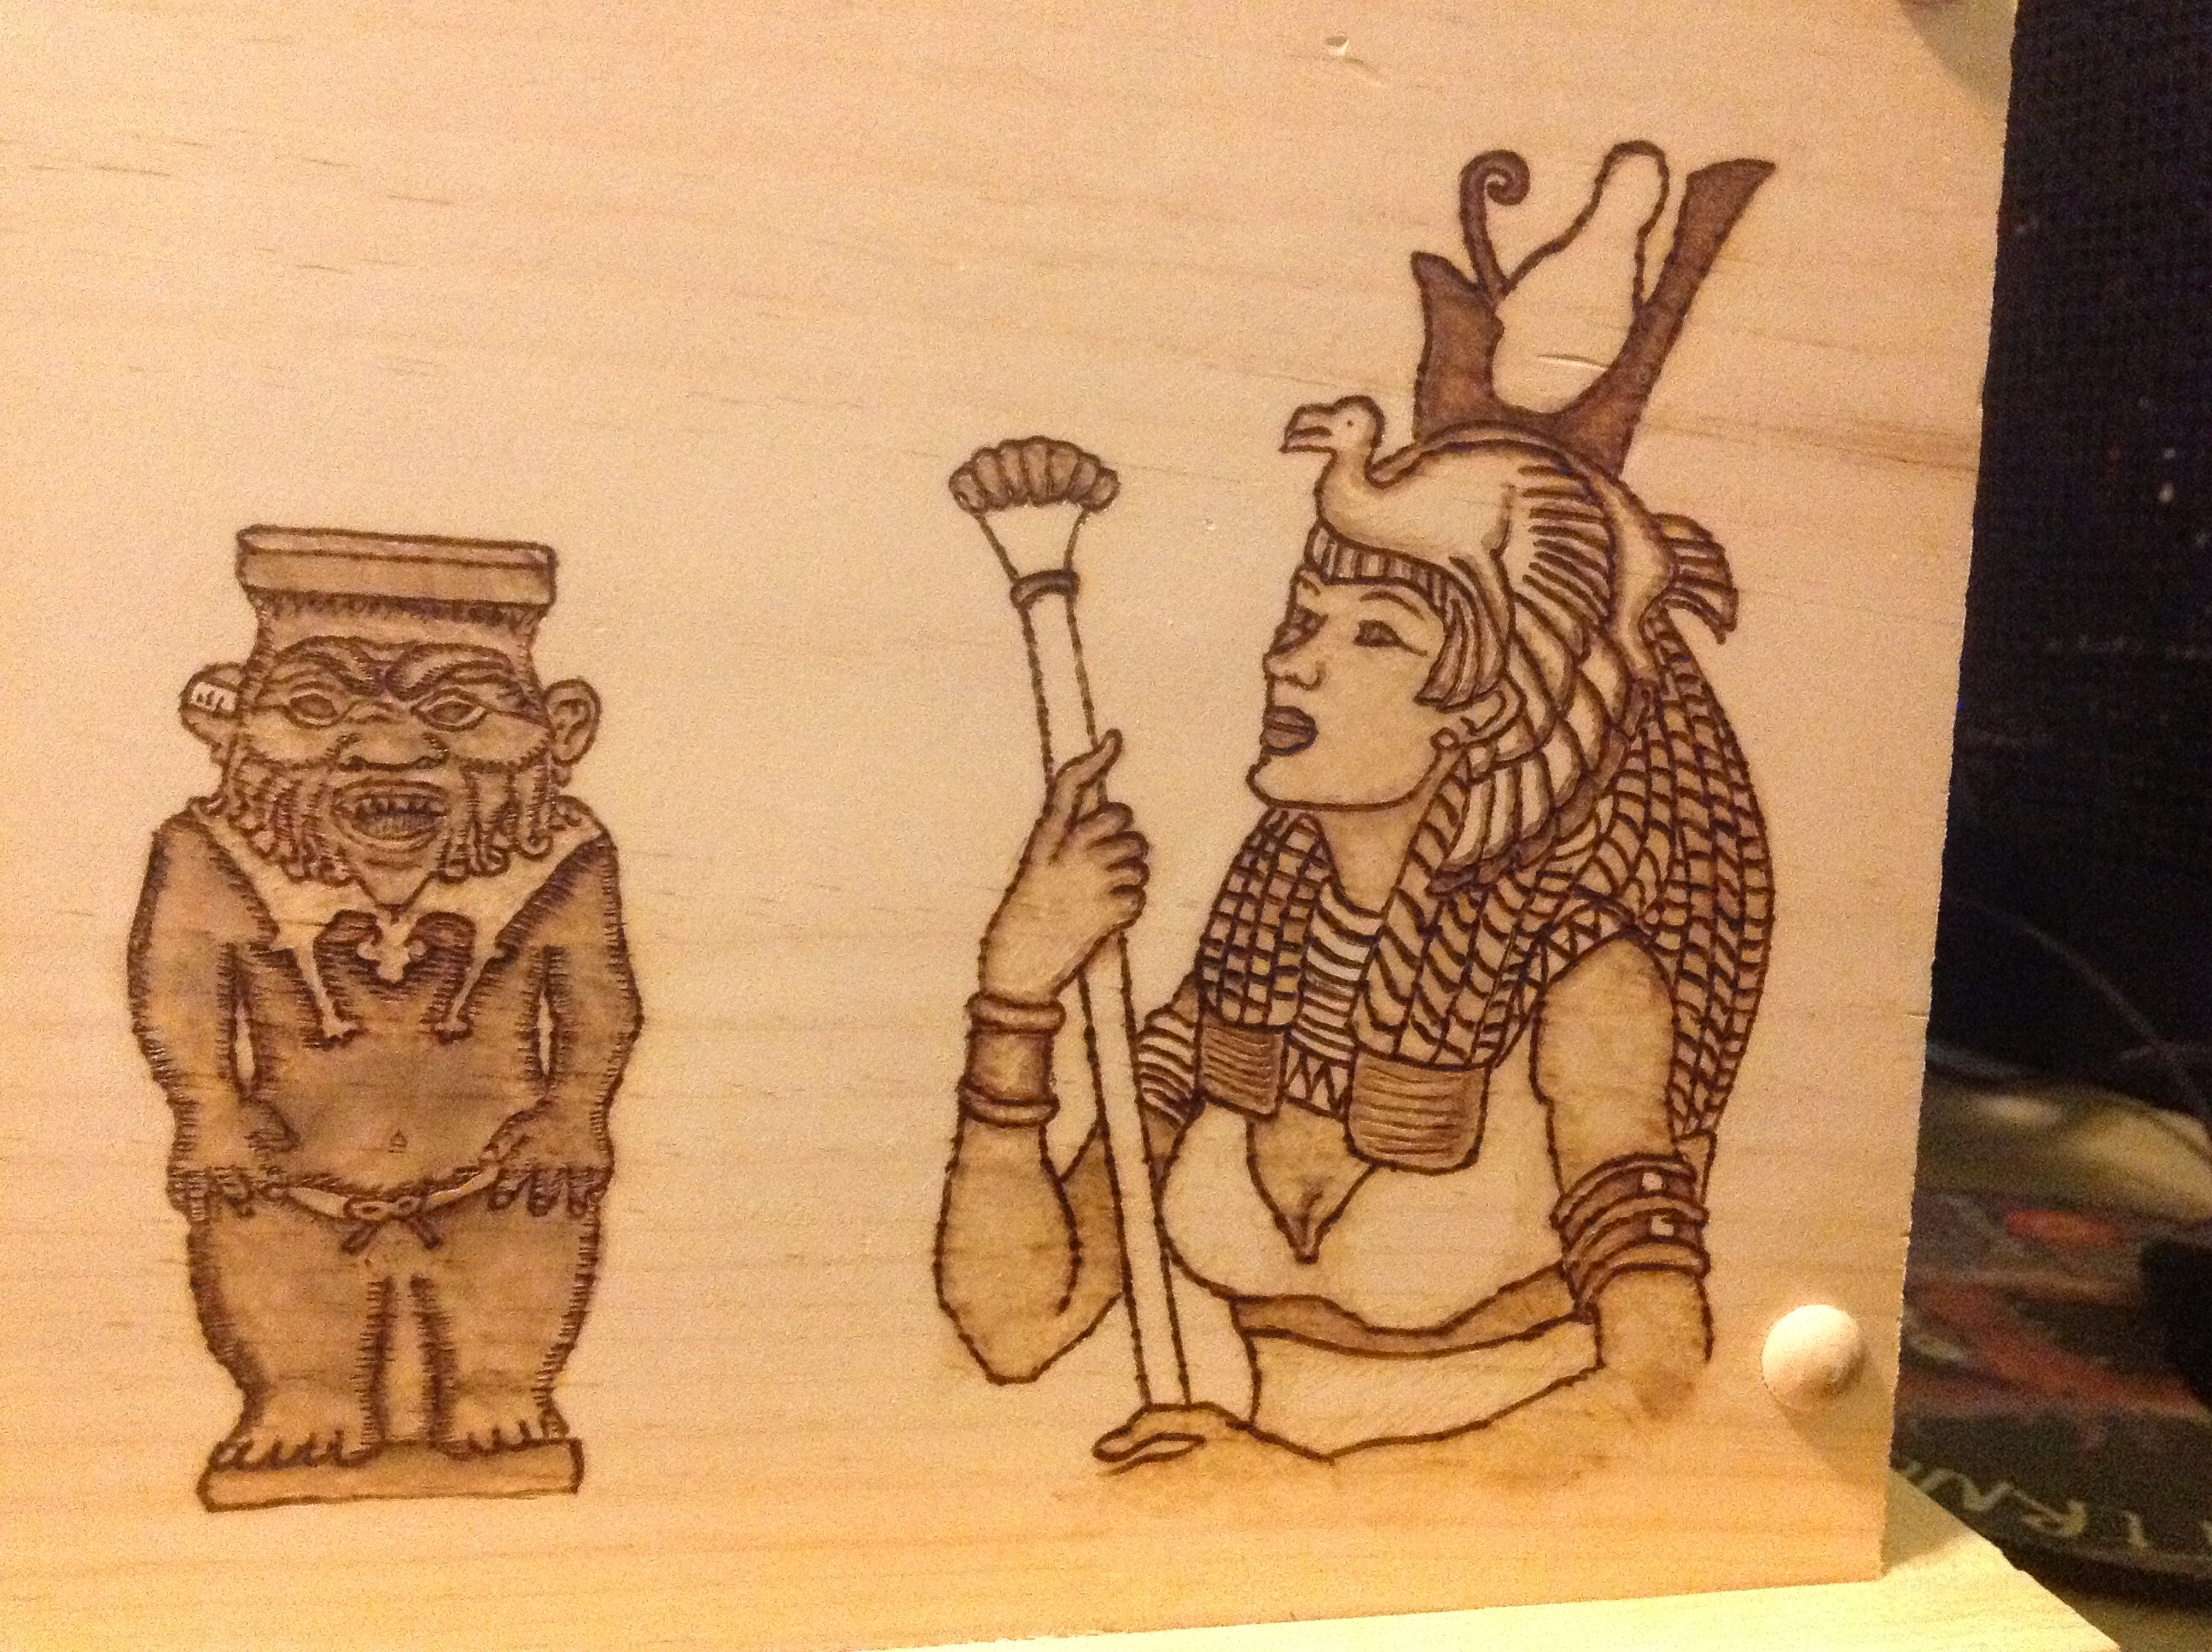
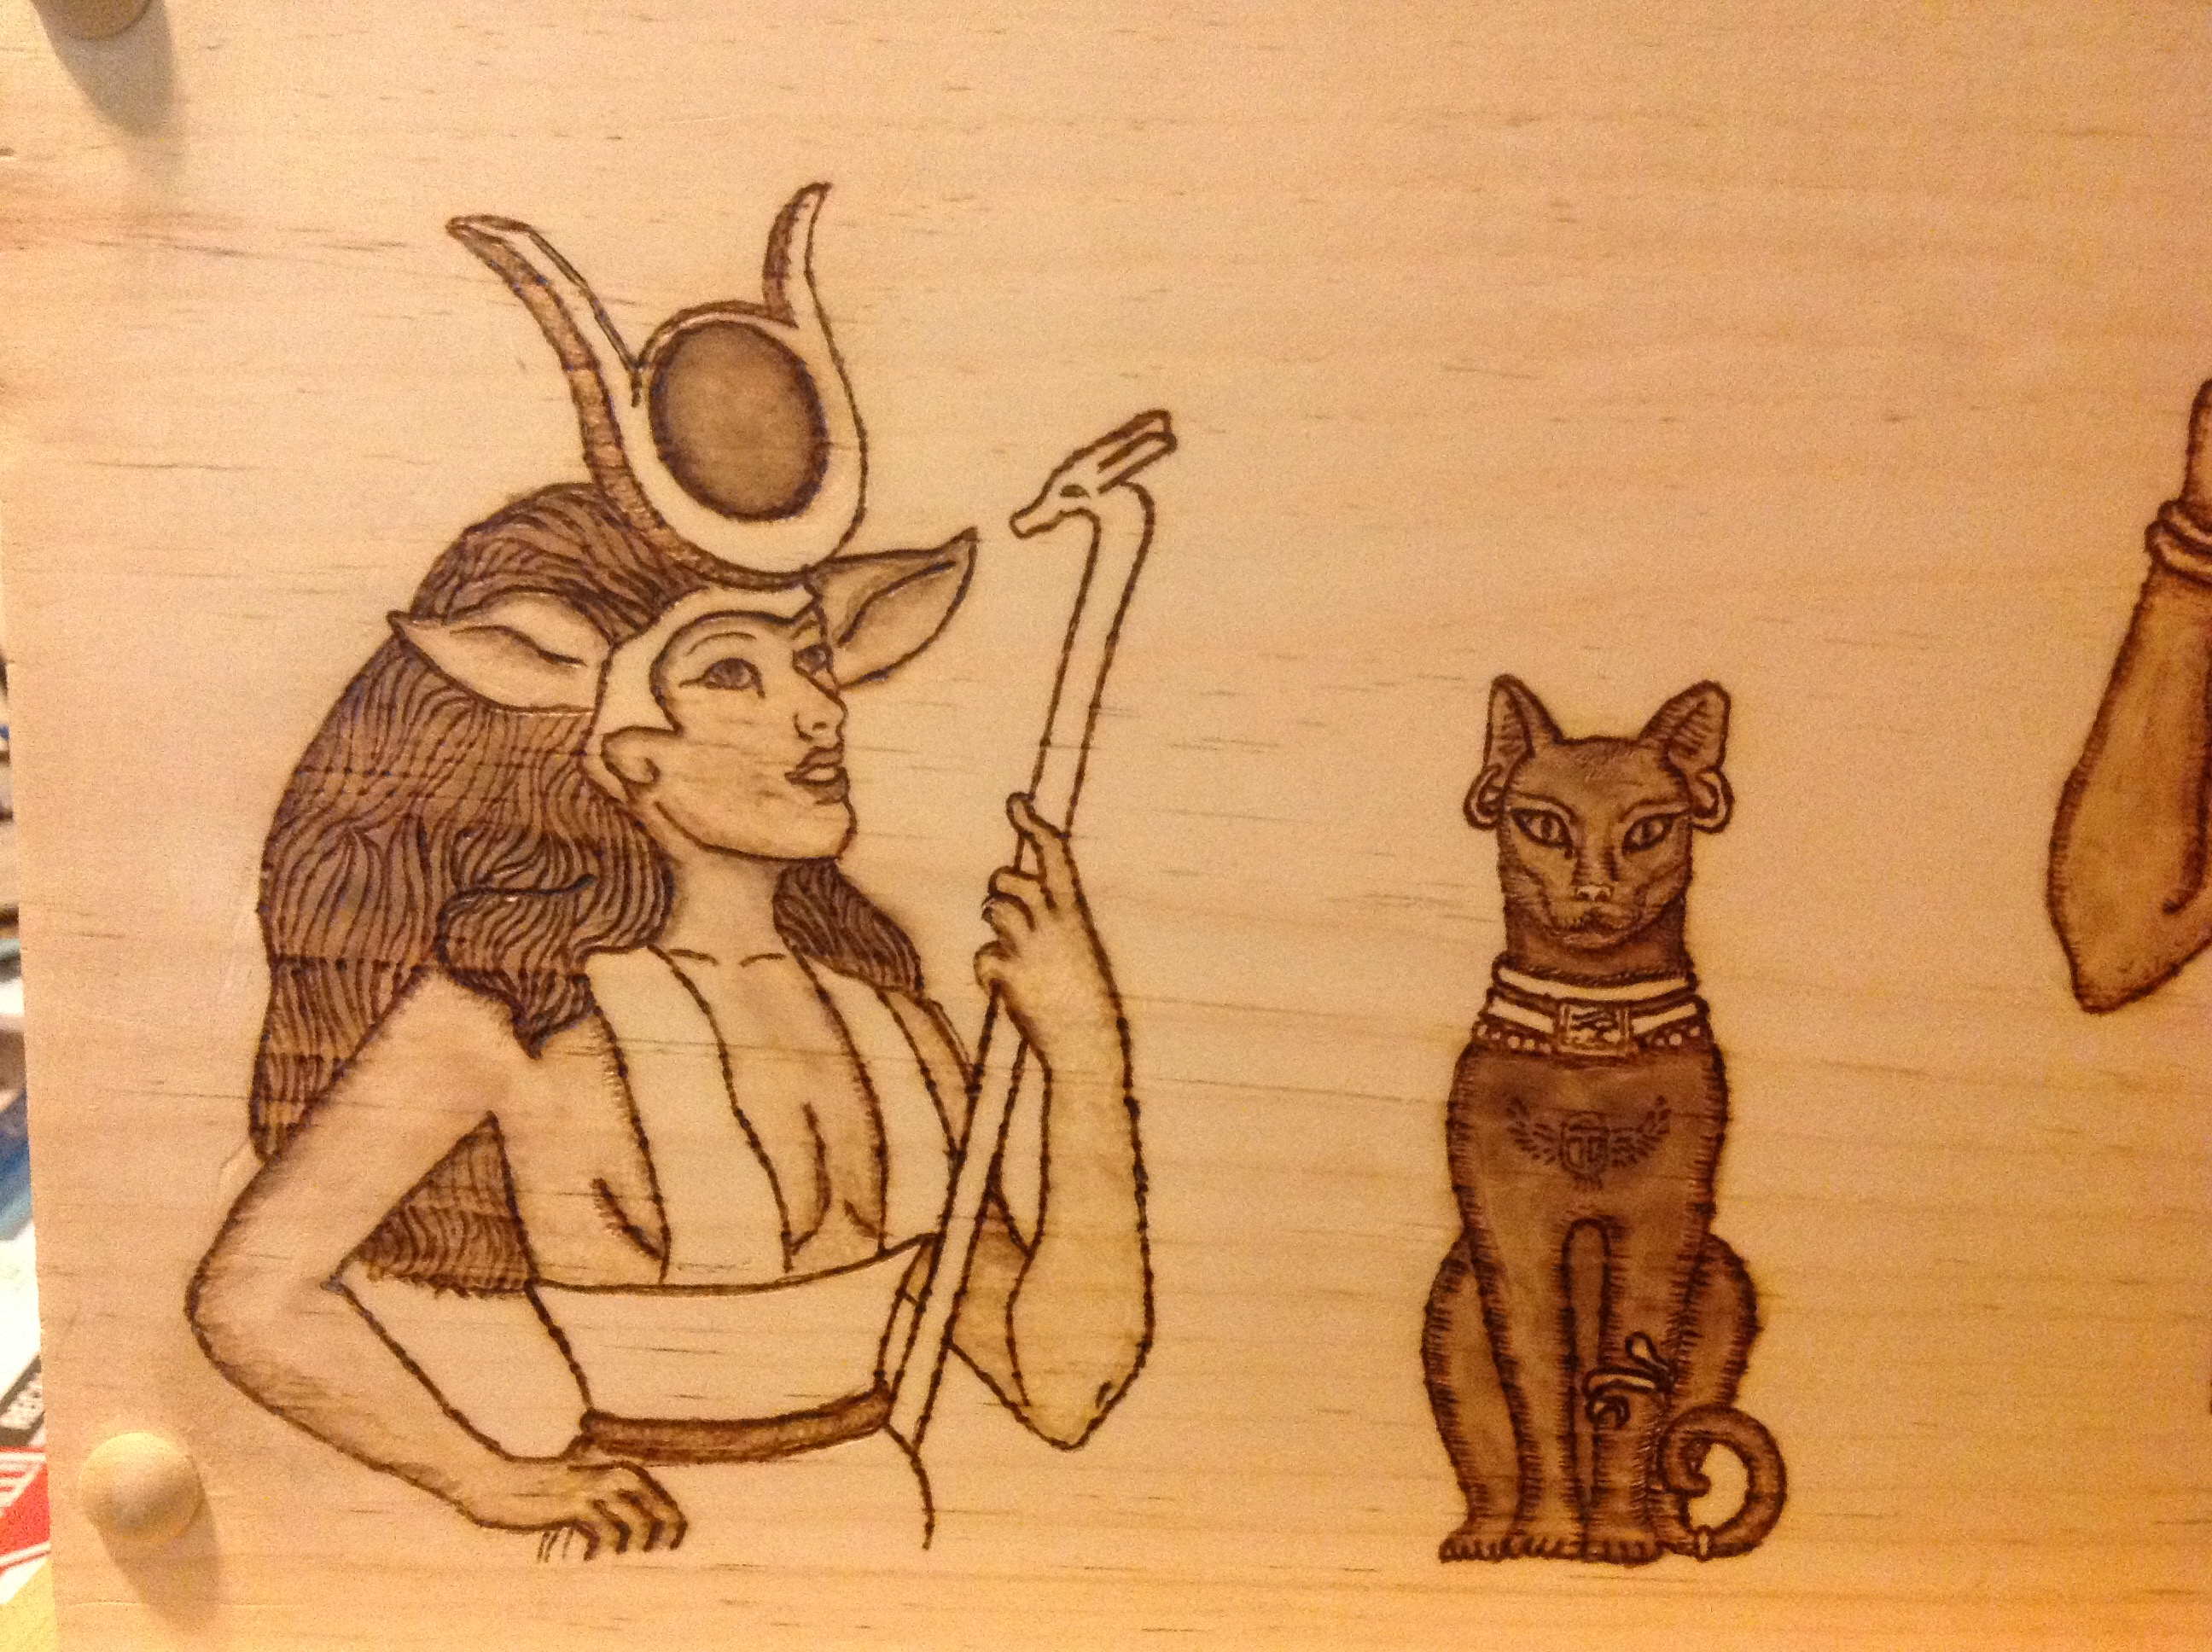
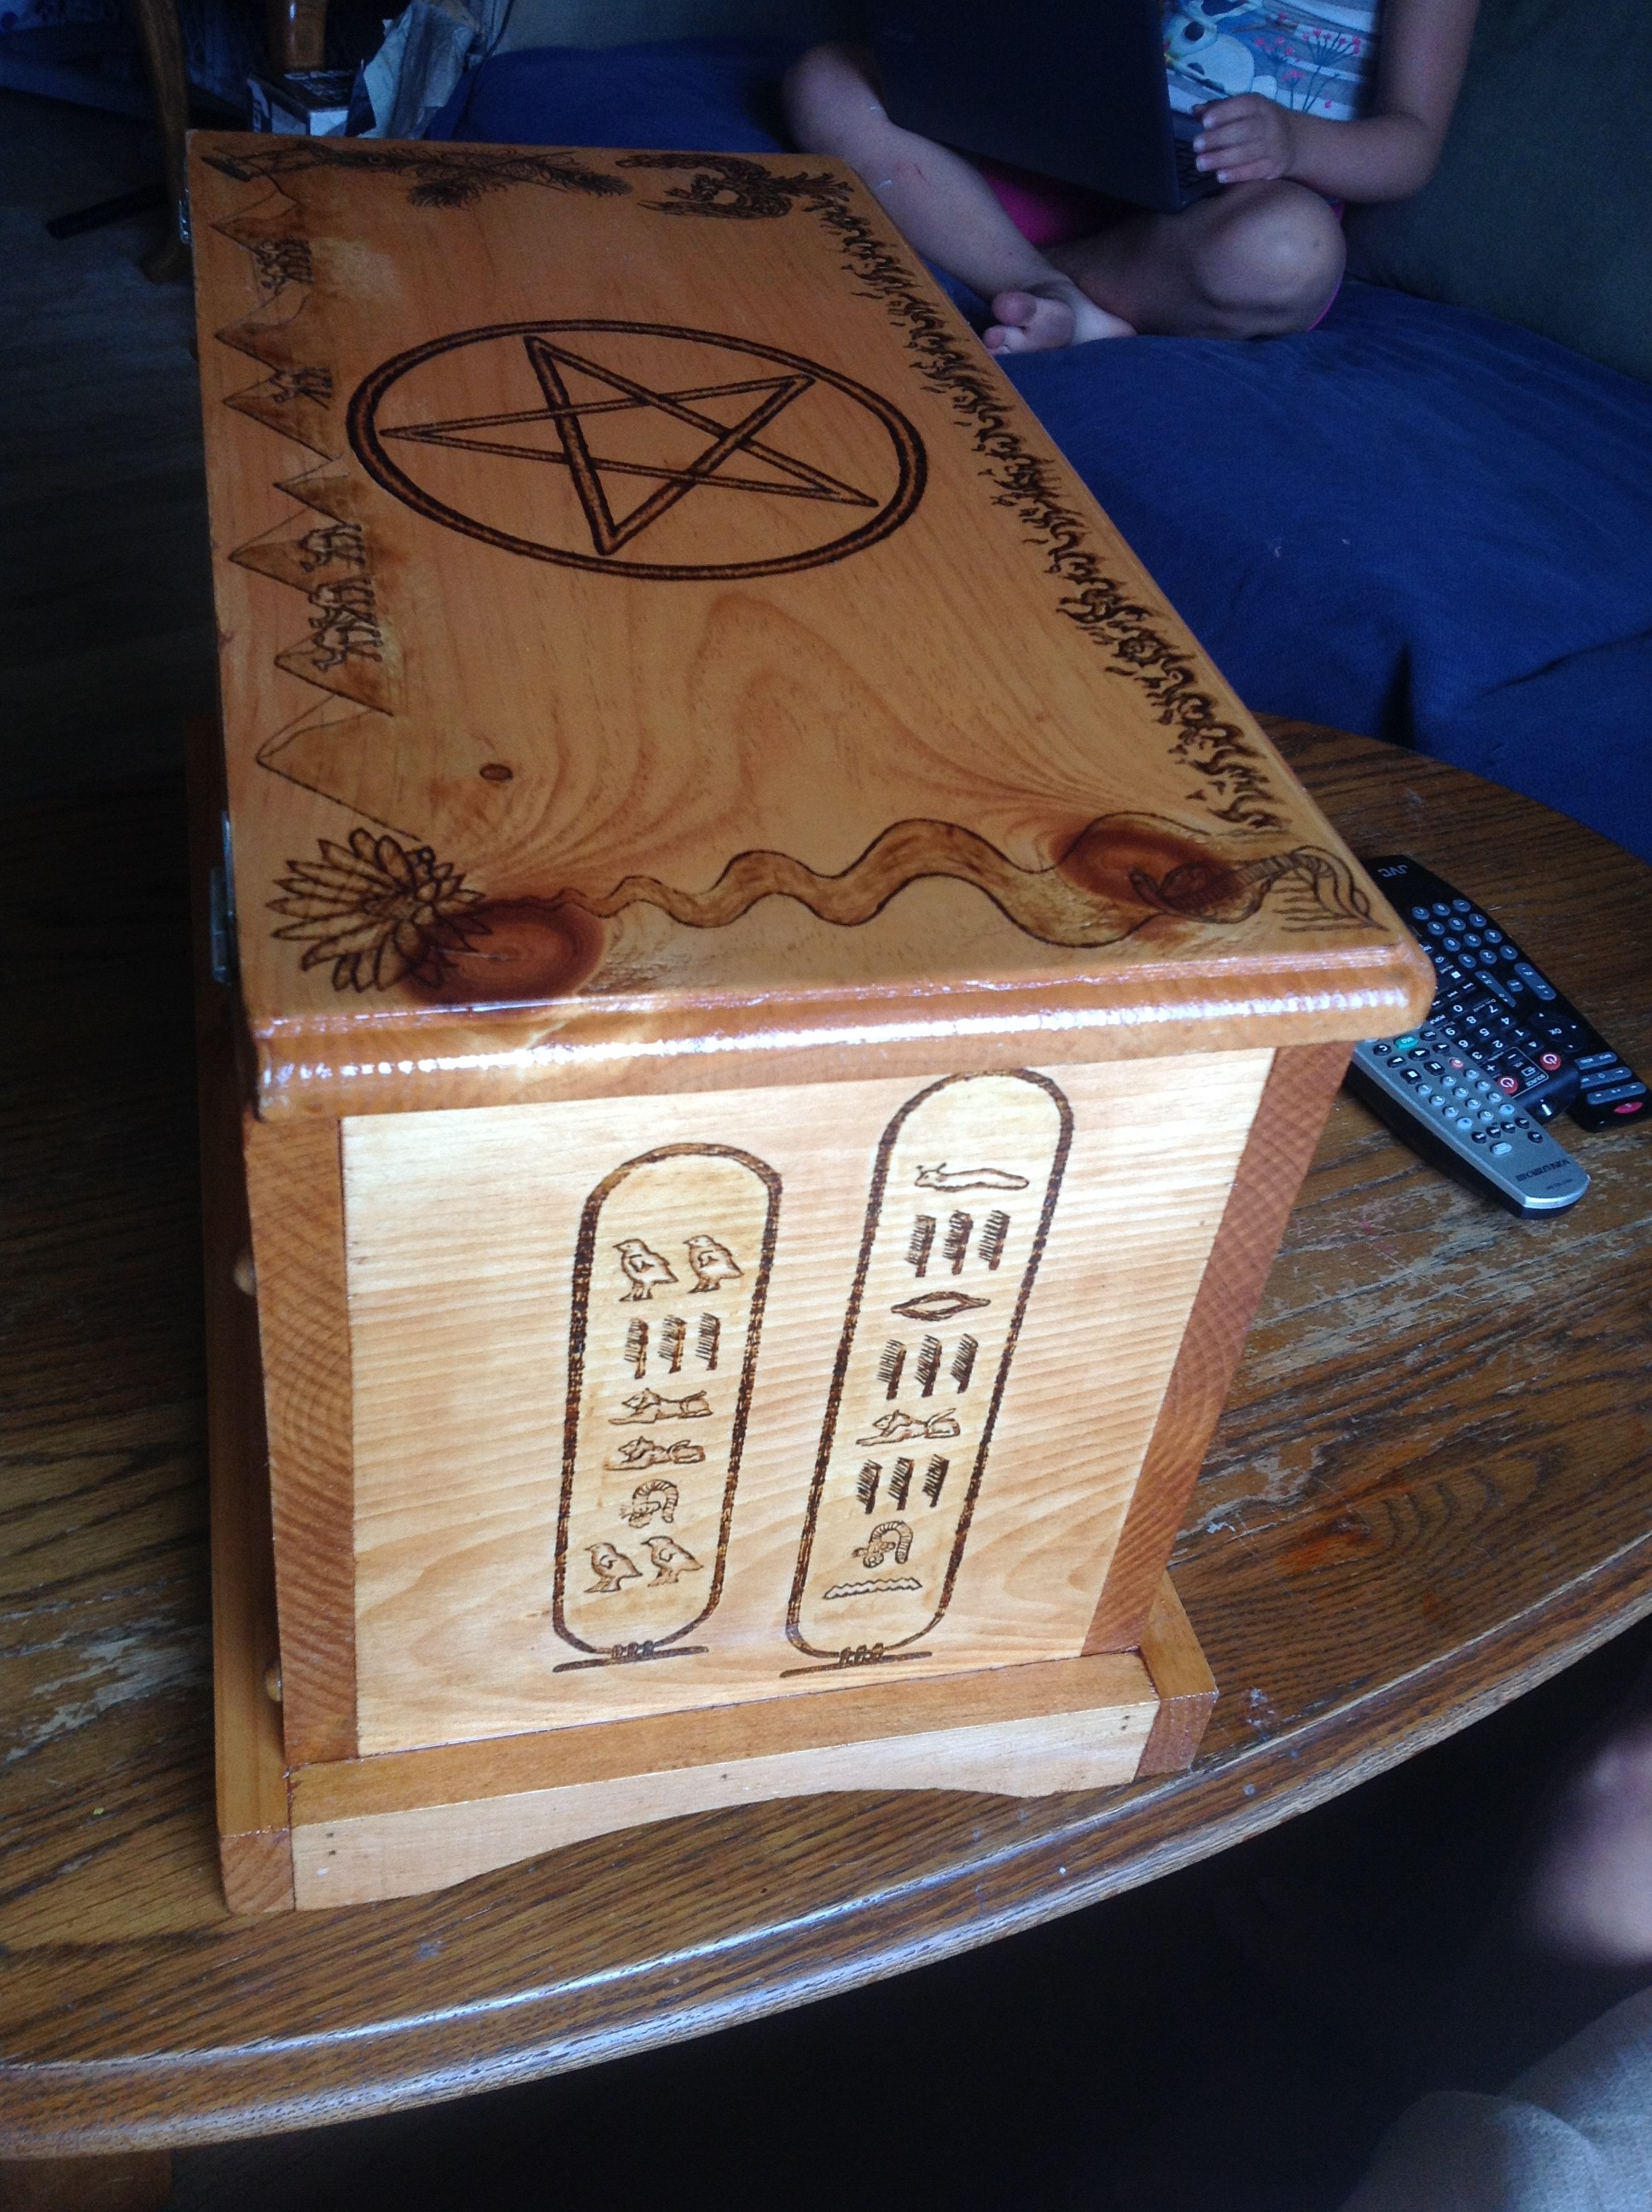
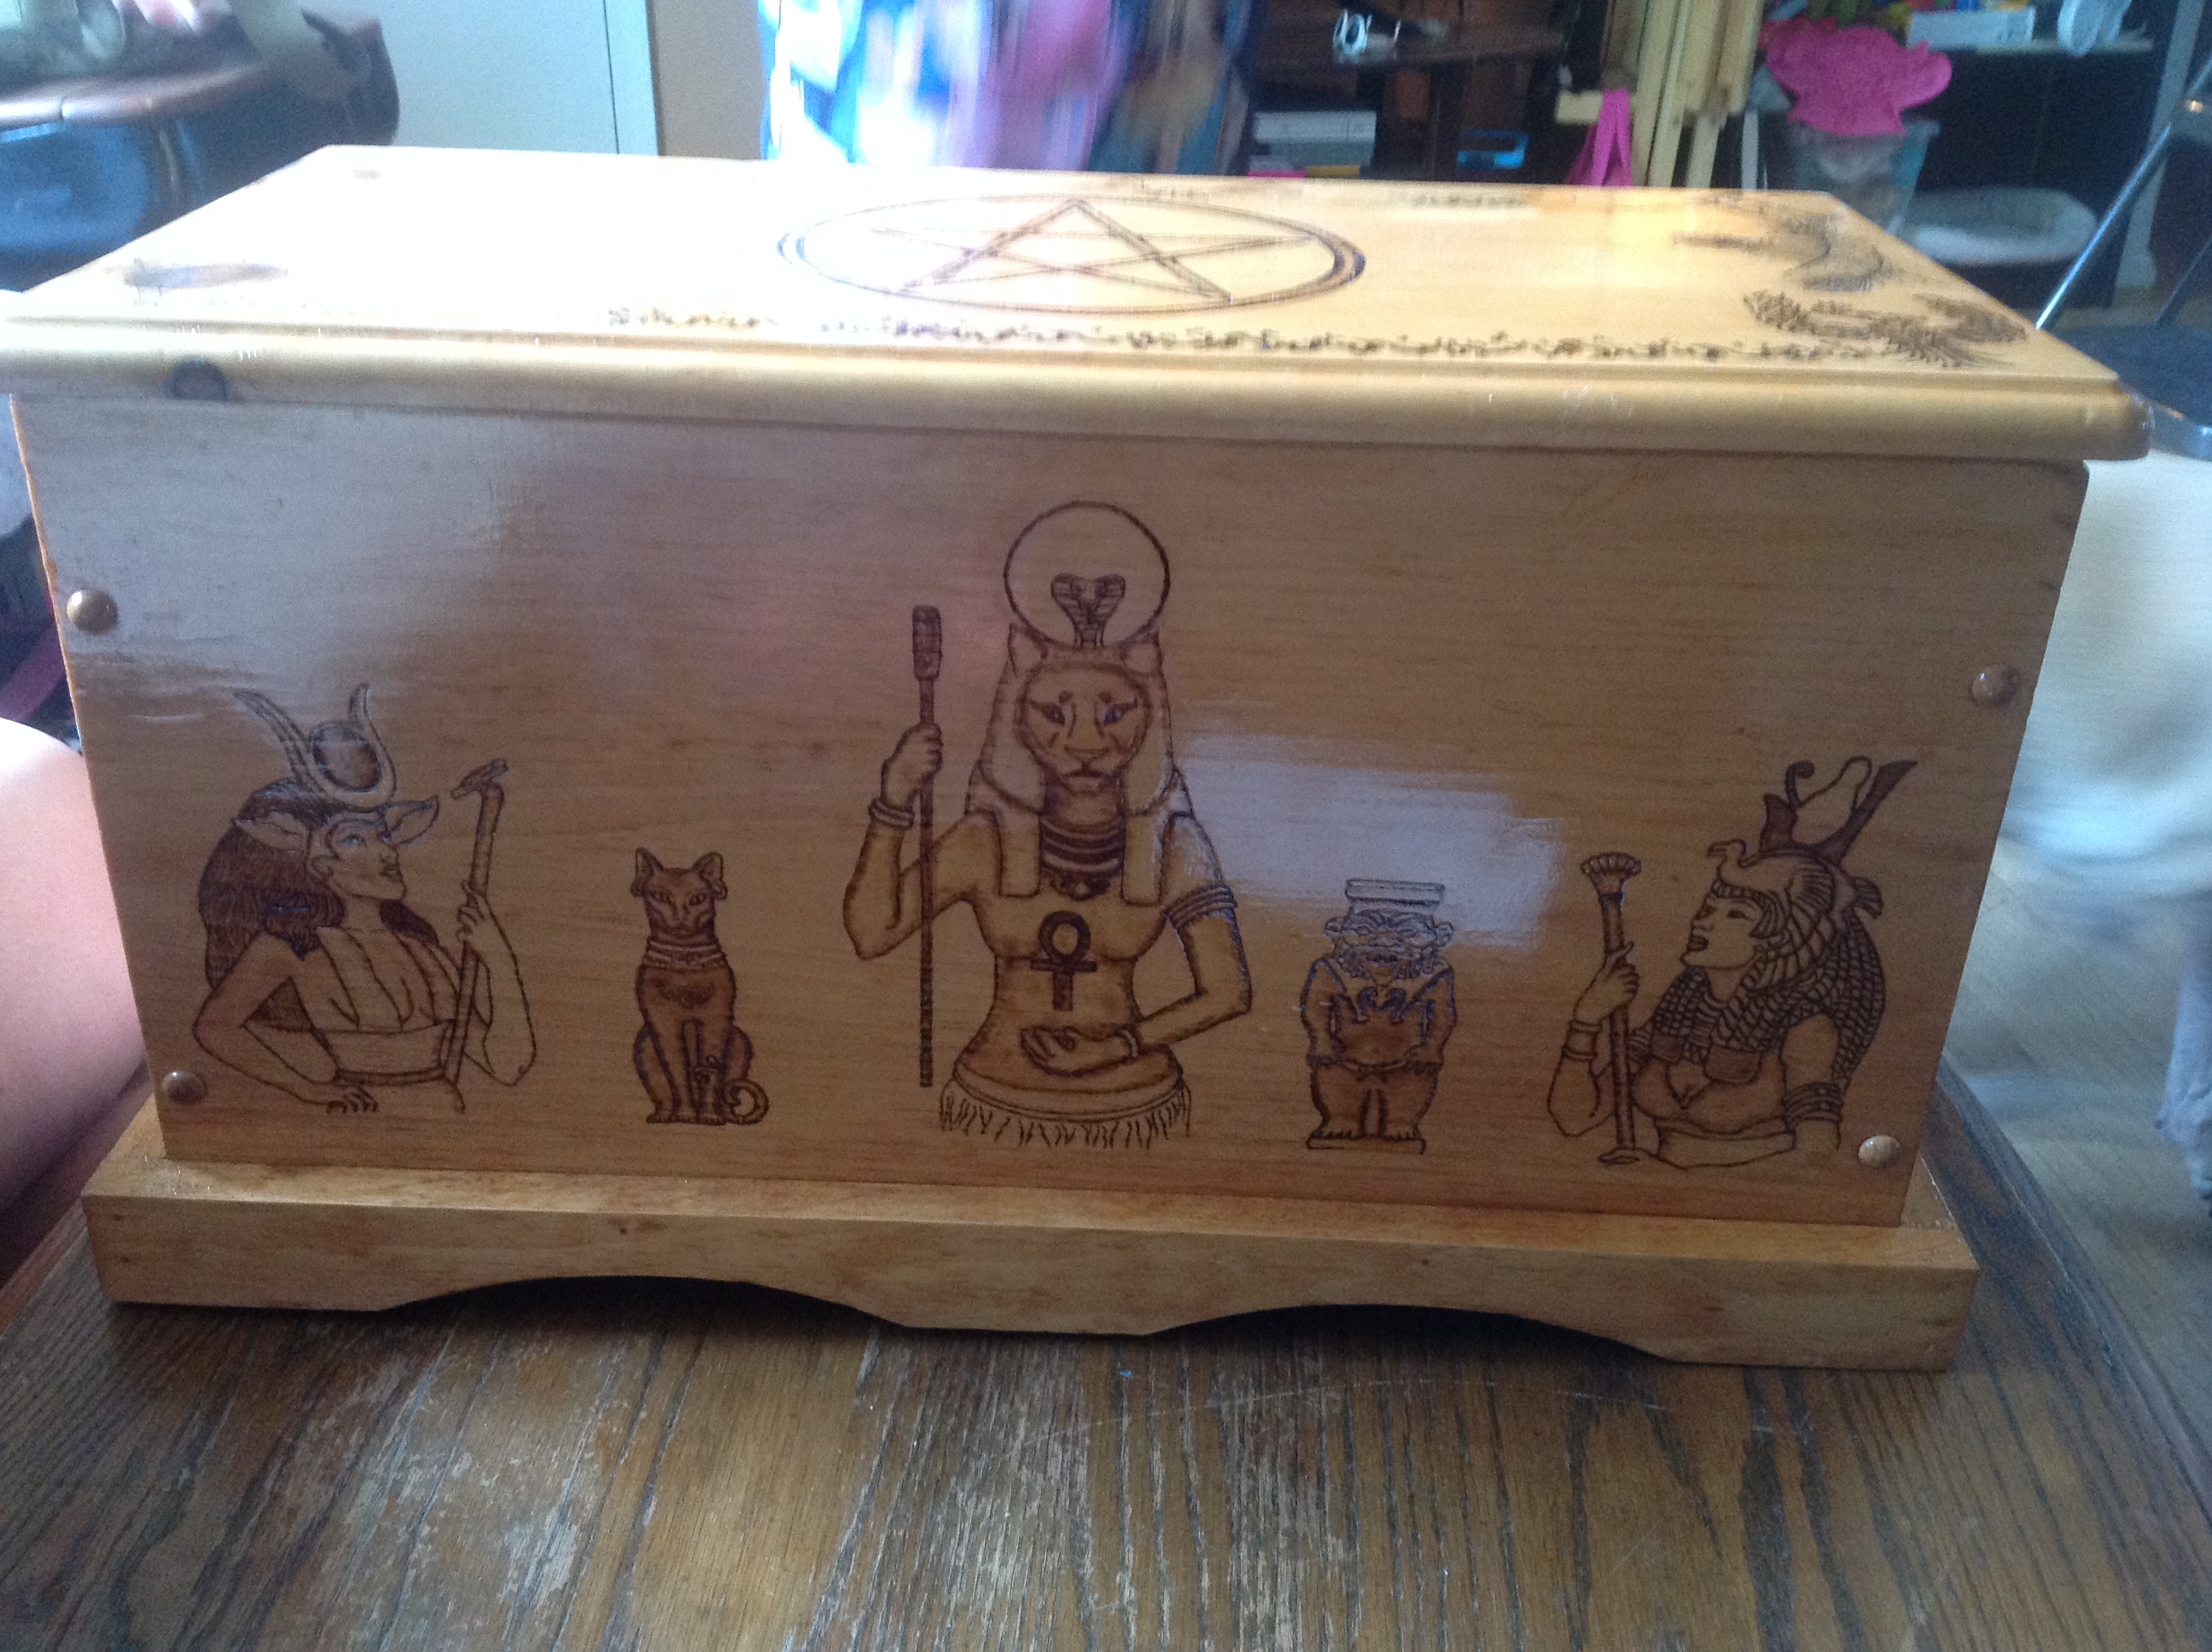
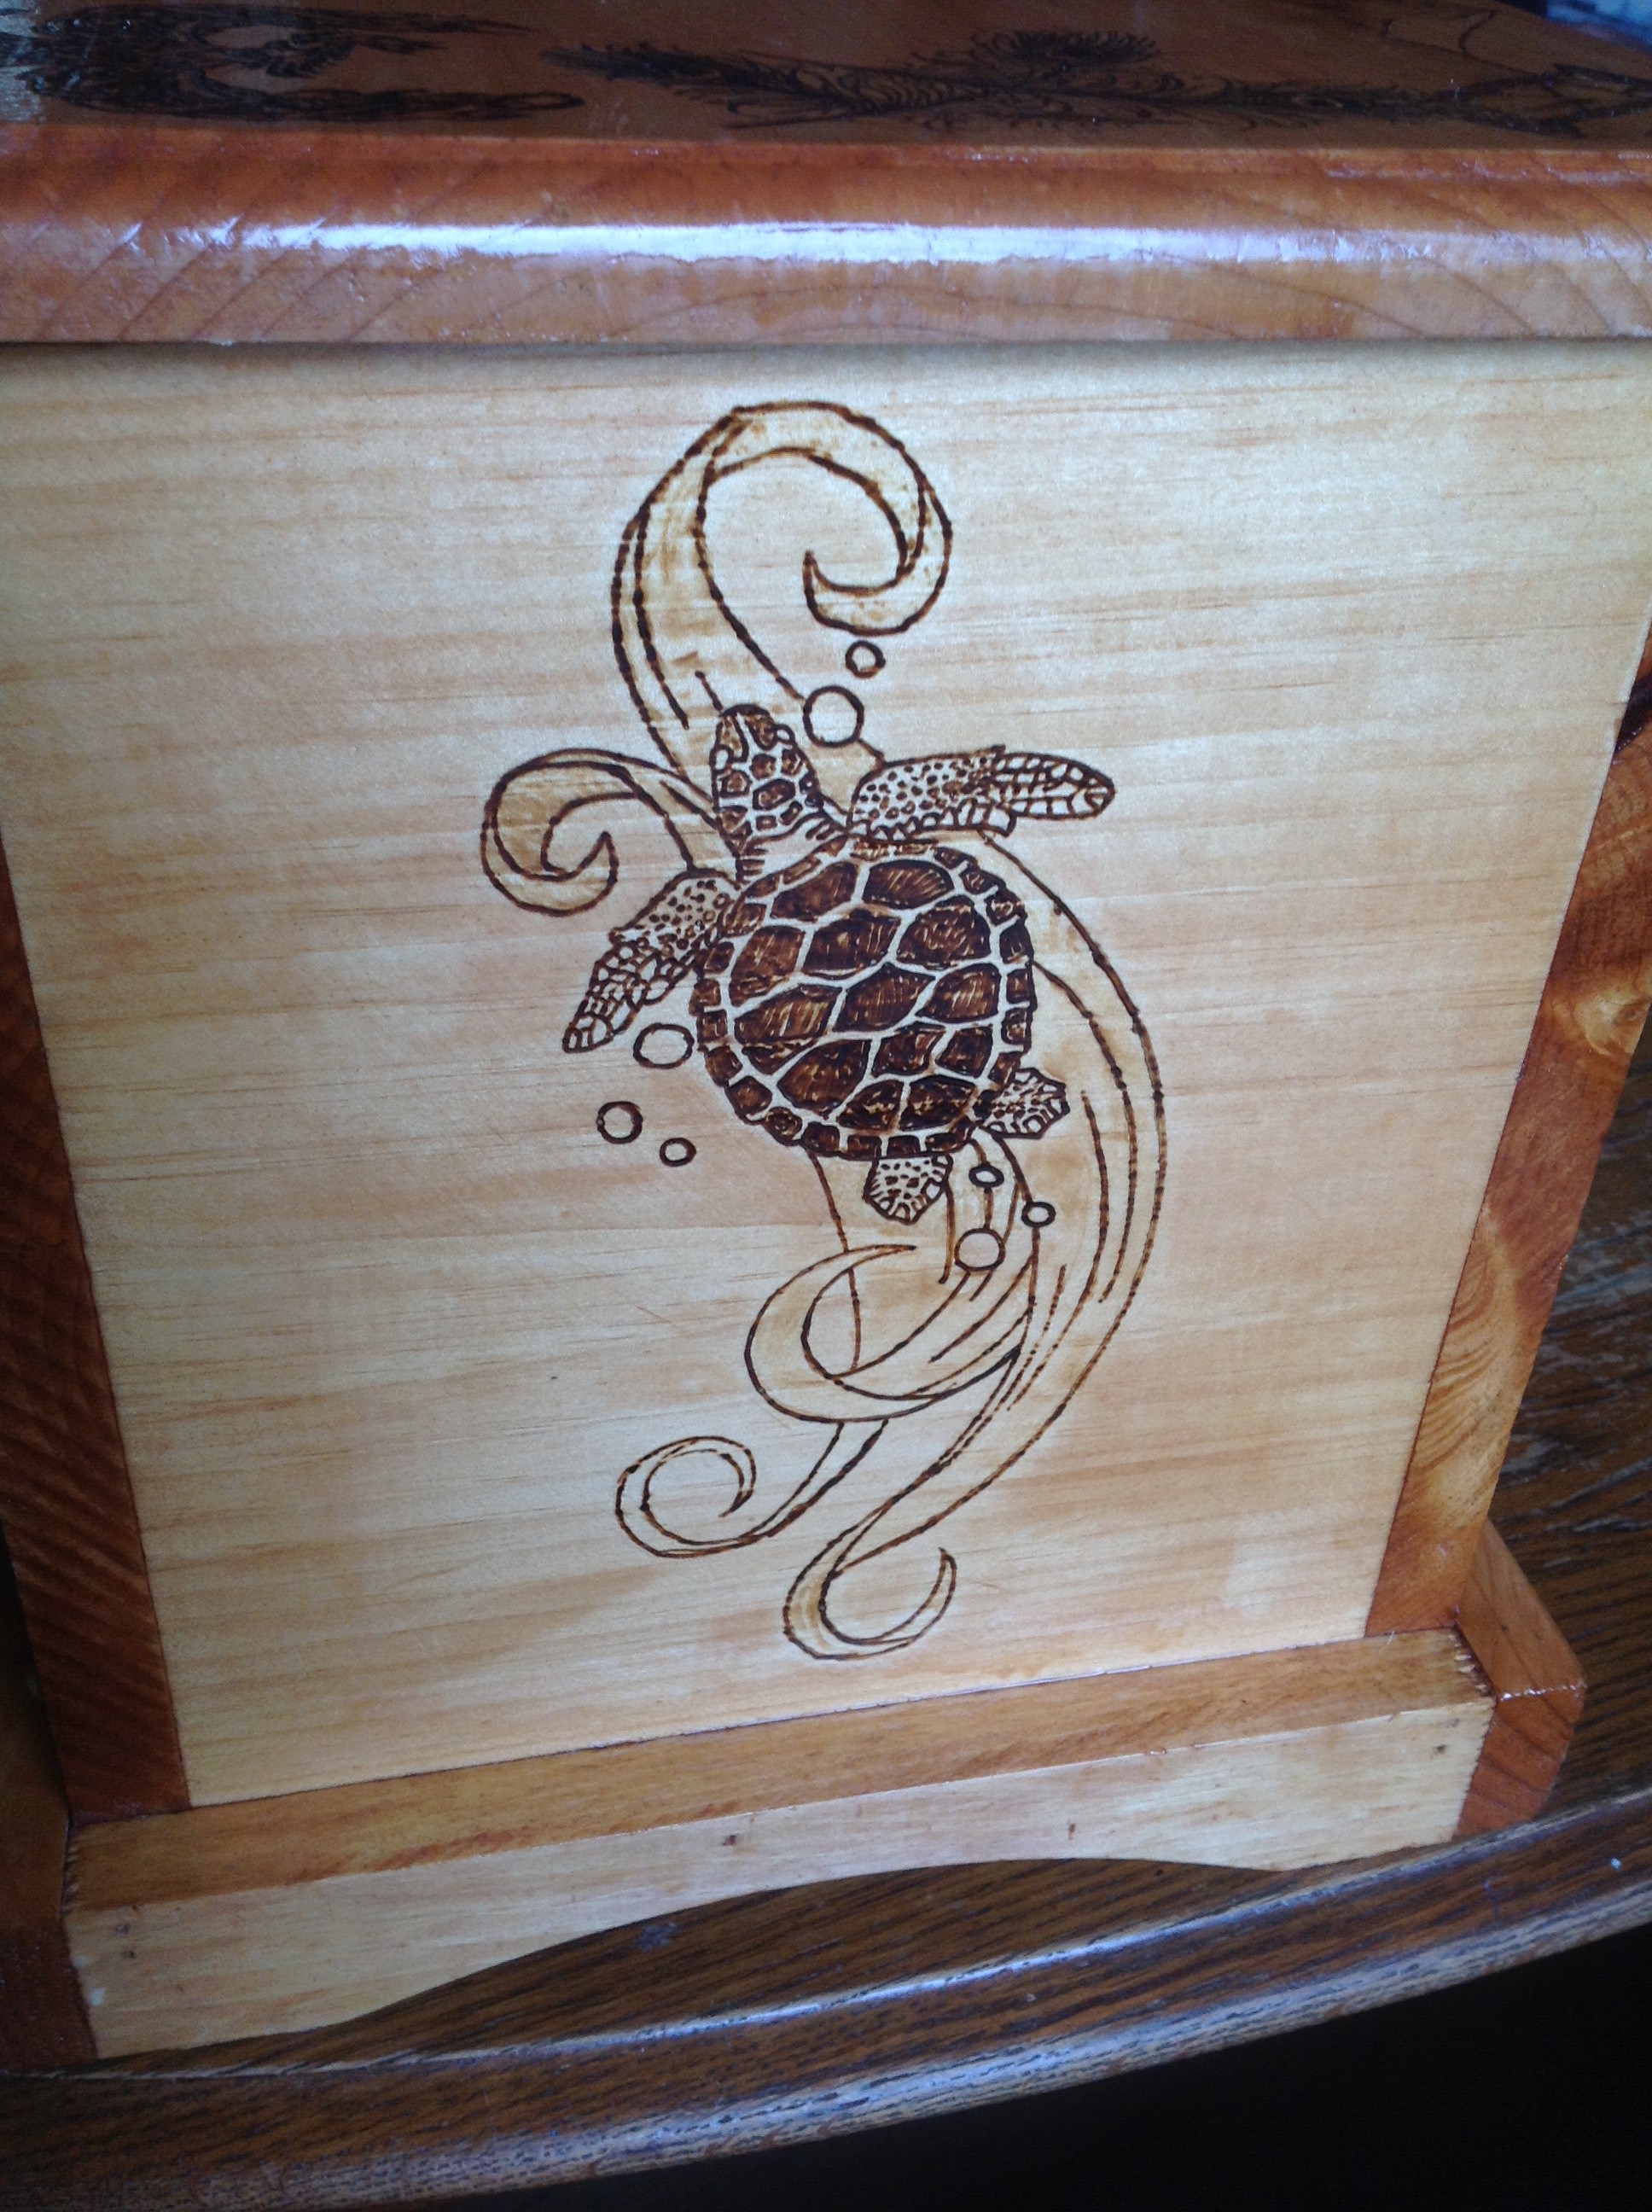
She said, “I think I need some other Deities.” Sure, who? Gradually more and more things were being added on. The front ended up being Hathor, Bast, Sekhmet, Bes and Mut. Between the front and the top, it was already more than I was expecting to do. I had originally thought this would be somewhere around $300, (if you give me ten bucks an hour, I knew it was going to be more than 30 hours, but I wasn’t sure what to do about that) and then we added the side images.
We emailed back and forth and once we agreed on everything, I did the transfer onto the front of the box. I had them all laid out in a diamond shape, (at the time there were four deities I think) and I transferred them.
I sent her the picture for the layout before I started doing the burn on the front.
She approved that, and I did the transfer.
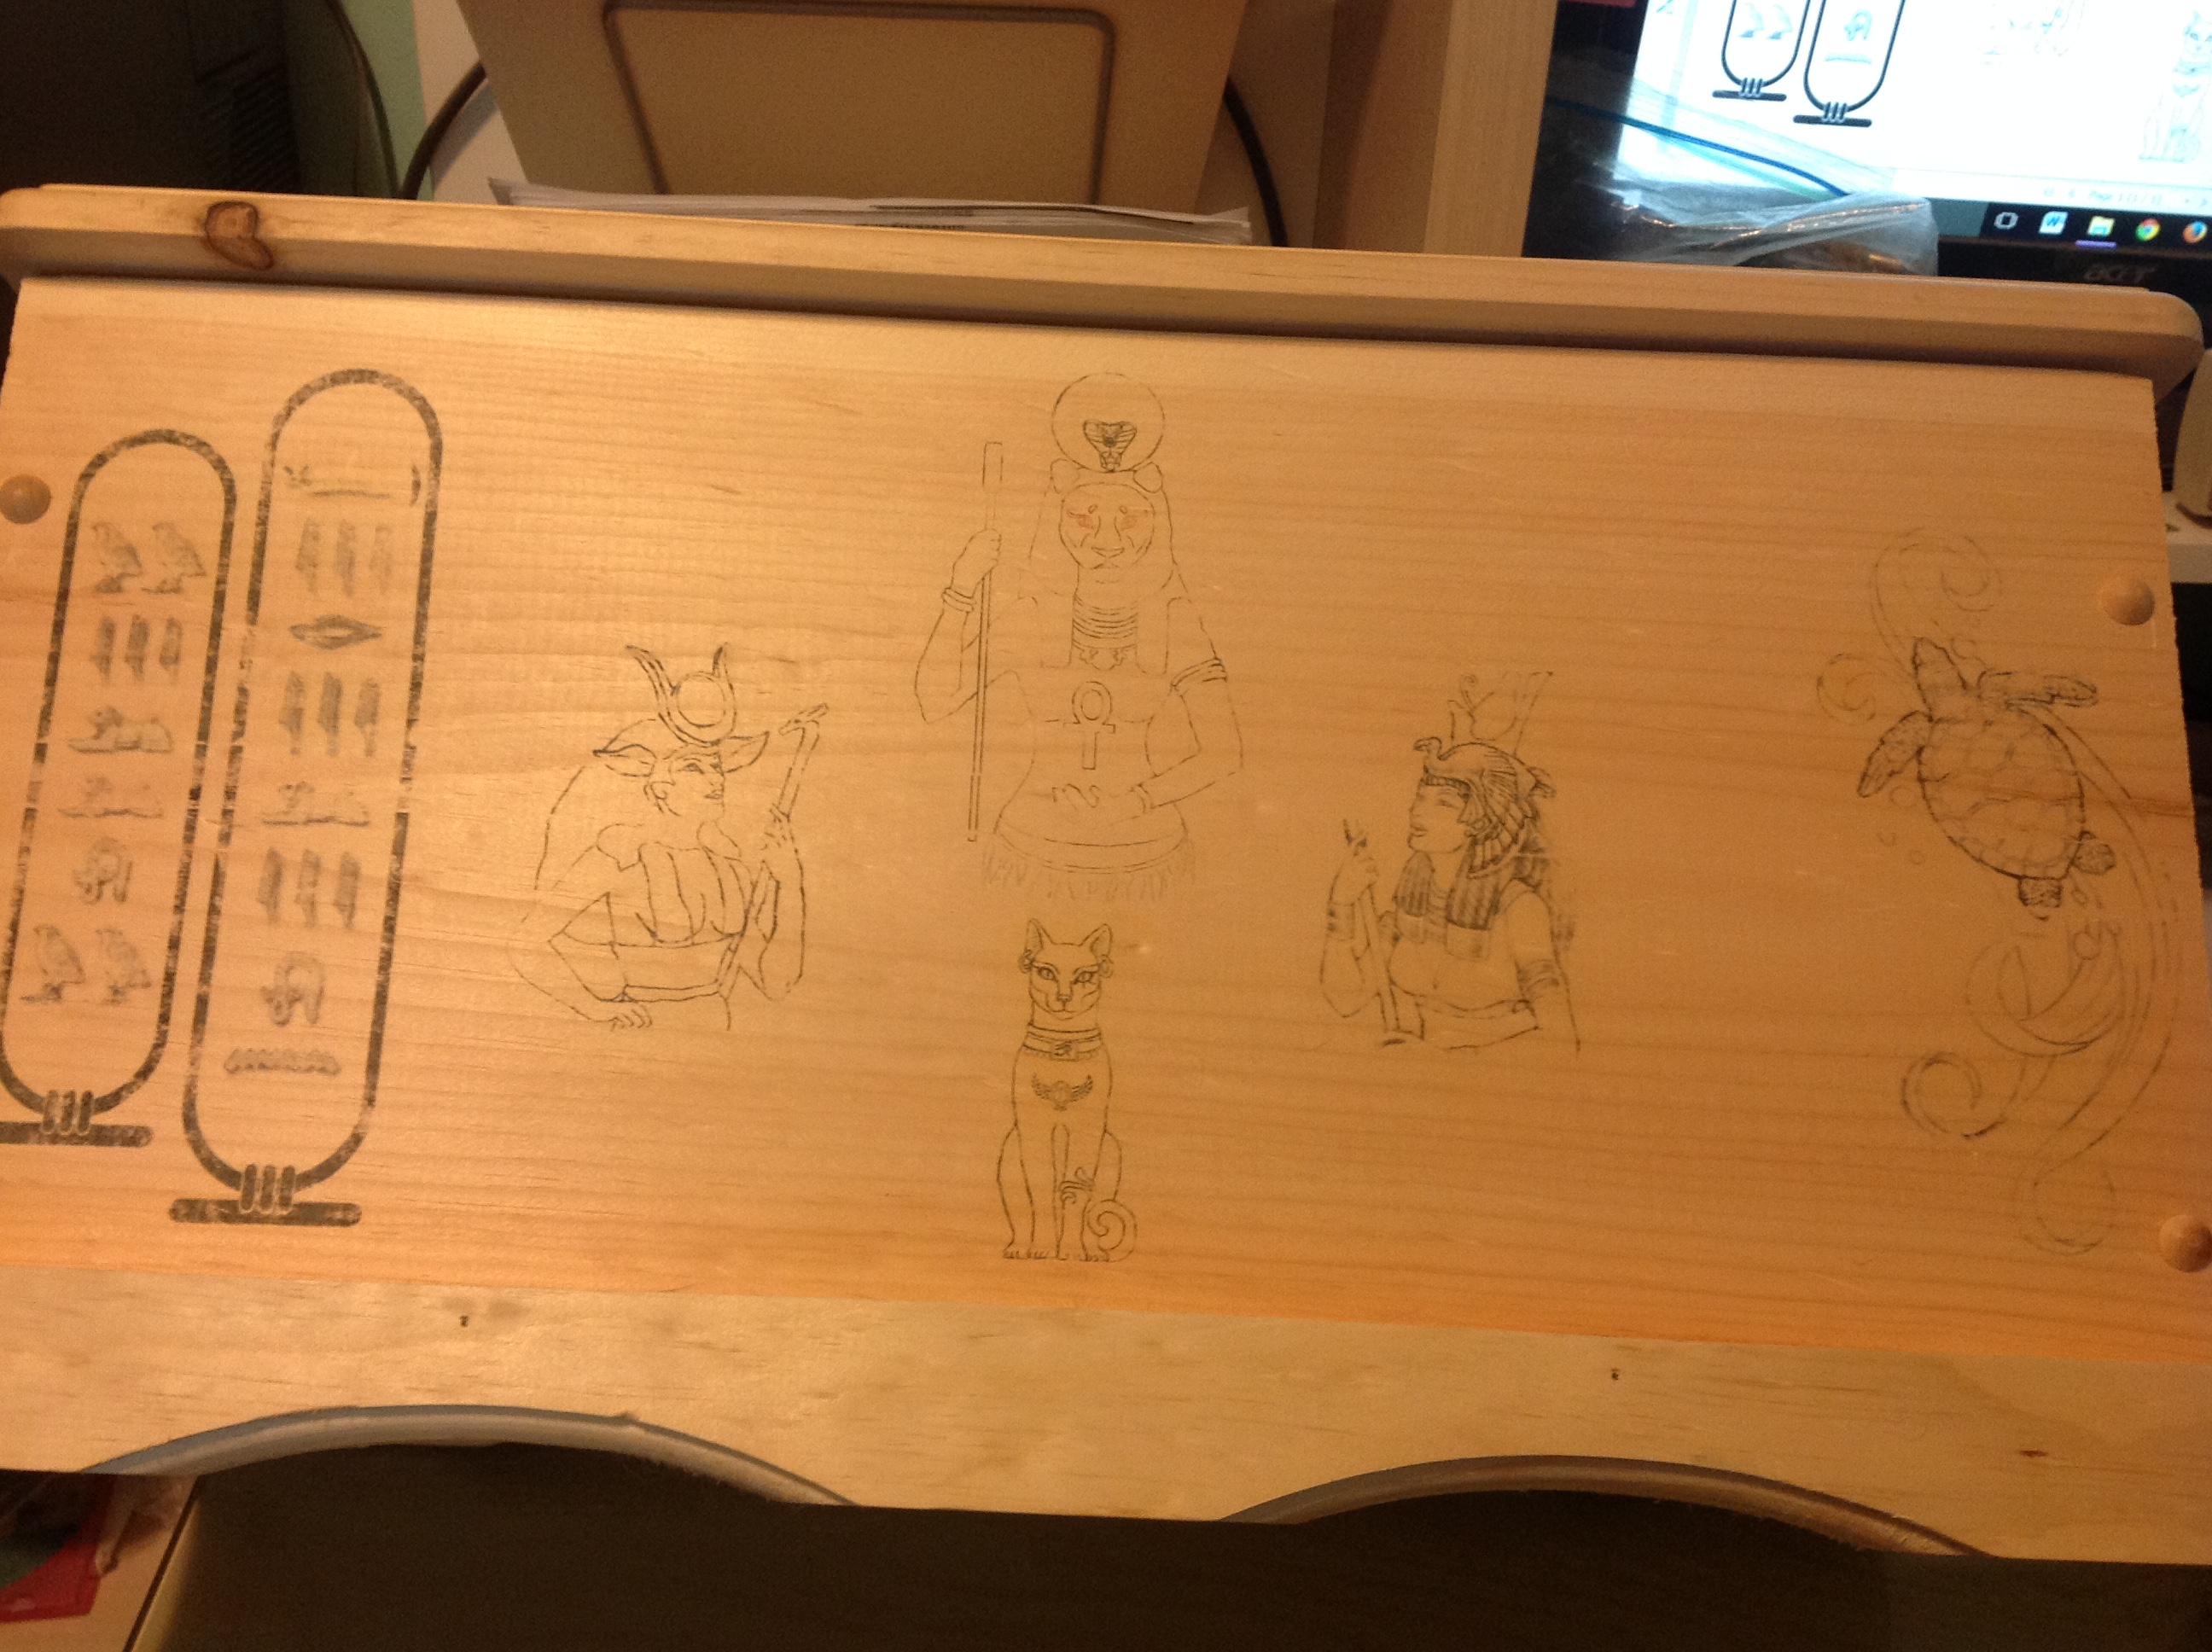
Unfortunately, this was not what she meant. As you’ve probably seen from the final picture, this was not it at all. When she saw it, she was like, “oh no! No, that’s not what I wanted!”
Miscommunications happen, that’s why we send pictures back and forth. It’s okay, it’s a good thing we caught it before I actually did the burning, but I had to sand up everything and start over.
So we emailed back and forth to make things straight. She also added in another deity, Bes.
At this point I had to raise the price. I hated to do it, but there was no question that this was going to take way more than 30 hours, and I would really just be ripping myself off if I did that. (There’s a bit of a struggle with that for me, but I really make every effort to just stick to the 10 bucks an hour thing. Maybe later I’ll feel more comfortable charging more, but right now, this is where I’m at. I know it’s WORTH more than 10 per hour, but that’s not the same thing as ASKING for more. It’s tough.)
So anyway, we discussed the pricing, and I re-did the layout until we agreed on this.
We had a consensus! Time to start the transfer!
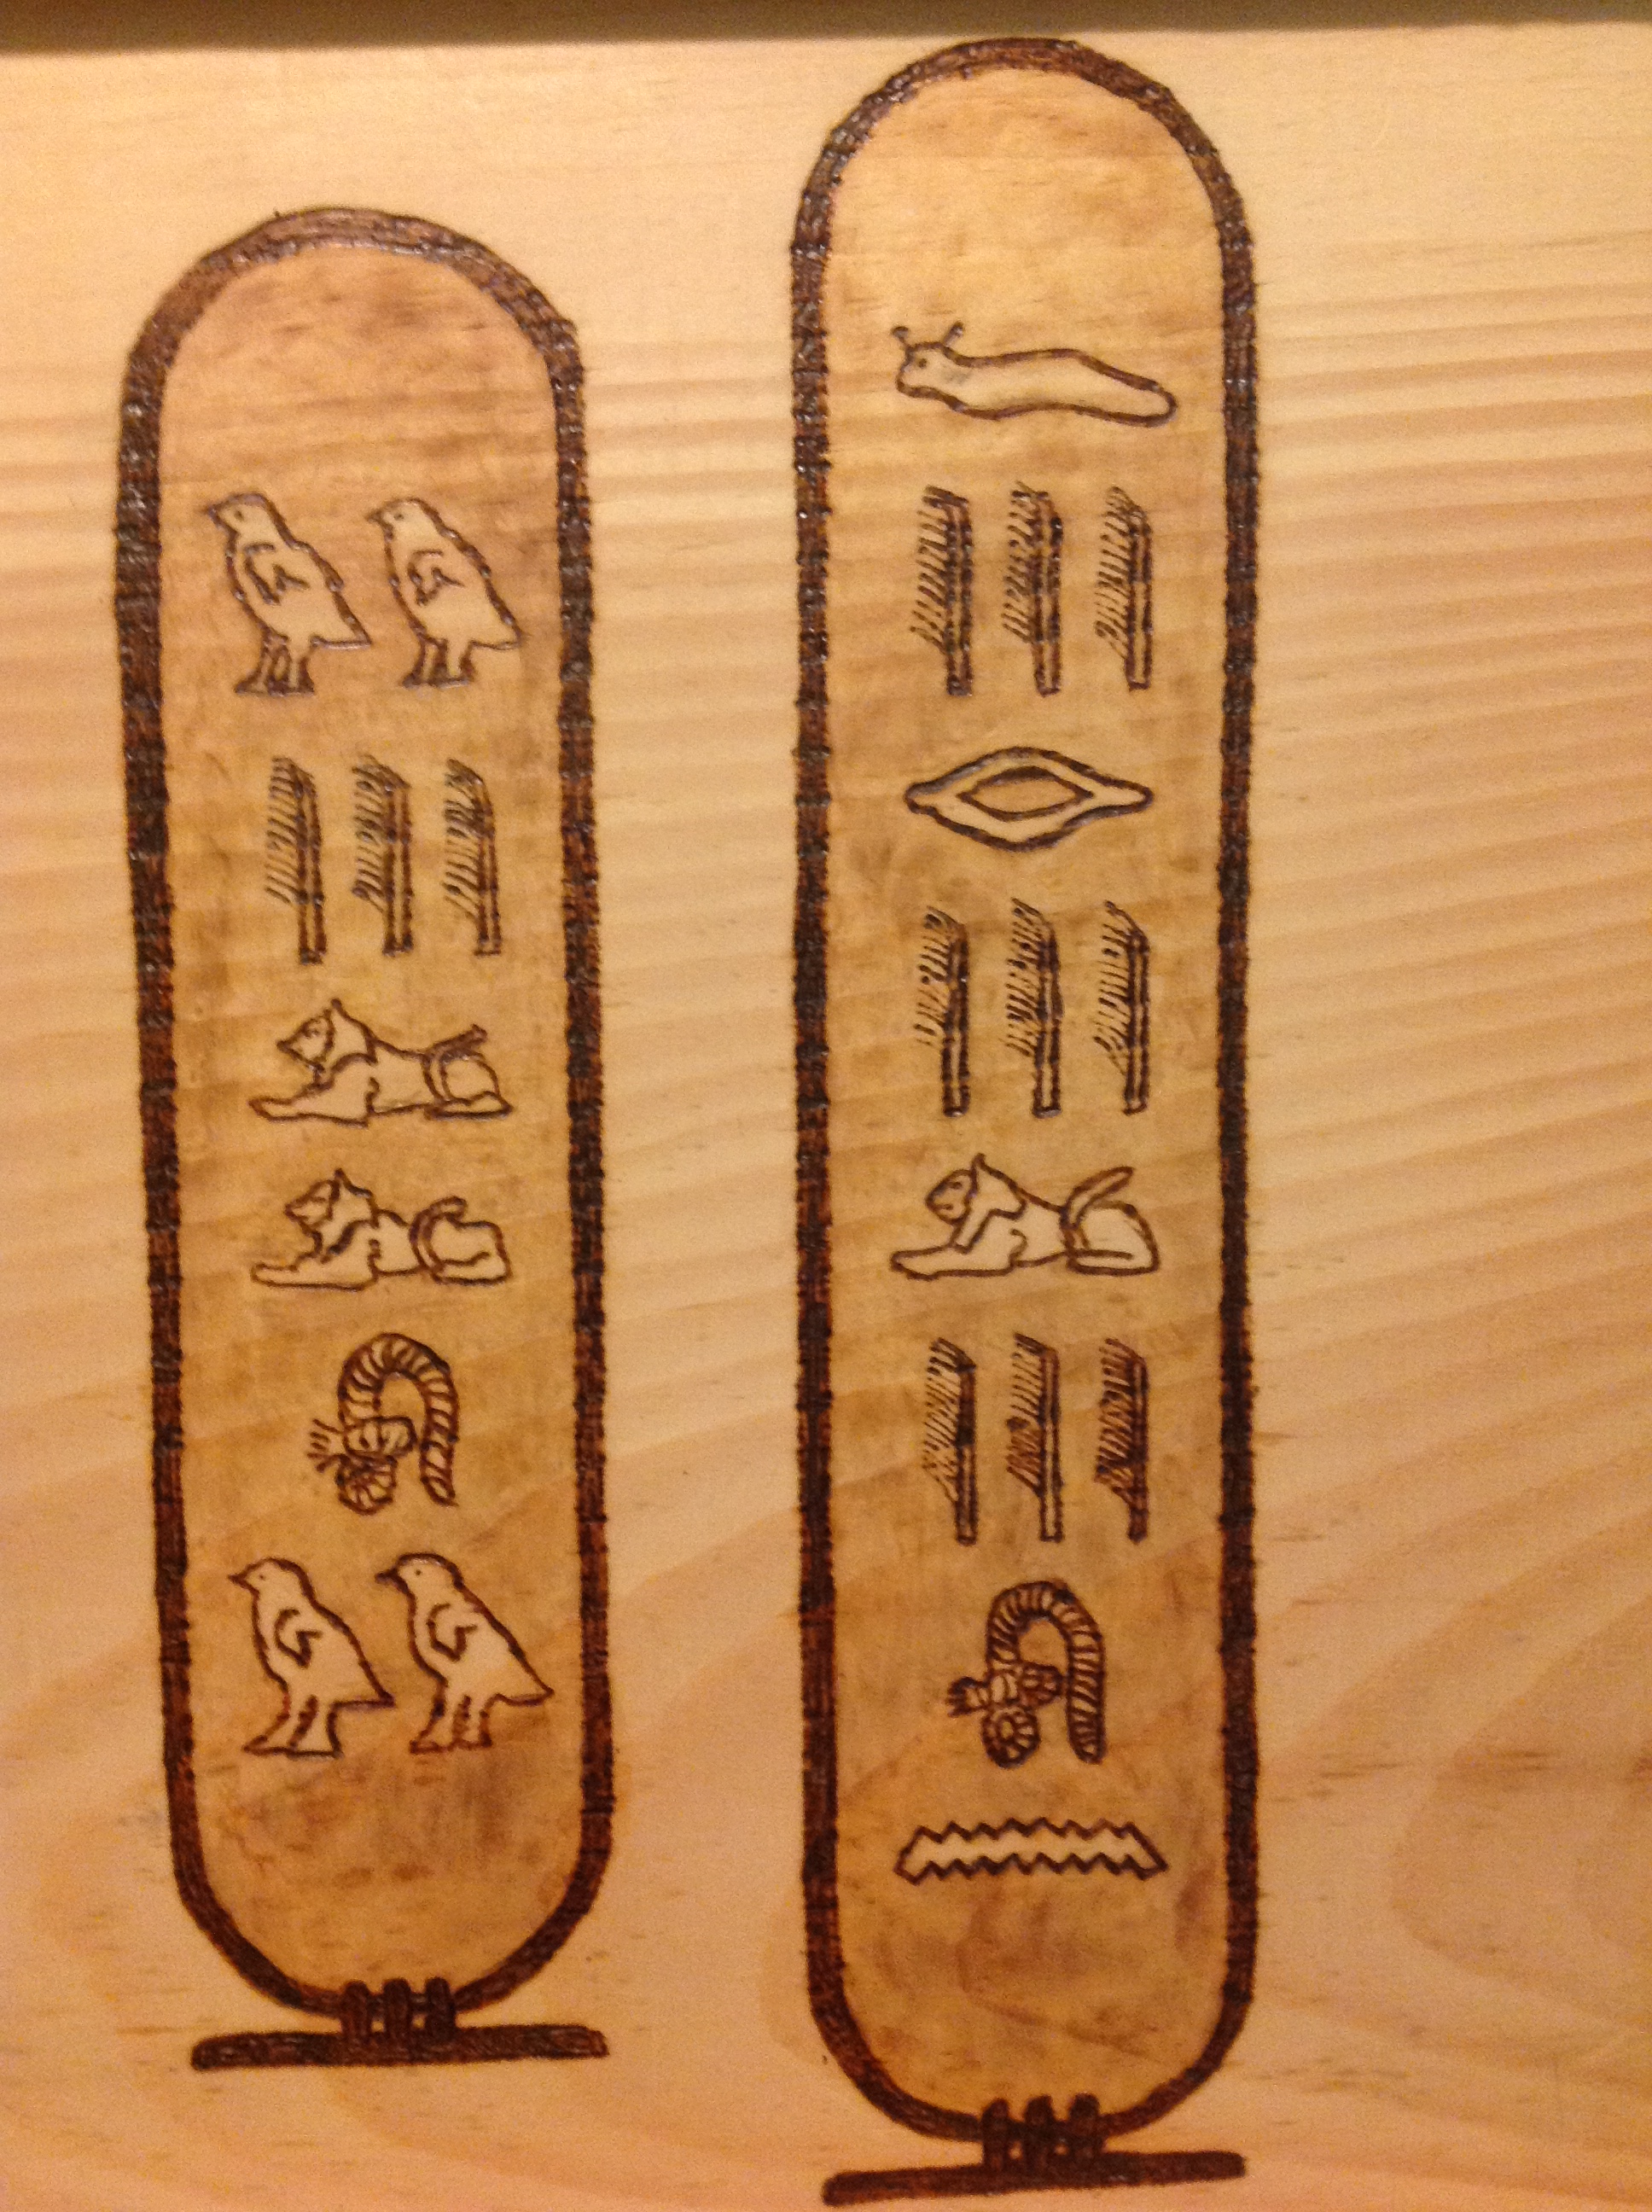
Meanwhile, we were discussing the Northeast. We were trying to come up with an idea for it. I had thought the birds in flight coming out of the rushes (straight from a heiroglyph btw) would fit the bill, but she said she was thinking about TIME. She couldn’t think of a good symbol for it.
Me – How about an hourglass?
Her – you mean like a “program loading” hourglass?
Me – no…lemme grab you an image.
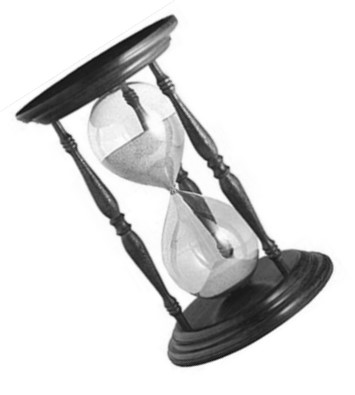
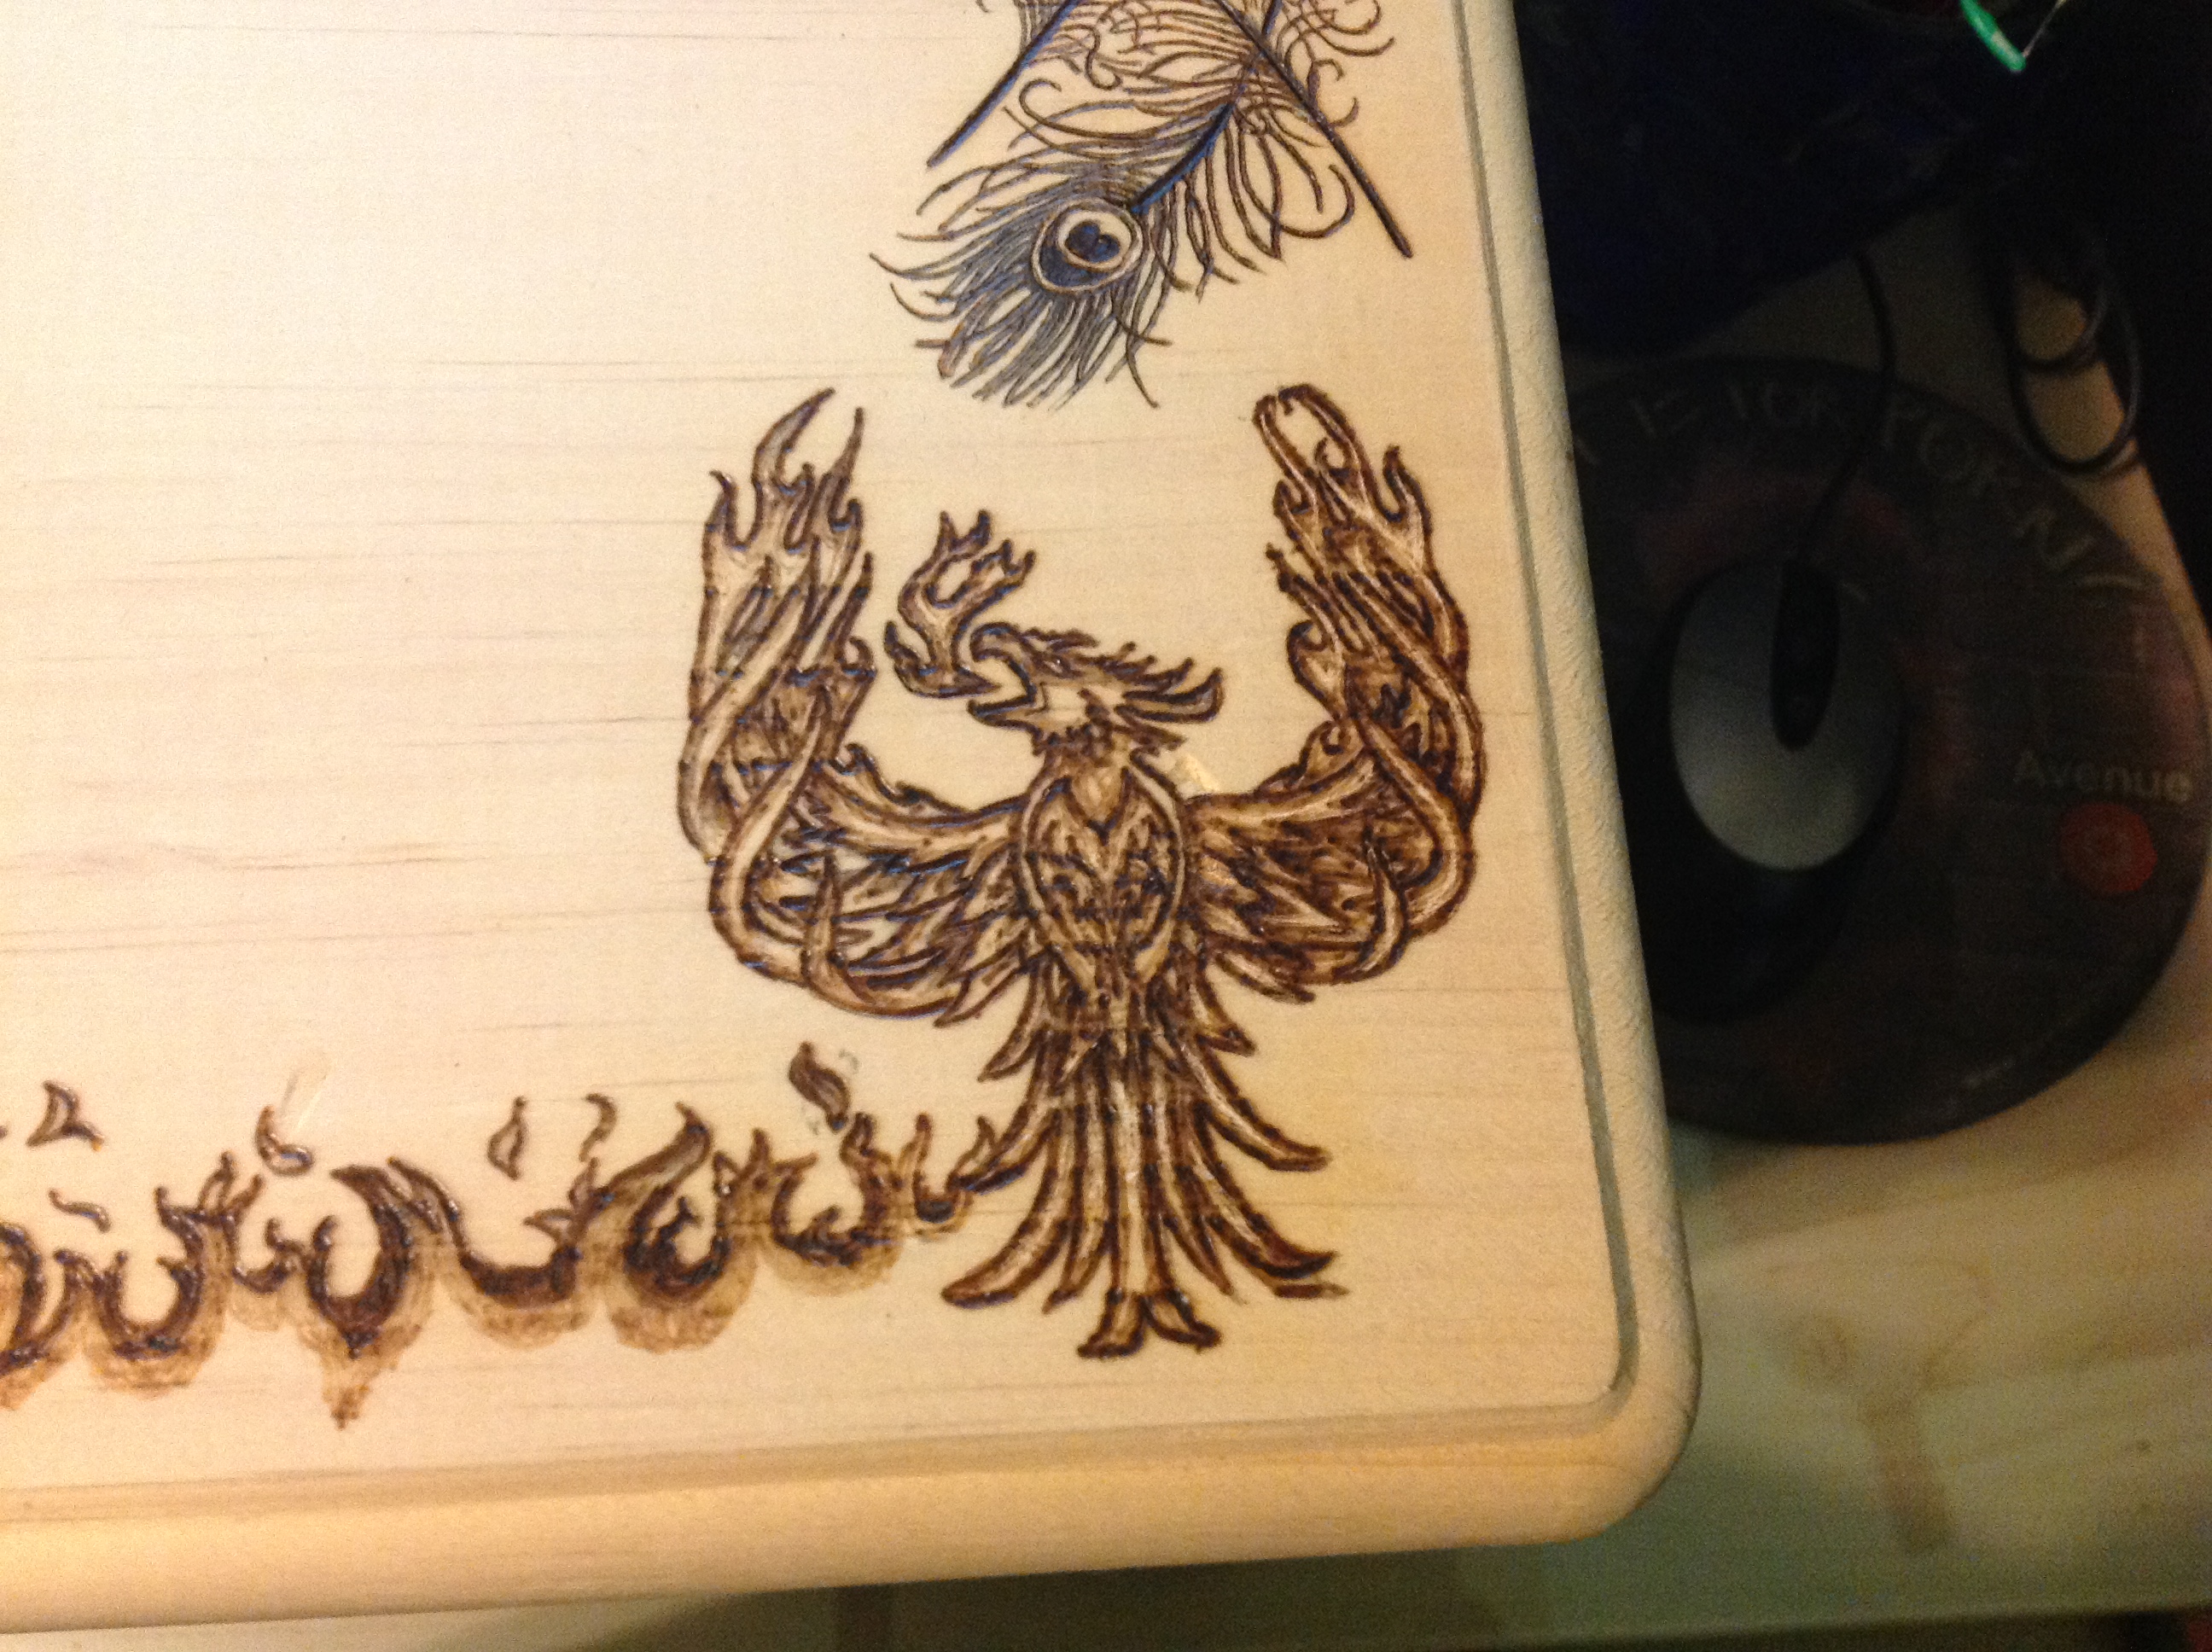
She approved, and then I realized that I could use the sand in the dunes to be the sand in the hourglass if I just did a kind of Escher-thing with it.
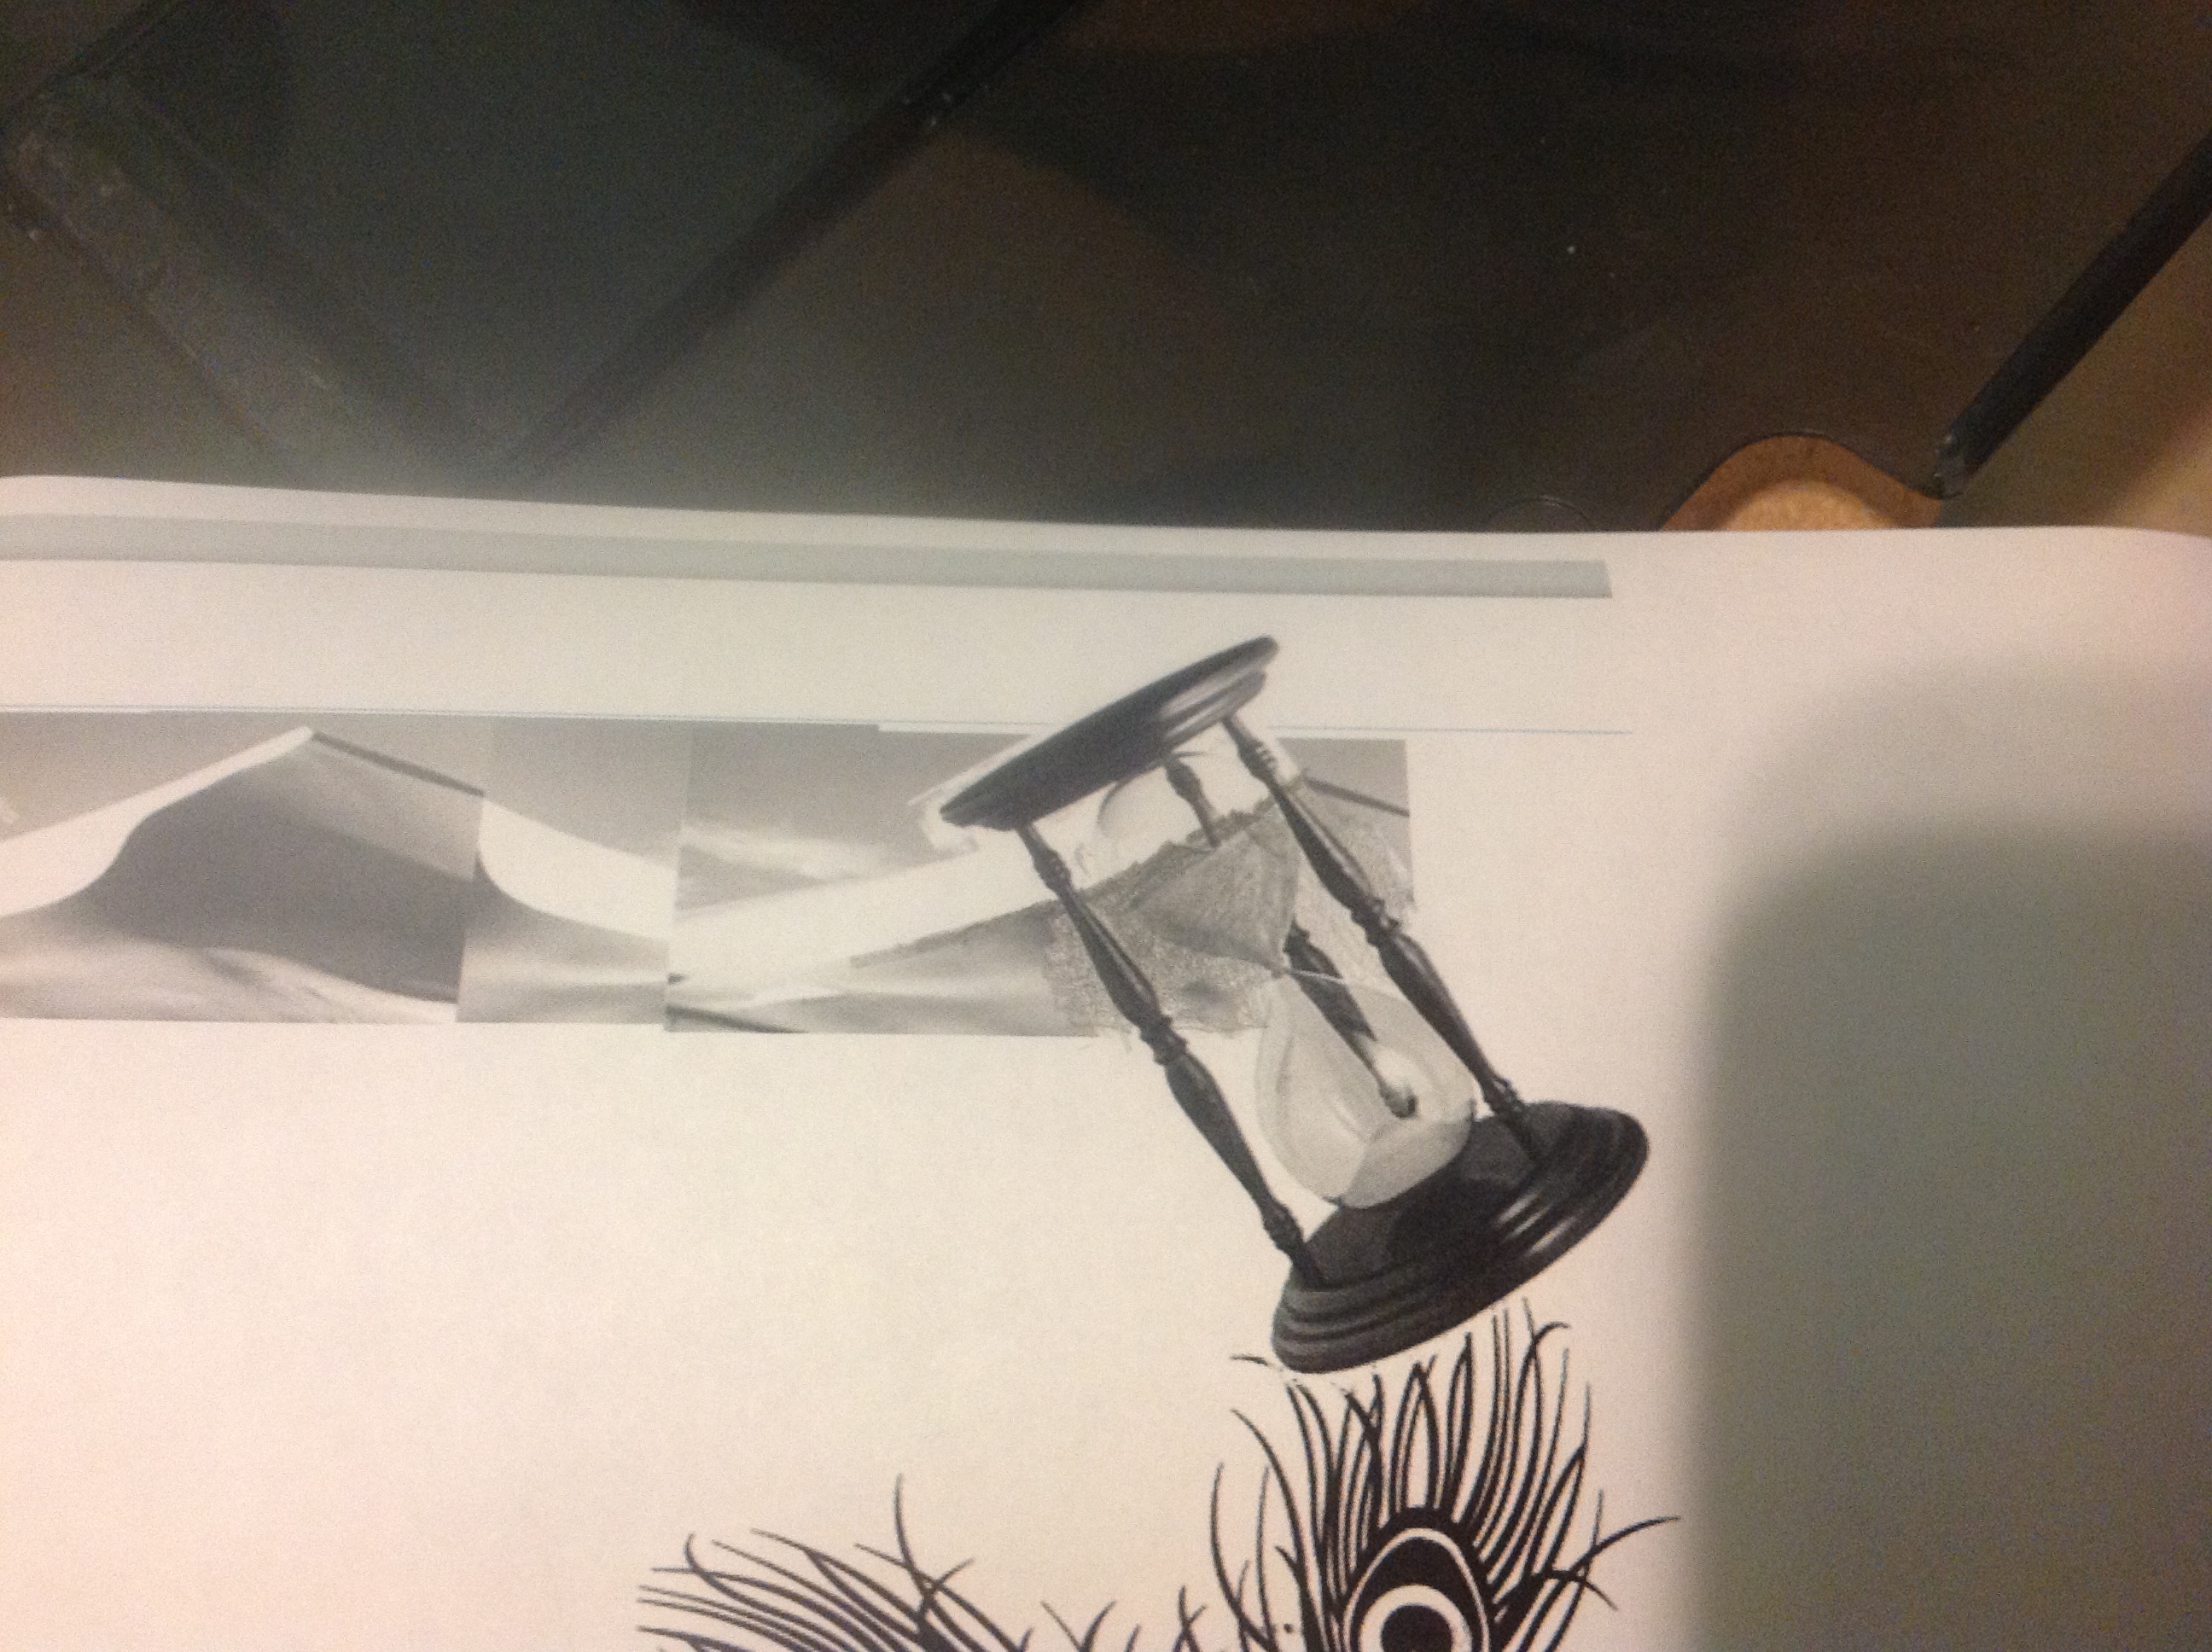
The final version of the lid came out like this.
And the transfers began.
Time to start a-burnin’.
You can probably tell that getting the layout and the design right is a huge part of the process. I kind of feel like each of these is so personal that it needs to be done that way.
The burning begins.
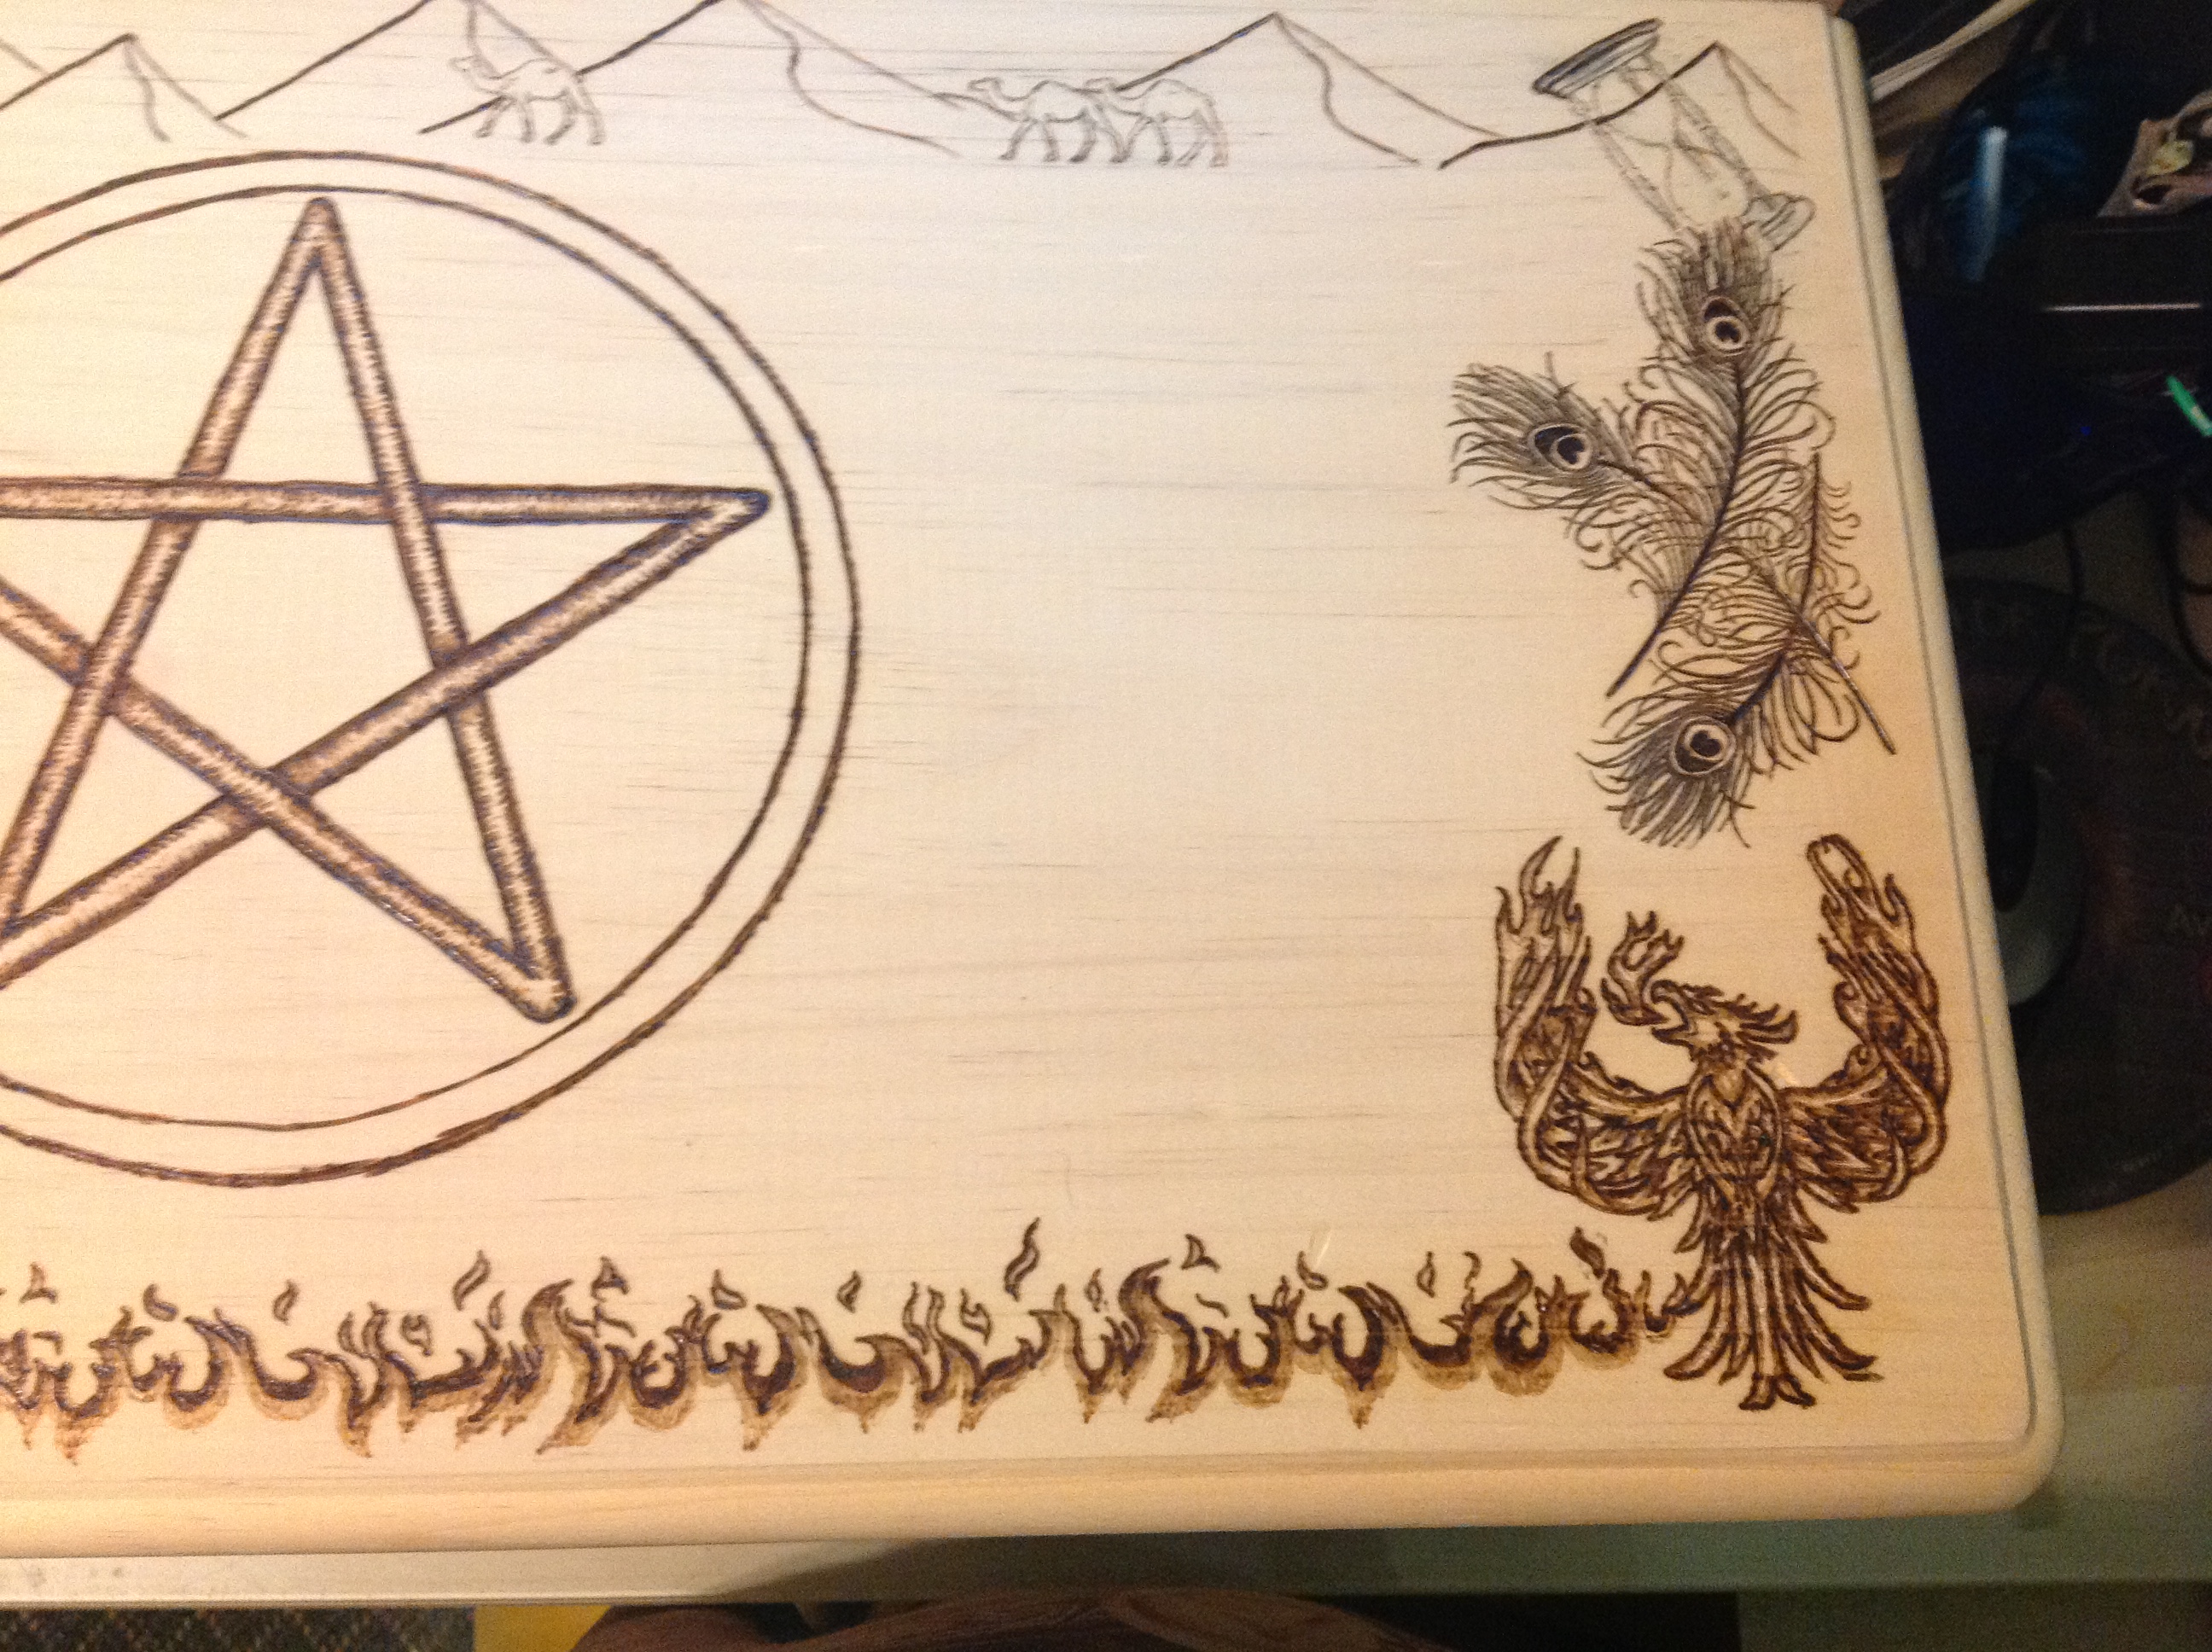

Time to deal with the camels. They were small, but in order to fit in with the rest of the box, they were going to need shading. So I figured out how to shade them no matter how teeny.
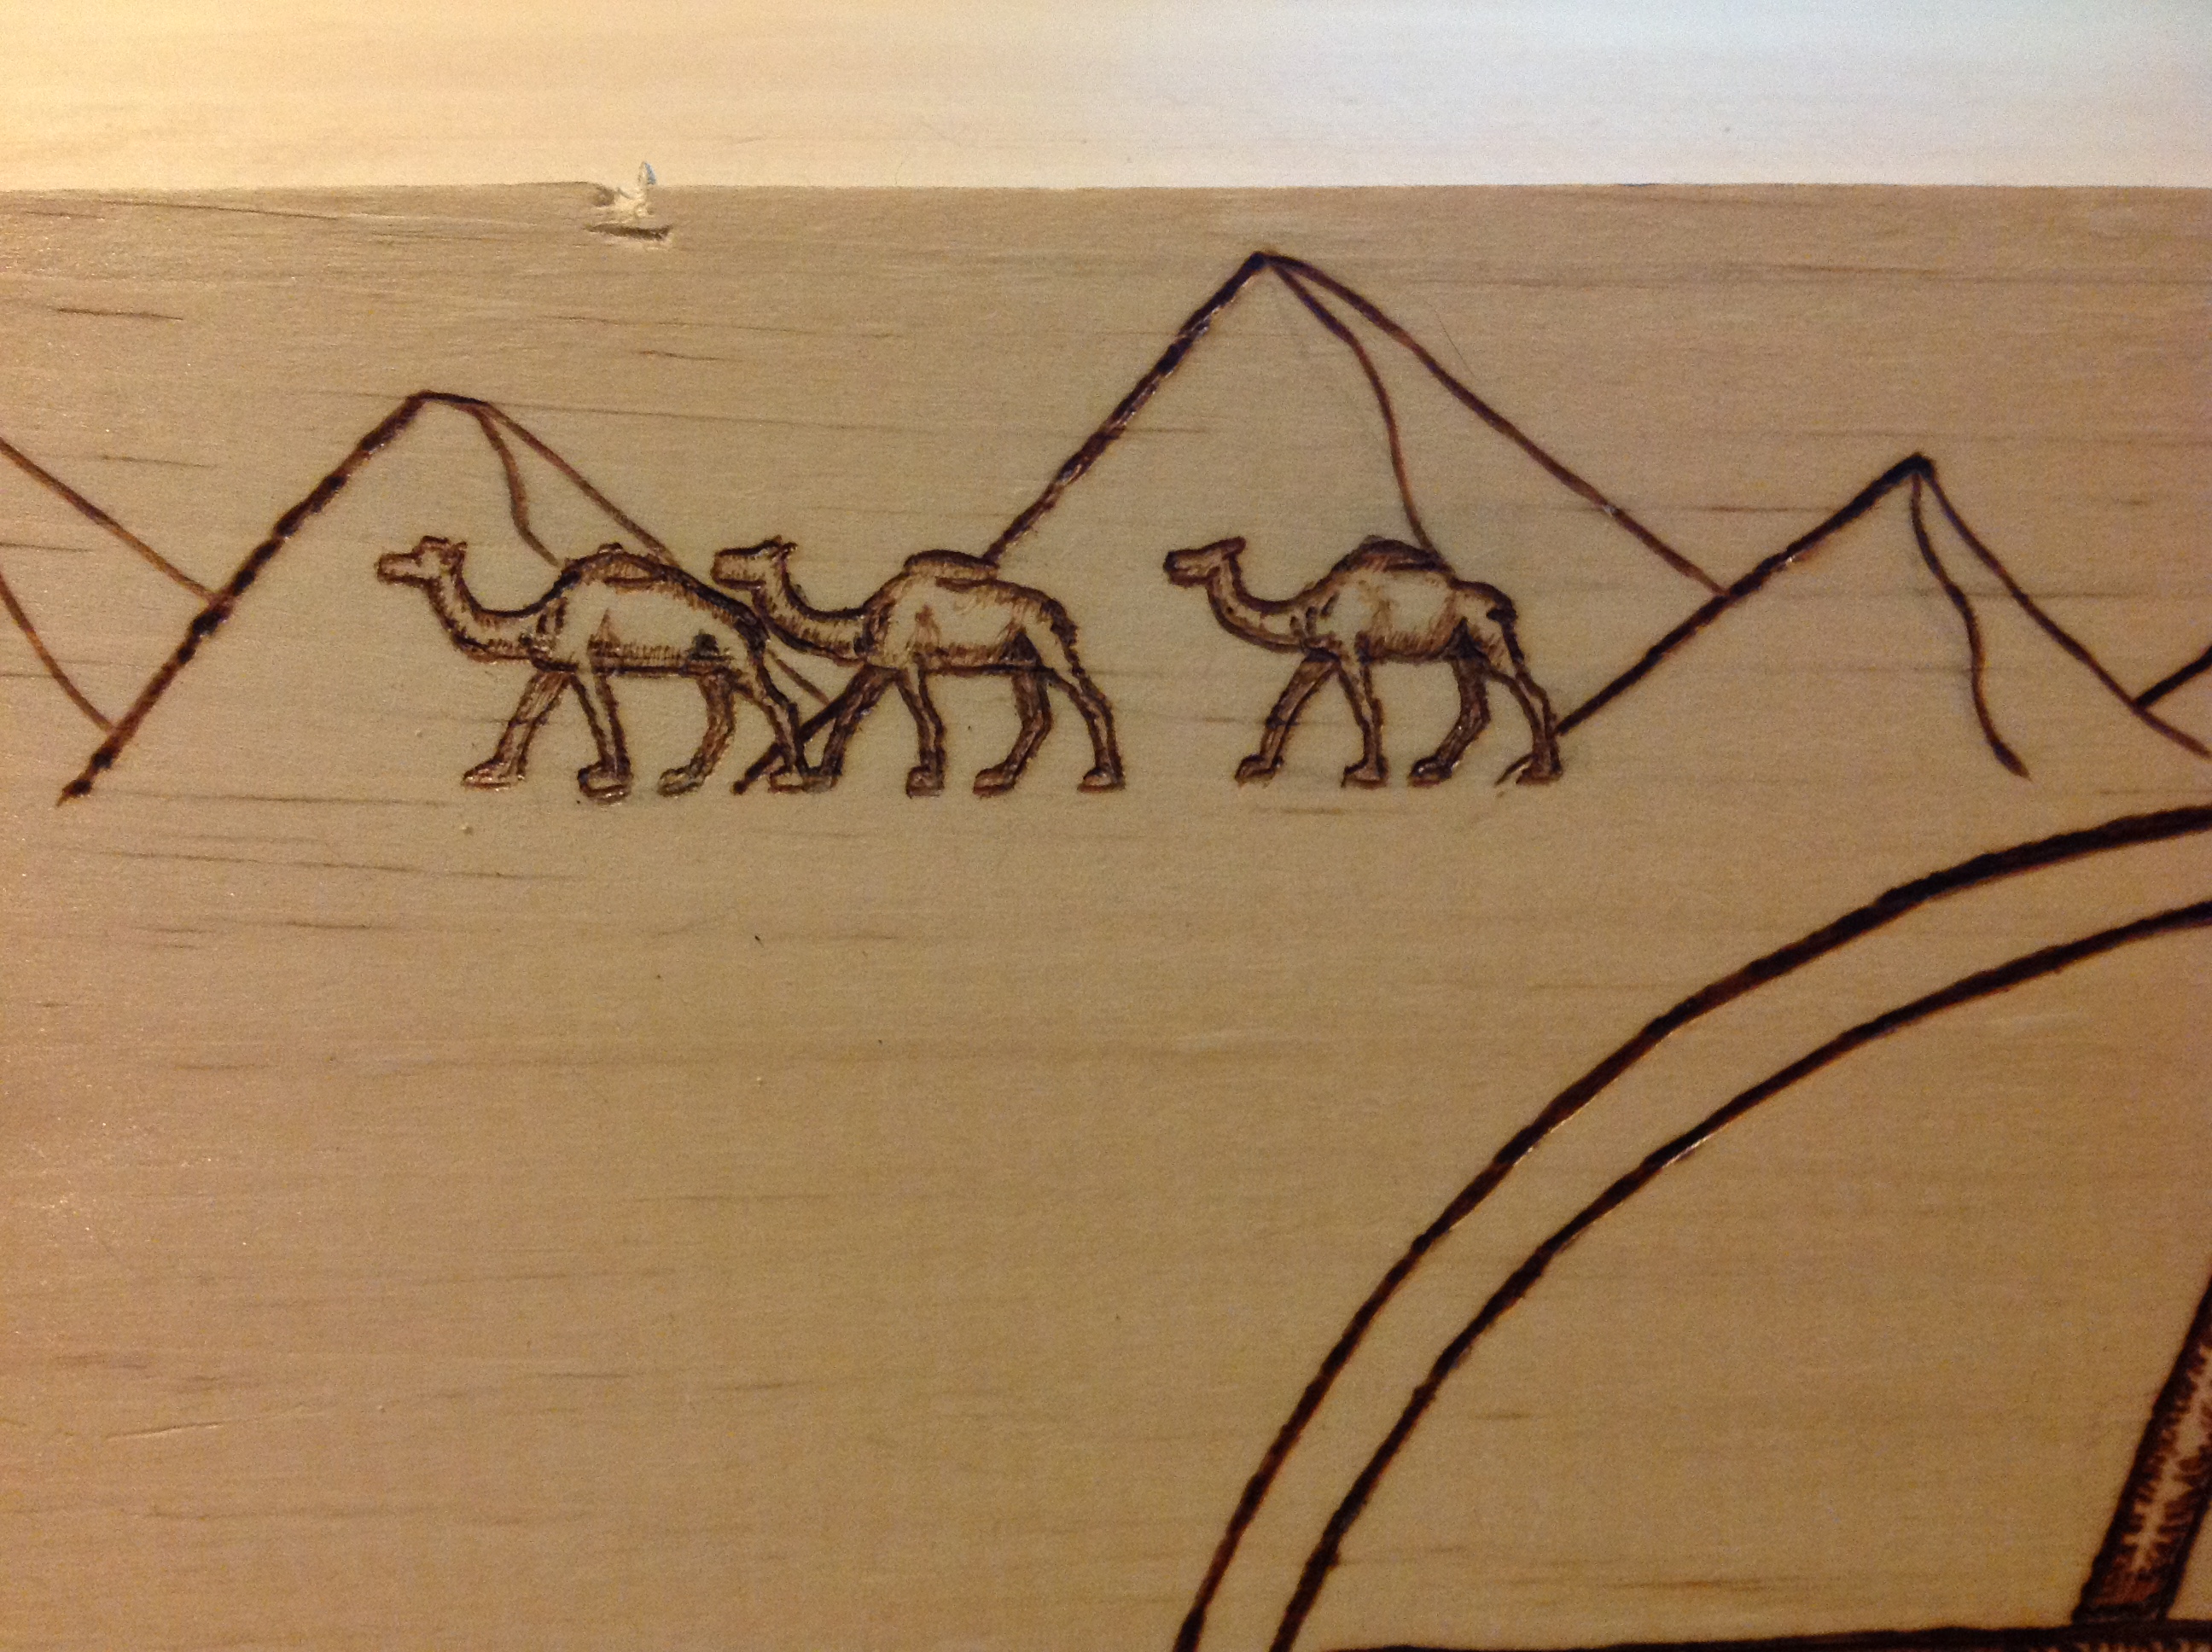
But THAT meant that the pyramids needed shading too. I grabbed the leaf-shaped head on the burner, and it gave them a lovely smokey look. I also started the shading on the circle around the pentacle, because it needed some kind of layering too.

Right, so the western side needed to get addressed. The cobra was simplistic, but that Lotus….damn. And it didn’t help that both of them were positioned on top of really big knots in the wood. That causes all kinds of drama for the burning. And on top of it, they were leaking sap…which smelled yummy, but really didn’t help for consistency in tone.
So while it all looks lovely, let me go onto the other parts of the box. First layer of burn on front and sides.
So time to do it again…and go deep.


At that point, Willow had never seen the entire box. She had no idea what the full product looked like, only bits and pieces, and she was concerned (she didn’t say it, but I could hear it in her voice) and I guessed it might have been the money. I sent her this, and it changed everything.
She said she had no idea from seeing all the bits and pieces how it was all falling together. And it was DEFINITELY falling together.
So several thoughts now. Mut and Hathor are decidedly caucasian looking. Bes and Bast are supposed to be very dark. If I make Sekhmet tawny skinned, how dark can I make Bes and Bast without losing the details of the burn? What am I going to do with Hathor’s hair? And when am I going to come to terms with the fact that that Lotus is killing me?
Let’s not think about that right now. Let’s just shade Sekhmet and see how that goes.
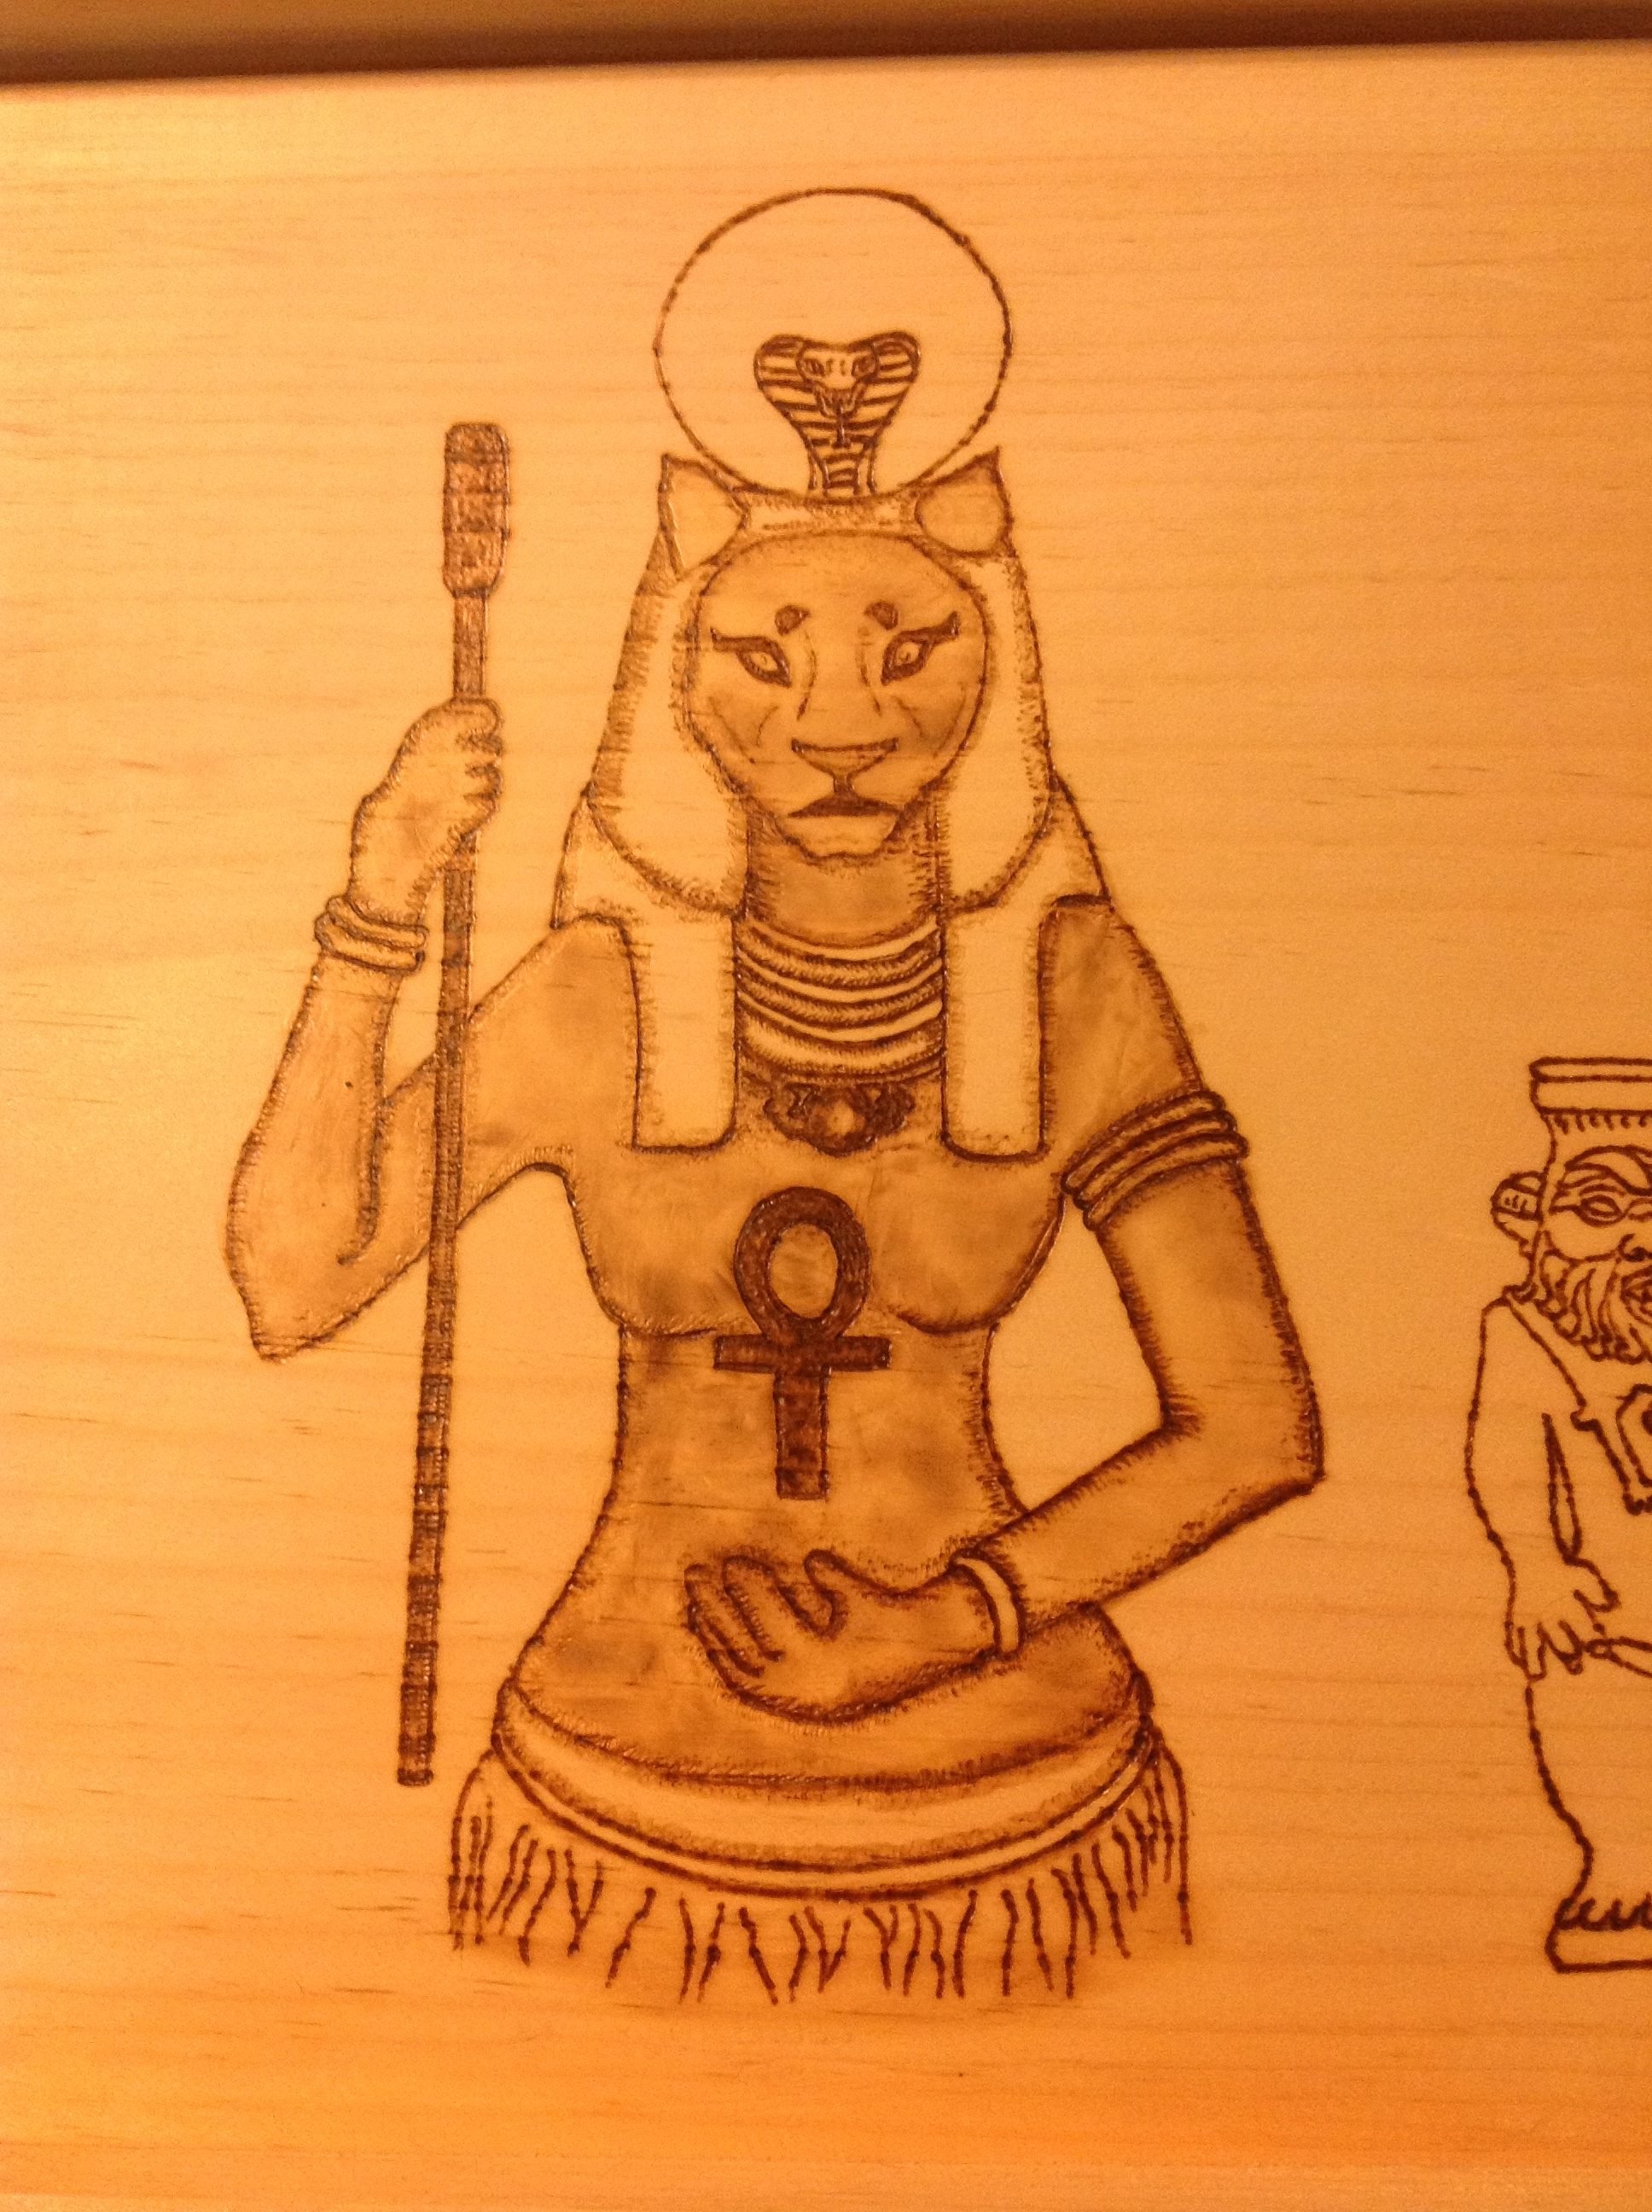
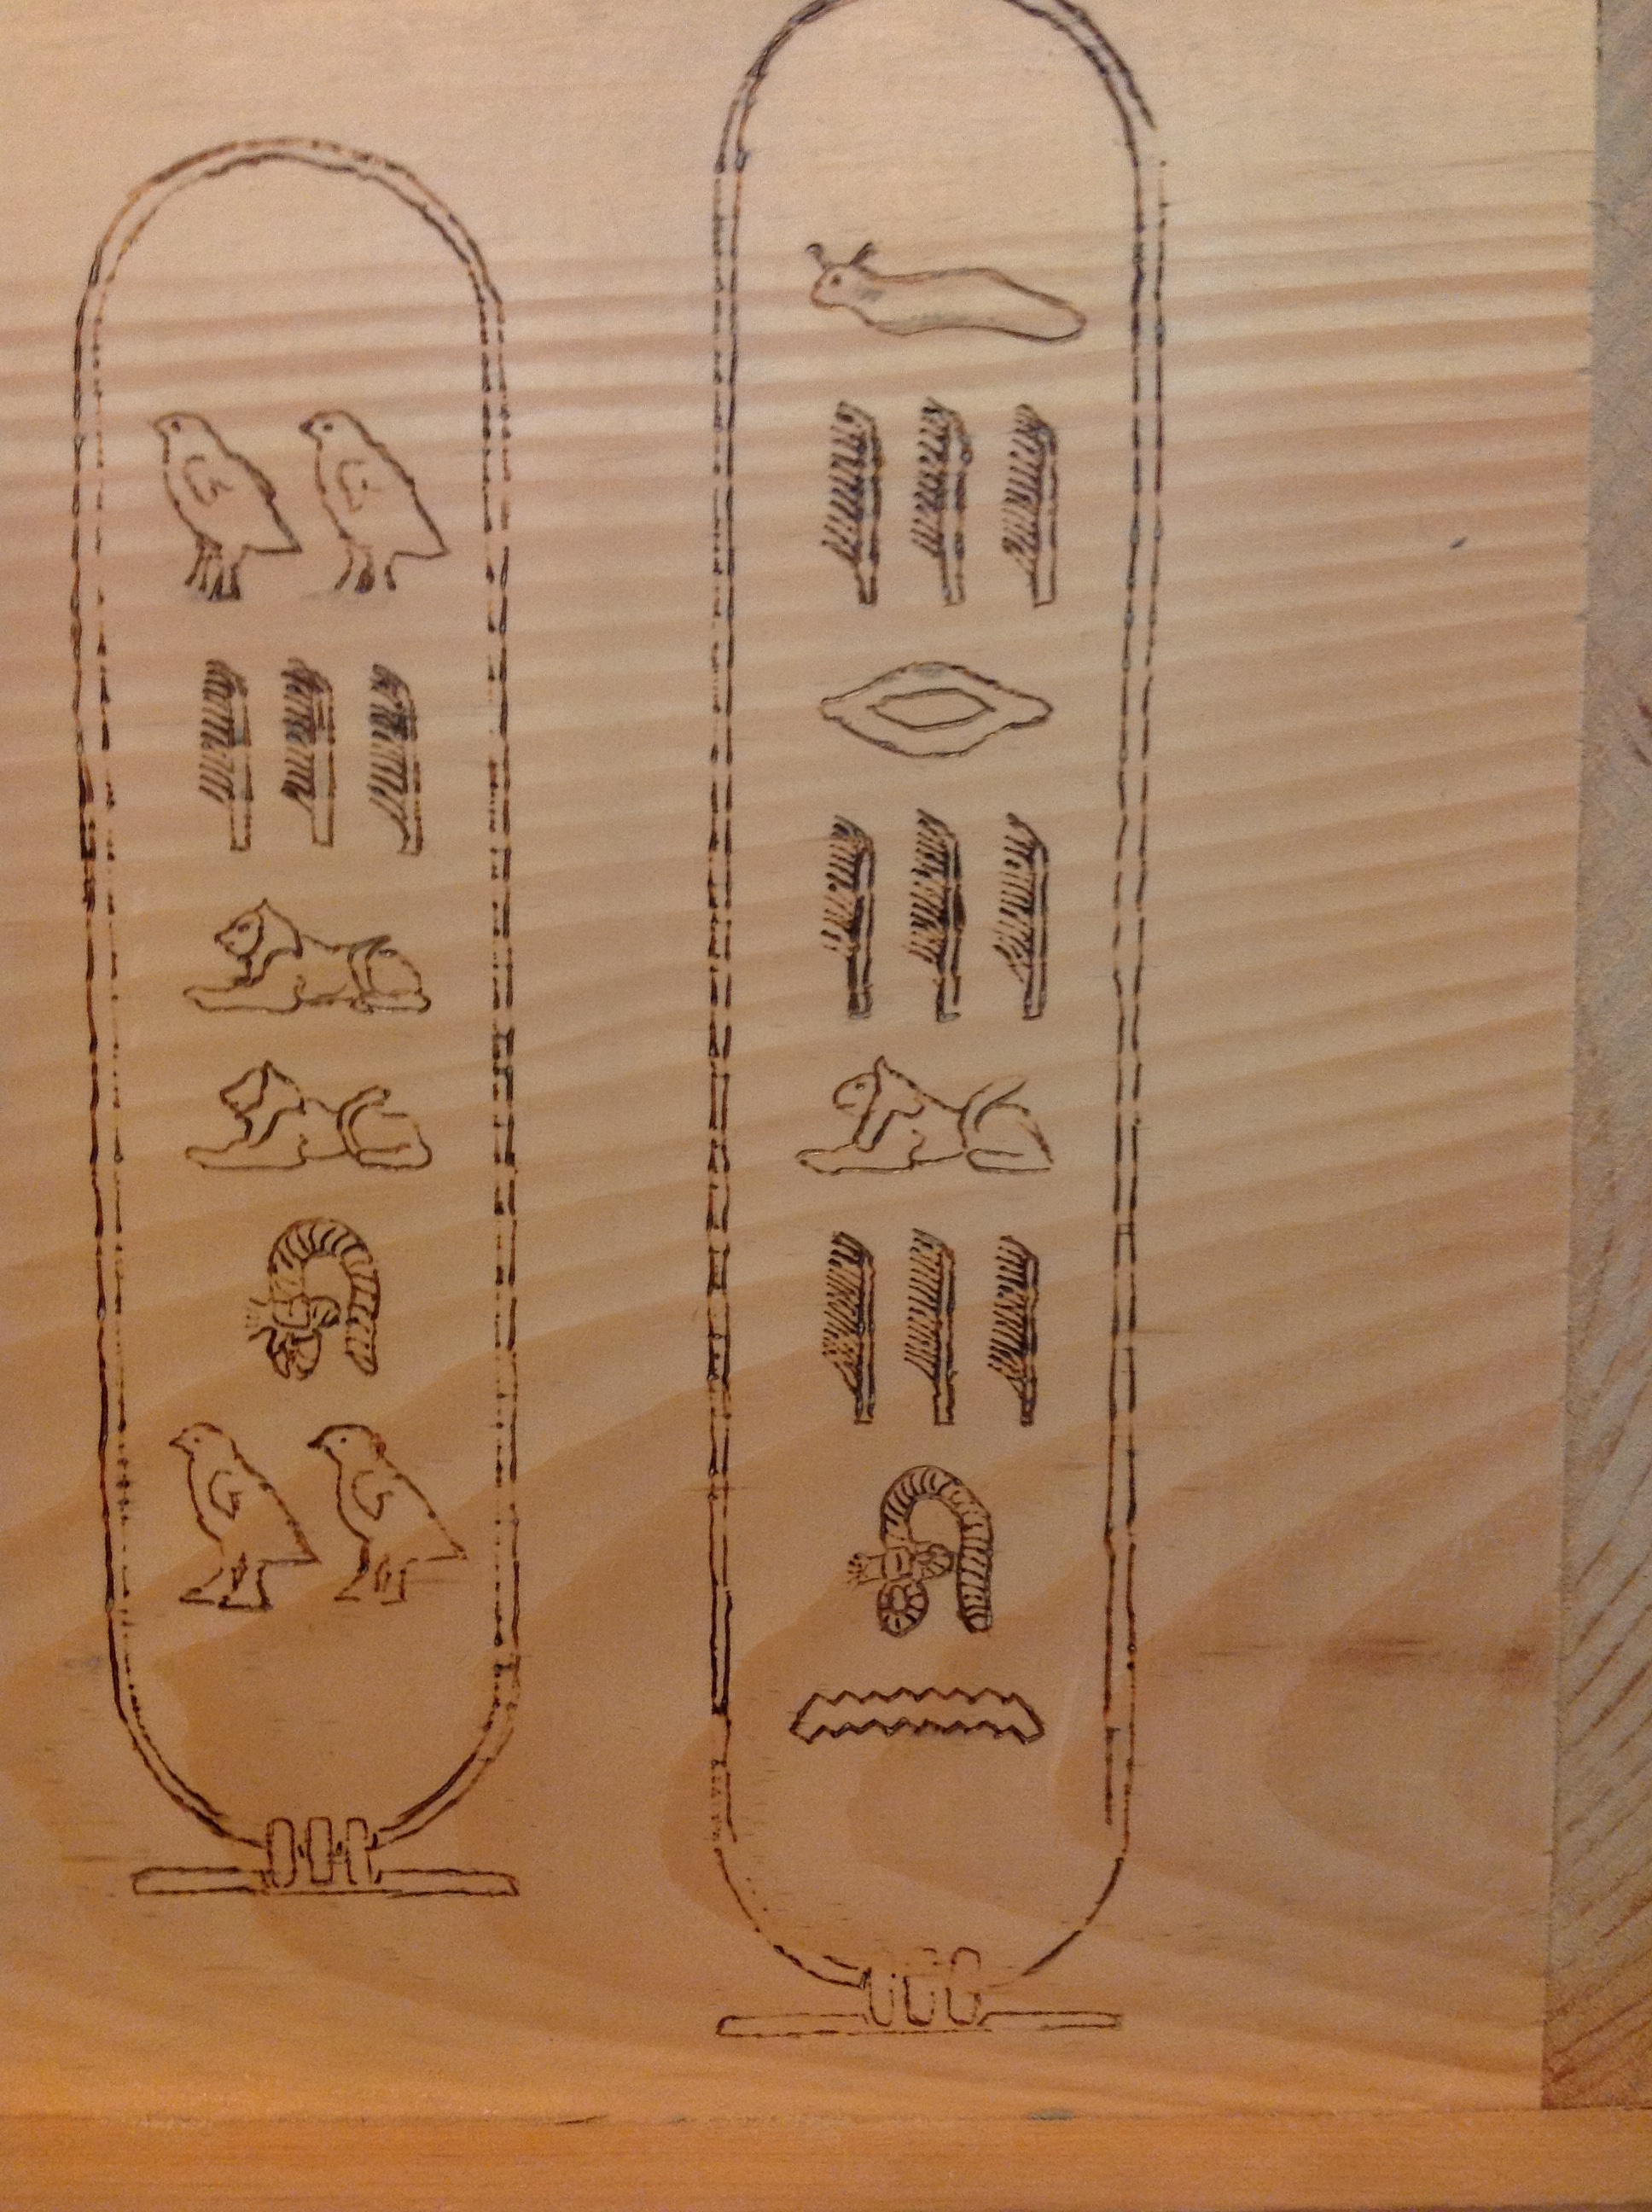
Alright, that looks MUCH better now. I’ll need to shade each heiroglyph, though.
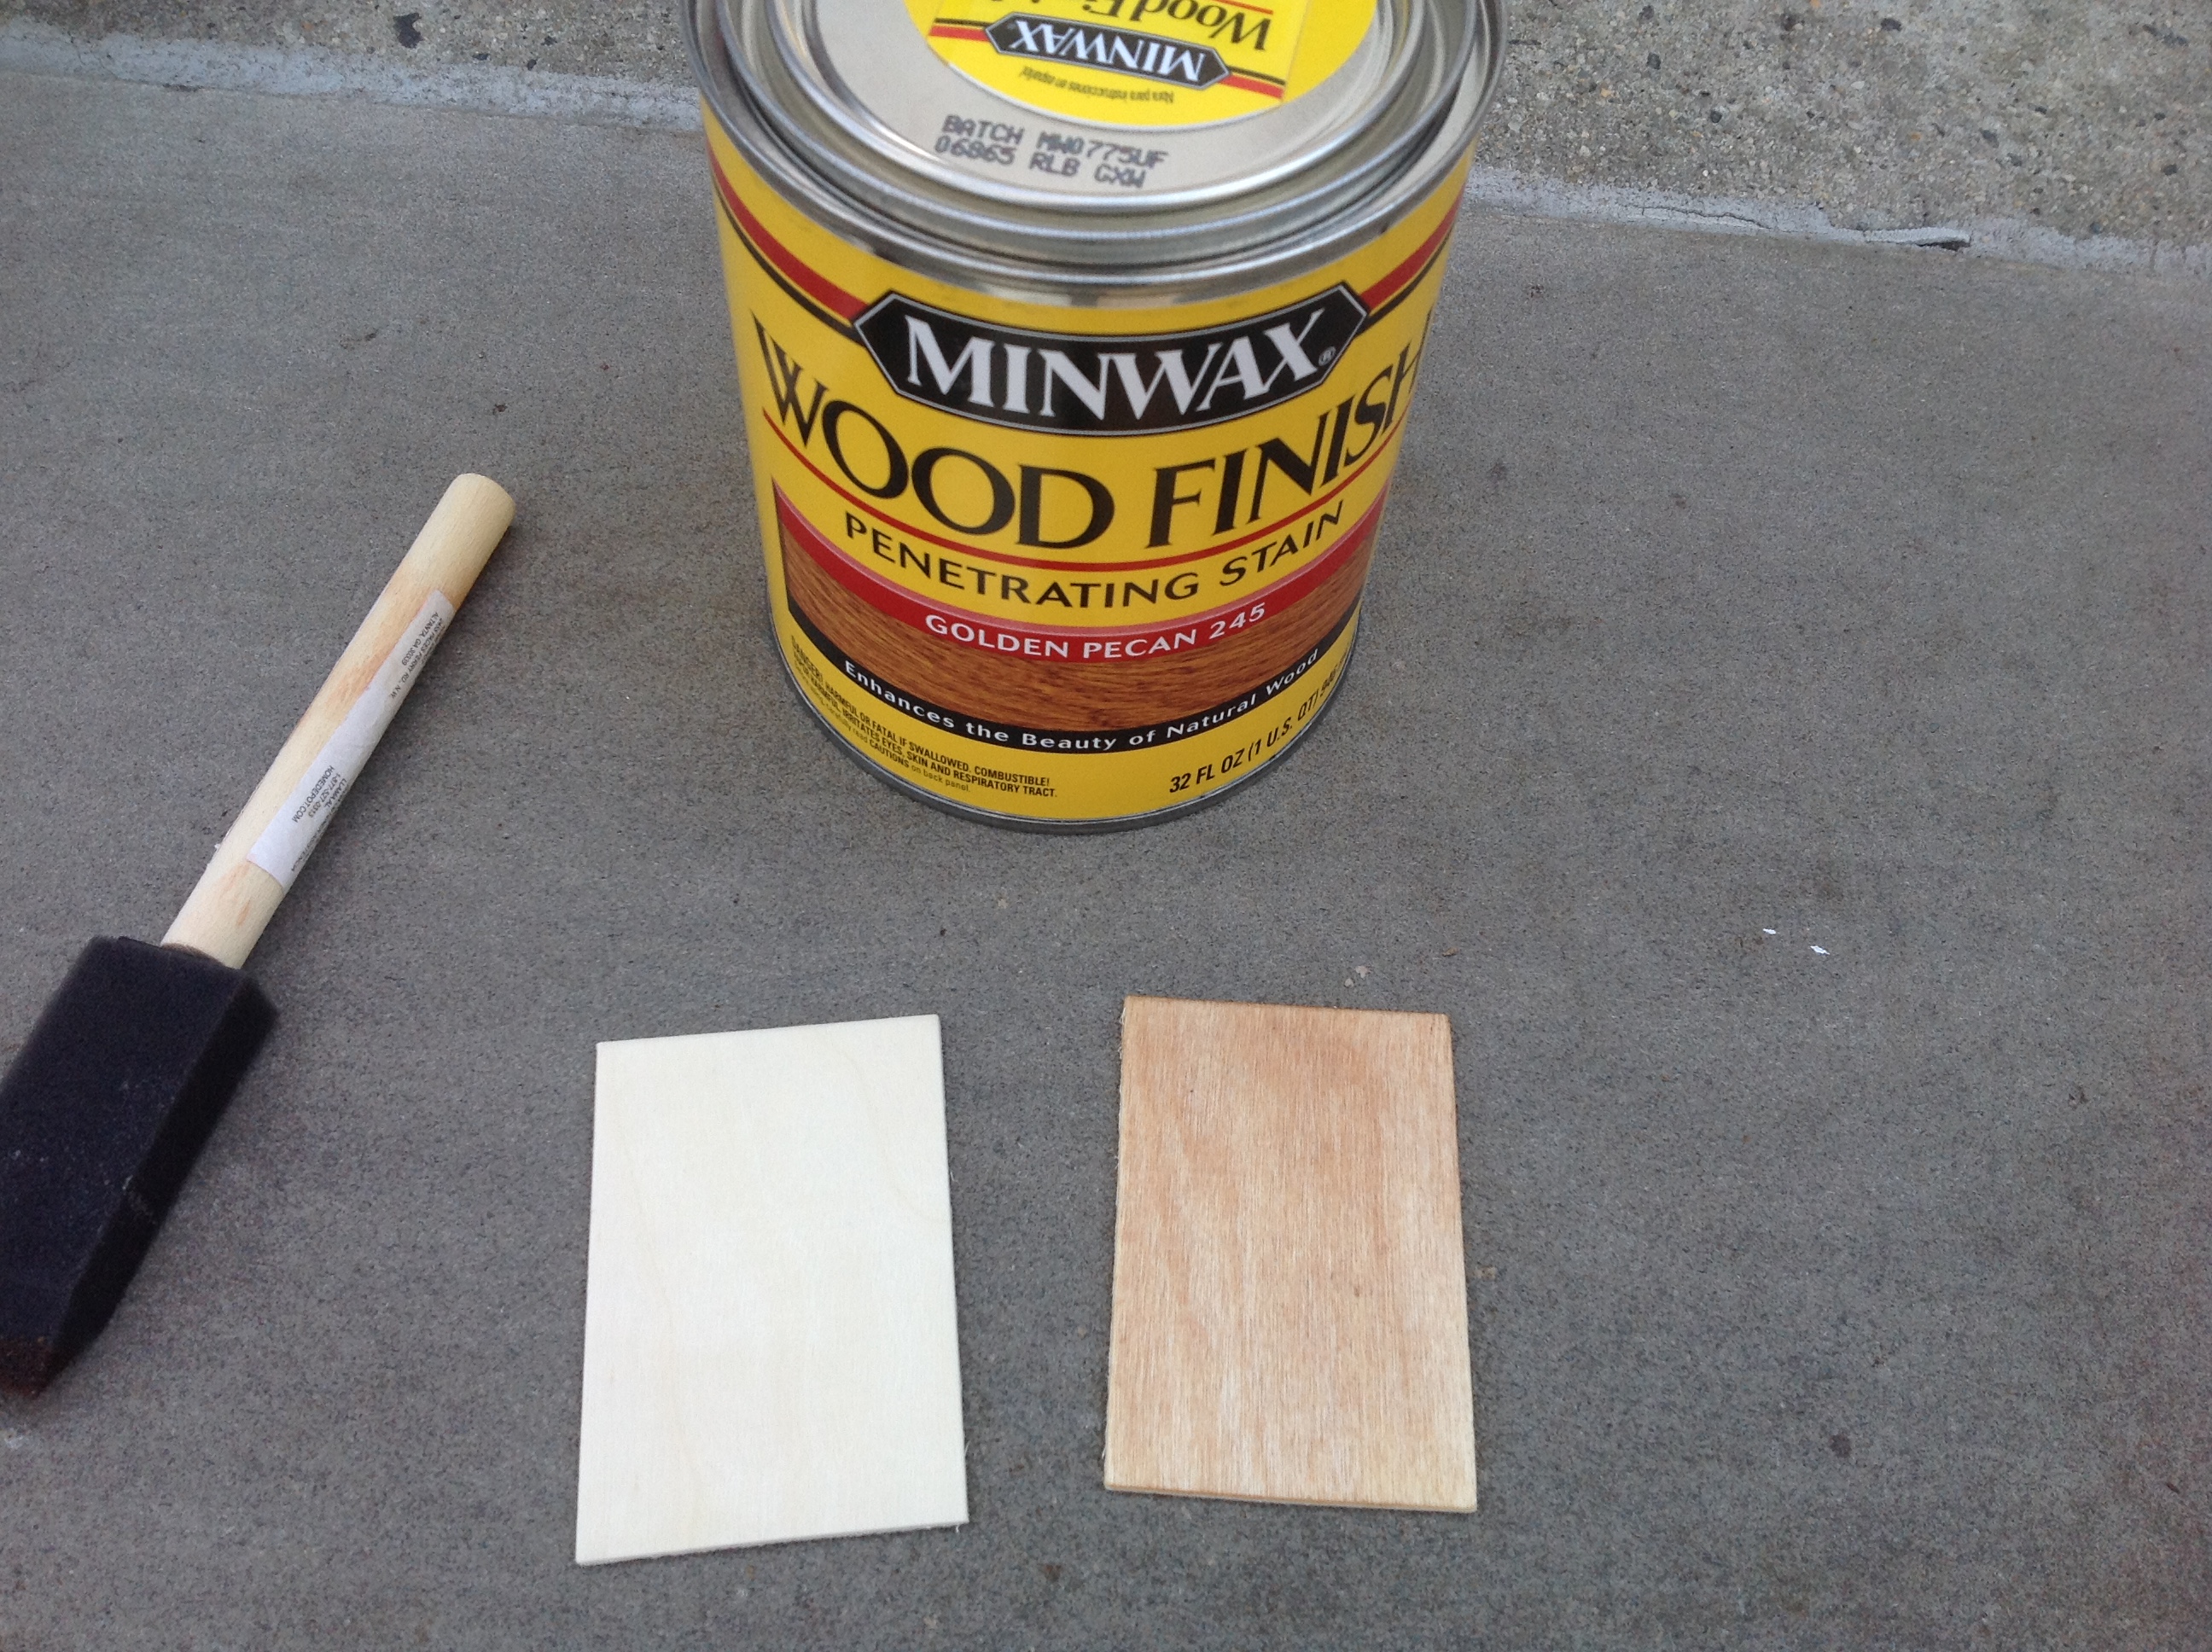
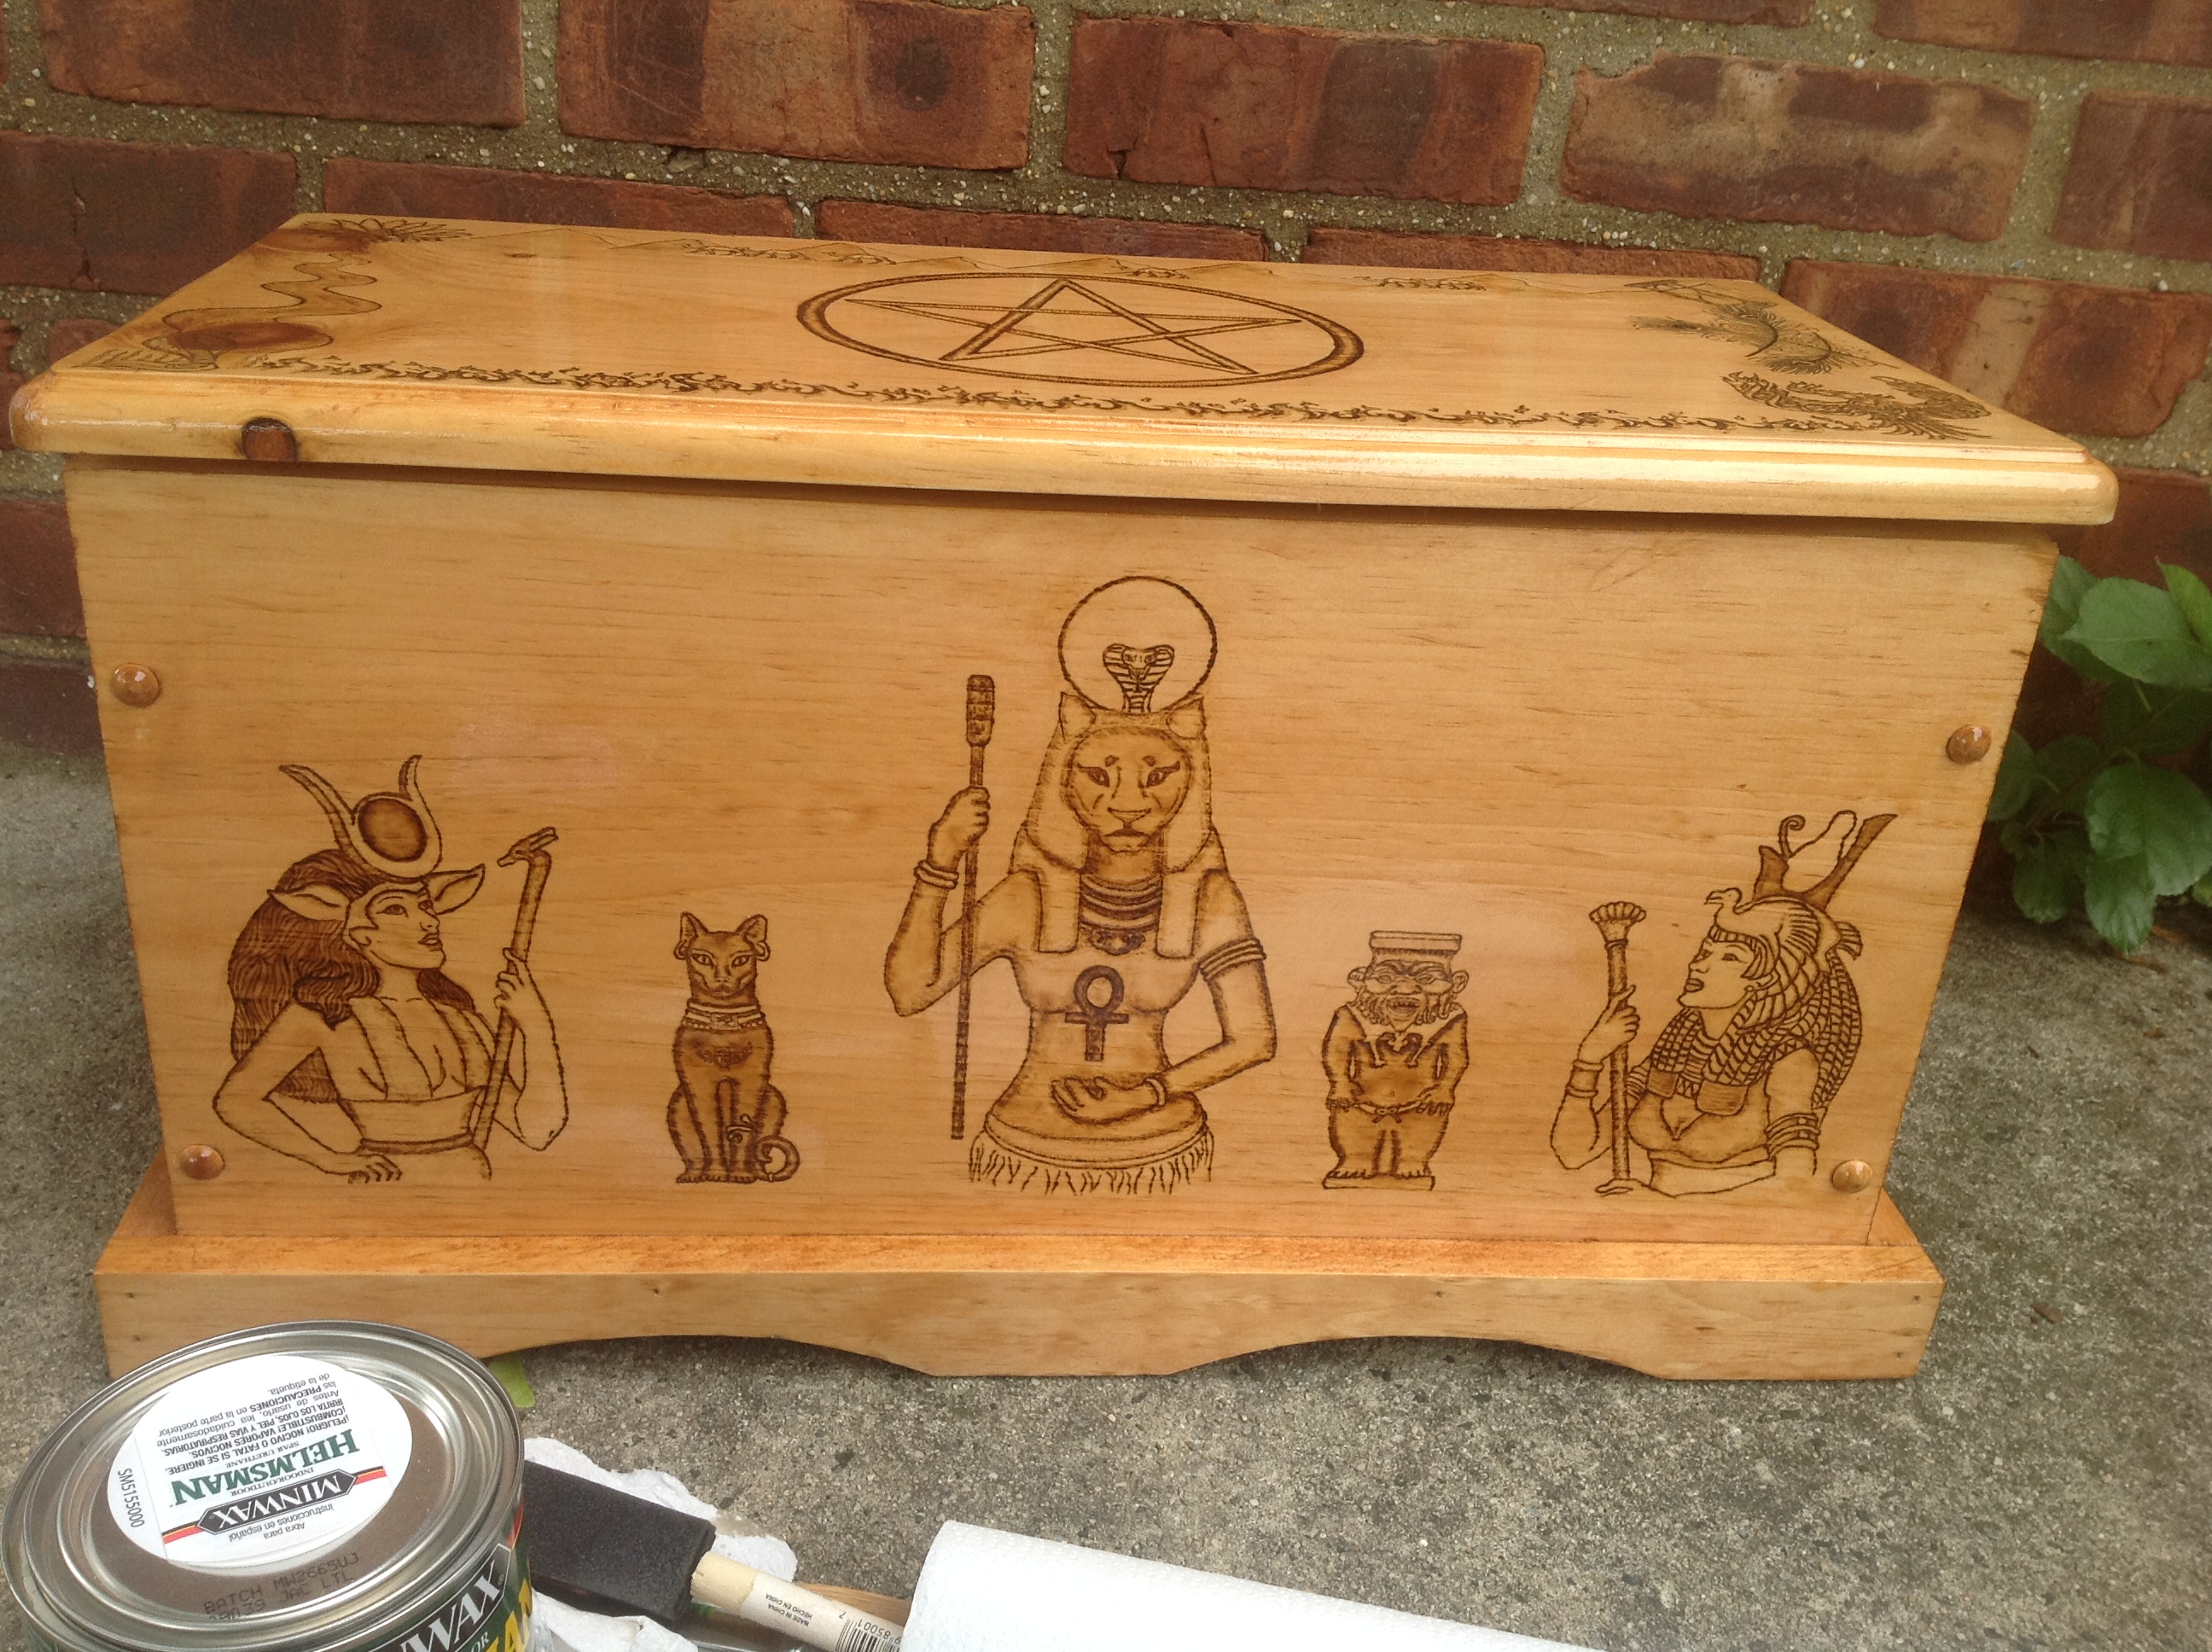
Once I finally got it all to the point where I wanted it, we were ready to stain. We chose this Golden Pecan tone. This is the before and after of a scrap piece. I love the delicate way it brings out the grain without being overpowering. It’s an excellent choice. I’ll be using it a lot in the future.
Rather than post ALL the Befores and ALL the afters, I’m going to post them side by side. I think the contrast will be nice.


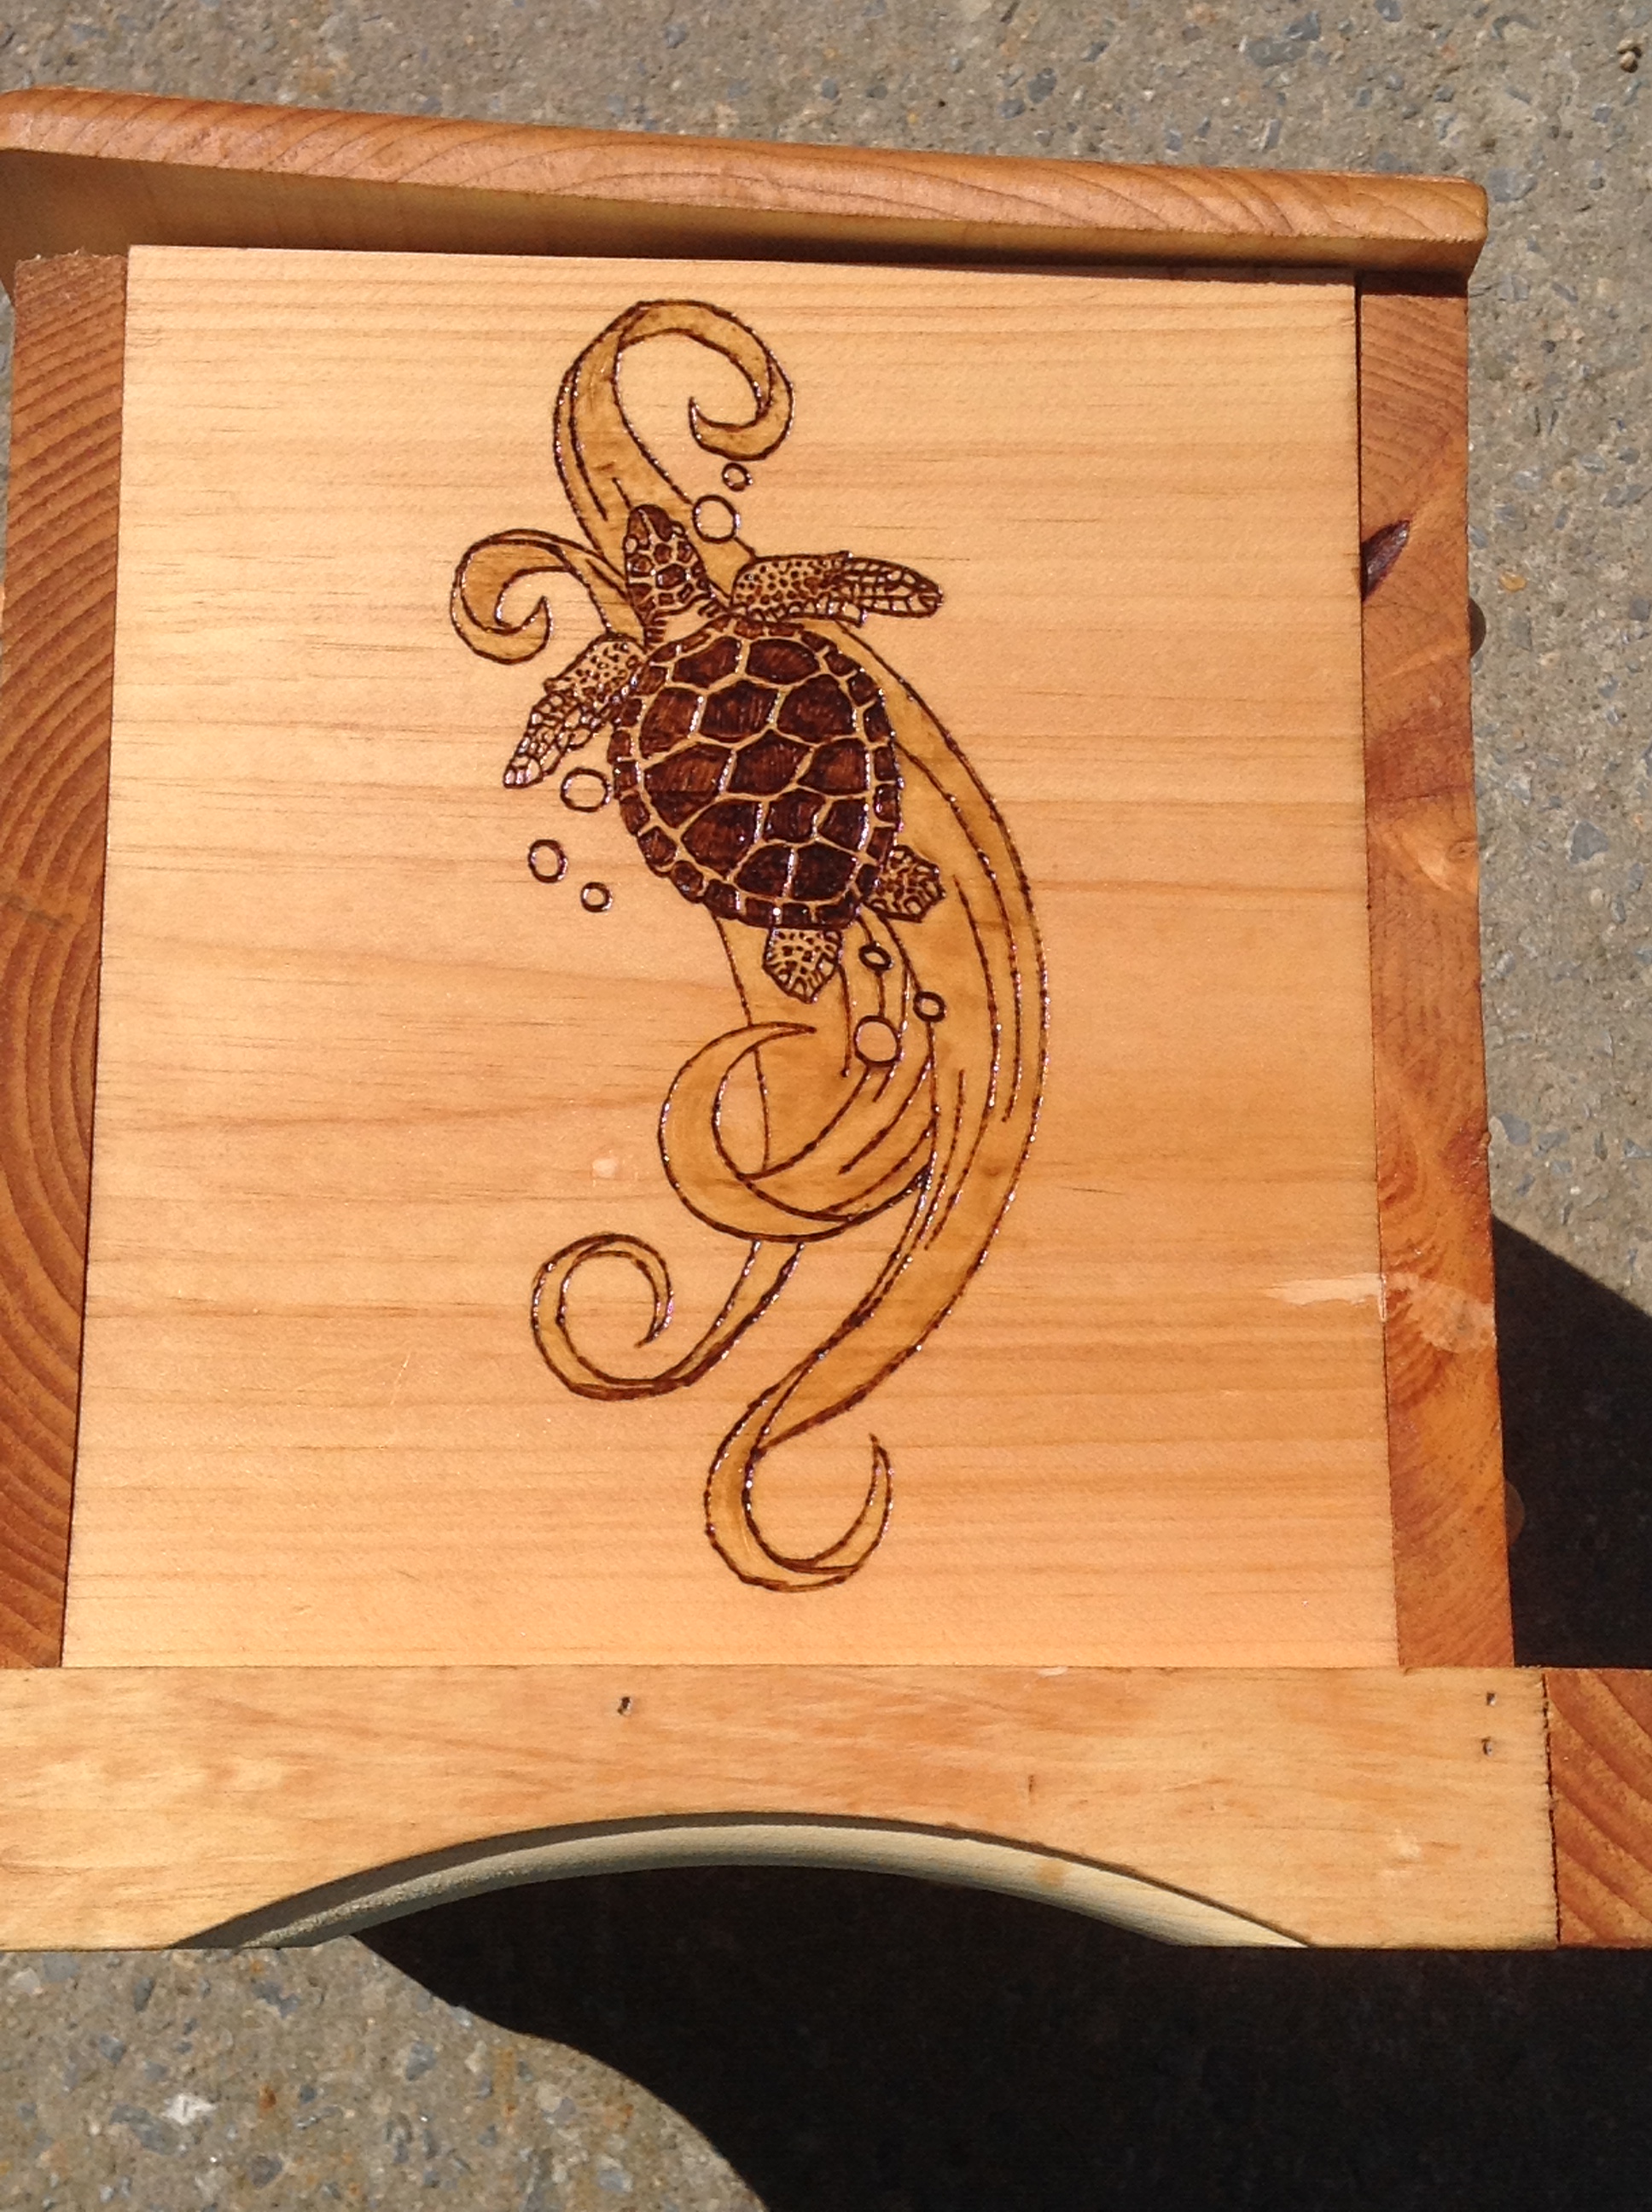
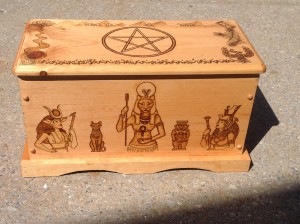
You can see how the whole thing becomes an entirely different animal after the staining.
I did several layers of stain, and a high gloss varnish, several coats. There was some sanding and restaining, but hey. You want to deliver quality, you know? I always say it’s like delivering a baby when you do this….you love it and you give life to it, and you want to send your child into the world with every advantage.
Final pictures here.

There is nothing like delivering good hard work to someone who really appreciates it.